Disclosure: This post contains affiliate links, which means we may earn a commission if you purchase through our links at no extra cost to you.
I grew up making tree ornaments in a tiny kitchen, fingers dusted with flour and glitter lingering on countertops for days. There’s something quietly joyful about crafting small things that catch holiday lights and bring back memories when the tree is taken down.
These DIY Christmas Tree Ornament Crafts are the kind of projects that invite conversation and a little mess.
I like to think of them as tiny keepsakes: tactile, colorful, sometimes fragrant, and often passing through the hands of family members as the years go by.
Salt dough stars with cozy, baked aroma

Salt dough ornaments carry the warmth of a kitchen and the memory of hands shaping simple forms. The surface tends to be matte with a slight grain that takes paint and ink in a friendly, forgiving way.
When finished, the smell is faintly baked, a soft reminder of holiday baking. I often leave small fingerprint impressions or press a sprig of evergreen for texture, and the heft of a dried dough star feels comforting in the palm, almost like a tiny, edible-looking keepsake that isn’t edible.
Steps
- Combine flour, salt, and water into a dough until it holds together.
- Roll dough out to even thickness and cut shapes with cookie cutters.
- Bake ornaments on a lined tray at low temperature until fully dried.
- Cool completely, then apply acrylic paint or natural stains for color.
- Seal with a clear varnish if a glossy finish is preferred.
Felt mitten ornaments with stitched charm

Felt mittens have that snug, textile warmth that makes them feel homemade right away. The soft nap of wool felt invites gentle fingers and the edges often show cheerful stitching that becomes part of the ornament’s personality.
Color combinations can be playful or muted, and tiny embroidered motifs—like a snowflake or a heart—add a touch of intimacy. Hanging from a loop of yarn, each mitten has a slight plushness and a quiet weight that swings gently when the tree is nudged, bringing a homey visual rhythm among glass and lights.
Steps
- Trace mitten shapes onto felt and cut out matching front and back pieces.
- Stitch around the edges with contrasting thread, leaving a small opening.
- Add embroidered details such as a snowflake or simple logo on the front.
- Lightly stuff through the opening for a puffy look, then close the seam.
- Attach a small loop of ribbon or yarn for hanging.
Cinnamon stick stars that smell like holidays

Cinnamon stick stars seem to carry the smell of holiday kitchens, sharp and warmly spiced in the air. The natural bark texture adds a rustic, tactile element and small imperfections make each star feel unique.
Their color ranges from warm tan to deep rust, depending on the sticks, and they look delightfully old-fashioned nestled among glass baubles. There’s an organic simplicity to them that conjures memories of snowy walks and mugs of warm drink, and they bring an aromatic note to a tree without overpowering a room.
Steps
- Lay out cinnamon sticks in a star pattern on a flat surface.
- Bind intersections with thin craft wire or twine to hold the shape.
- Wrap additional twine around the center for reinforcement and visual interest.
- Trim any excess twine and tuck ends neatly into the weave.
- Add a hanging loop of twine or ribbon to one point of the star.
Wine cork reindeer with playful little faces
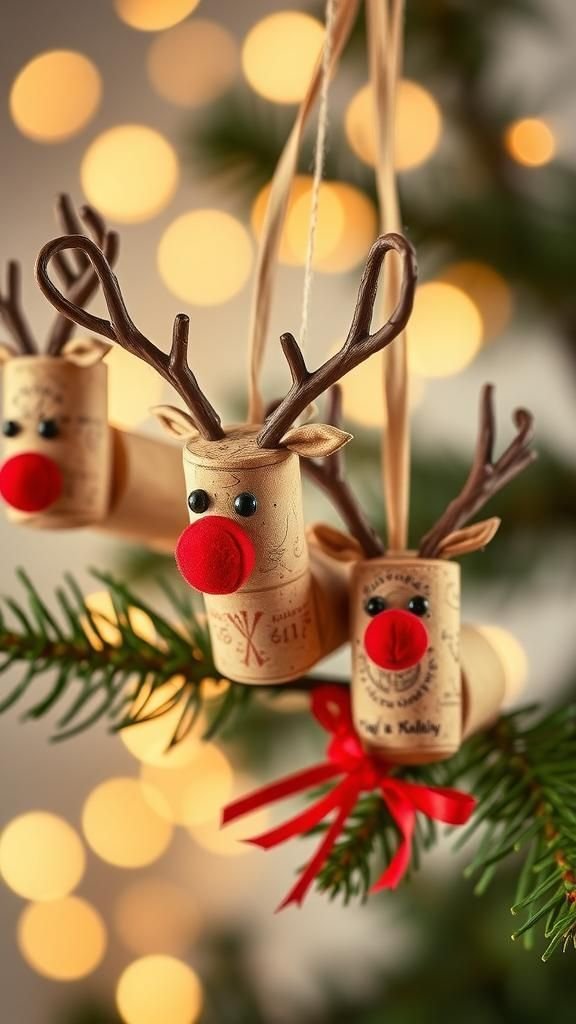
There’s a playful thriftiness to wine cork reindeer that always makes me smile. The cork’s slightly spongy texture contrasts with tiny twig antlers and bead eyes, creating a miniature woodland character.
Some have tiny red noses made of fabric or clay, which adds a cheeky point of color. The body is compact and warm in tone, and when hung from a ribbon the reindeer tilts a bit, as if caught mid-head-tilt.
They feel like friendly scavenger finds turned into ornaments, full of personality and small imperfections.
Steps
- Select sturdy wine corks and clean them of any residue.
- Insert small twig pieces into the top of each cork for antlers.
- Glue on bead eyes and a small nose made from clay or fabric.
- Wrap a thin ribbon around the middle or tie a loop at the top.
- Allow glue to set before gently hanging on the tree.
Origami paper stars with crisp folded geometry

Origami stars bring angular geometry and a sense of quiet precision to the tree. Paper edges catch tree lights in little glints, and patterned papers add layers of interest without bulk.
The crisp folds create small pockets of shadow and highlight, making each star look architectural. When several different papers are clustered, the effect is charmingly eclectic, like a tiny paper constellation.
They feel lightweight and delicate, offering a hand-made contrast to heavier glass ornaments and introducing a papier-mâché softness that complements evergreen greens nicely.
Steps
- Choose decorative paper squares with contrasting designs on each side.
- Follow an origami star folding sequence, creating precise creases for sharp edges.
- Secure the final seam with a small dab of glue or tucked flap.
- Add a thin thread or ribbon loop through a point for hanging.
- Group several stars on a branch for a clustered visual effect.
Beaded snowflake ornaments that catch light beautifully

Beaded snowflakes glint when lights pass through them and have a fragile, icy quality. Tiny seed beads and faceted crystals create a delicate lattice that feels almost translucent from certain angles.
The tactile sensation of smooth beads strung on thin wire is satisfying, and finished pieces often have a slight twinkle as they move. Pale blues, clear crystals, and silver tones make them read cool and wintry, while warmer brass beads lend a vintage mood.
They hang with a light flutter, like captured frost on a branch.
Steps
- Arrange a wire framework in a symmetrical snowflake pattern.
- String seed beads and crystal beads onto each wire arm to achieve desired density.
- Twist and secure wire ends neatly at the center to lock beads in place.
- Add a small jump ring or loop at the top for hanging.
- Gently adjust bead spacing so the snowflake sits flat when hung.
Hand-rolled clay baubles with thumbprint textures

Hand-rolled clay baubles feel heavy and intimate, each thumbprint or tool mark tracing a small human presence. The clay’s matte or slightly satin finish contrasts beautifully with glossy tree lights.
Natural earth tones or painted glazes change the mood from rustic to elegant, and the roundness invites touch. When baked, the surface sometimes shows tiny fissures that add to the handmade appeal.
They sit calmly among shinier decorations, offering a tactile, grounded counterpoint that seems to slow down a glance as fingers brush the surface.
Steps
- Knead air-dry or oven-bake clay to a workable consistency.
- Roll clay into smooth spheres and lightly press a thumb or tool for texture.
- Make a hole or install an eye pin near the top for hanging.
- Bake or air-dry the clay according to material instructions until hardened.
- Apply glaze or paint if desired, then allow to dry before hanging.
Glittered pine cones with frosty sparkle
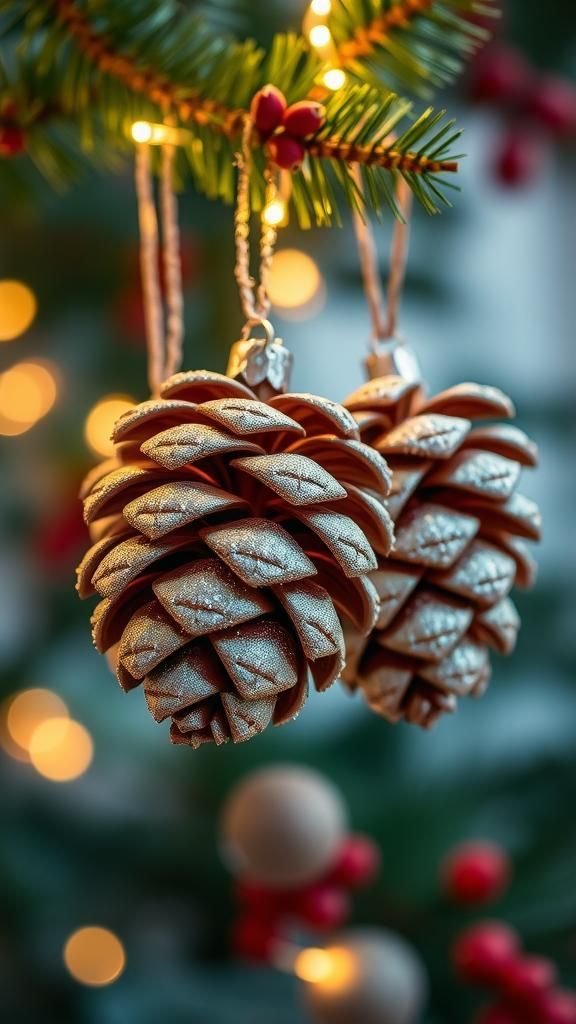
Glittered pine cones feel like tiny conifers that caught a dusting of snow and holiday glitter. The woody scales open into small pockets where sparkles nestle and reflect light like frozen dew.
Their scent can be faintly resinous, and the visual is both rustic and celebratory. Hung in clusters, they bring natural texture and a playful shimmer that complements clearer, more polished ornaments.
I often think of them as the bridge between outdoor walks and indoor decoration, carrying a hint of the forest into the living room.
Steps
- Brush a layer of clear adhesive onto the pine cone scales where sparkle is desired.
- Sprinkle fine glitter or coarse mica flakes over adhesive until coverage feels even.
- Shake off excess glitter and allow adhesive to dry completely.
- Attach a twine loop or ribbon securely at the top for hanging.
- Optionally seal lightly with a spray sealer to reduce shedding.
Upcycled sweater baubles with knit texture

Sweater baubles feel like small sweaters for tree bulbs, soft and comforting to look at. The knit texture adds a tactile pattern that invites a touch, and reclaimed wool brings warmth in color and feel.
Patterns like fair isle or cable knits lend a vintage, cozy aesthetic, and frayed edges often contribute to a lived-in charm. They diffuse light slightly, softening the overall glow, and the weight of a wrapped bauble feels reassuringly solid.
There’s a sustainability story in the seams that makes each one feel meaningful.
Steps
- Select a scrap of wool sweater and cut a circle slightly larger than the bauble.
- Slip the bauble into the fabric and gather the edges snugly around it.
- Secure the gathered fabric with a hidden stitch or narrow ribbon at the top.
- Trim excess fabric and add decorative elements like buttons or a small bow.
- Attach a loop for hanging and tuck in any loose fibers neatly.
Pressed flower resin ornaments with delicate blooms

Pressed flower resin pieces capture a delicate moment of a bloom and hold it as if in amber. Petal veins show through translucent resin, with subtle color shifts that feel nostalgic.
The surfaces are glossy and smooth against a fingertip, and the floral silhouettes create almost botanical illustrations in miniature. Mounted on a slender ribbon, they refract tree lights softly and offer a quiet, natural elegance.
Each one feels like a tiny memory preserved, fragile in appearance but pleasantly solid and cool to the touch.
Steps
- Place well-pressed flowers into a small silicone mold in an arranged composition.
- Mix clear epoxy resin according to product directions until fully combined.
- Pour resin carefully into the mold over the flowers, avoiding bubbles.
- Allow resin to cure fully in a dust-free area, then demold gently.
- Polish edges if needed and add a small ribbon or metal loop for hanging.
Watercolor paper circles with soft color washes
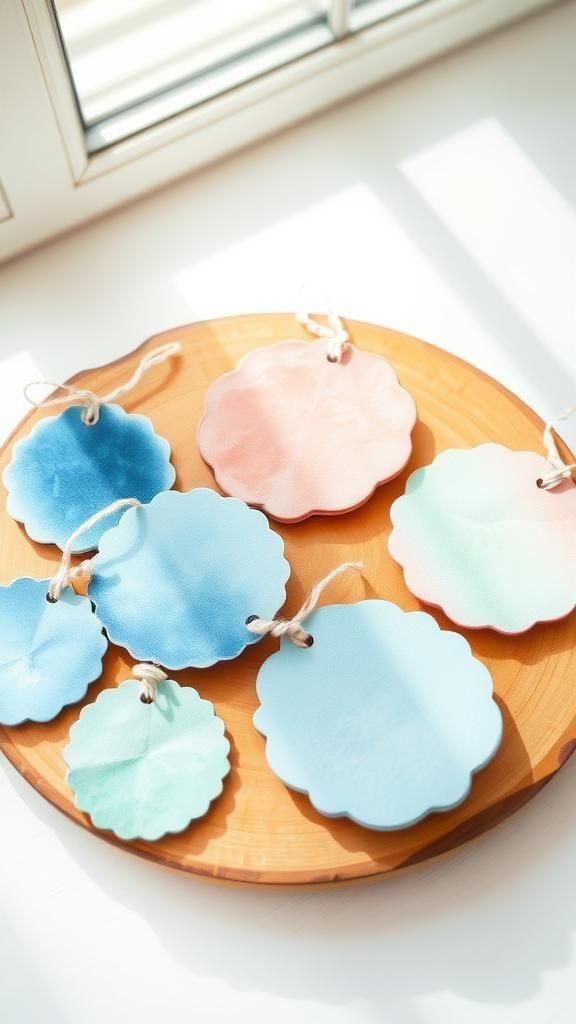
Watercolor ornaments feel like tiny canvases, each one carrying a soft bleed of color and the paper’s gentle buckle. Pale washes merge into one another, creating subtle gradients that look luminous beneath tree lights.
The edges sometimes show the feathered rim of pigment, lending a handmade, painterly look that feels intimate and calm. When hung in groups, the ornaments form a little gallery of abstract moods, and the scent of damp paper and pigment, though faint, recalls quiet afternoons at a small table with a mug nearby.
Steps
- Cut watercolor paper into uniform circles using a template or punch.
- Apply wet-on-wet watercolor washes in layered hues until desired depth is reached.
- Let paper dry flat to prevent warping, then press gently under a heavy book.
- Seal with a light spray fixative to protect the surface from light handling.
- Attach a small hole and ribbon loop for hanging.
Button baubles with cheerful mismatched charm

Button baubles have a playful thrift-store energy, like pocketed memories on a spherical stage. The glossy curves of old buttons catch light in tiny highlights, and mismatched colors or styles create a cheerful patchwork.
Textured button faces sit against wool or ribbon backings, and the overall effect reads as cozy and slightly nostalgic. When I hang one, it brings a tactile curiosity to the tree—each glance prompts a little examination of patterns, finishes, and the small histories suggested by sewn-on threads and patina.
Steps
- Collect an assortment of buttons in complementary colors and sizes.
- Adhere buttons onto a foam ball in an overlapping pattern with craft adhesive.
- Cover any visible foam with ribbon or smaller buttons for a neat finish.
- Allow adhesive to cure fully before handling.
- Attach a loop of ribbon at the top for hanging.
Macramé stars with boho, tactile appeal
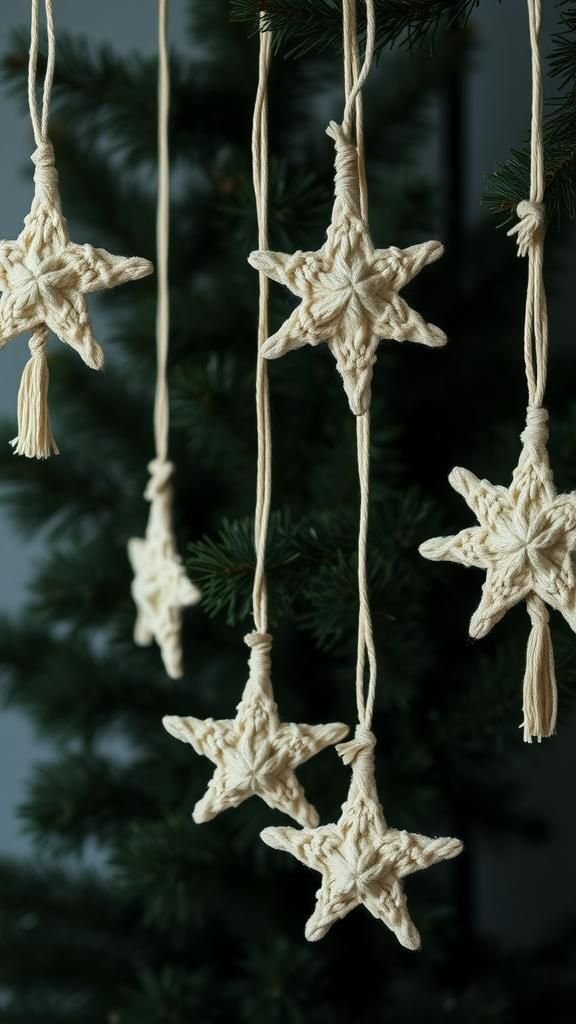
Macramé stars bring a textile architecture to the tree, their knots creating rhythmic patterns that feel meditative. The cotton cord has a soft matte finish and the fringe edges add a casual, bohemian flourish.
Natural cream and off-white cords look serene against evergreen boughs, while dyed threads introduce vibrant pops of color. The ornaments have a gentle drape and a handmade stillness, offering visual contrast to more reflective pieces.
They feel like a small woven talisman, made with repetitive motion and quiet attention that shows in every knot.
Steps
- Cut lengths of cotton cord and arrange them into the star pattern on a working surface.
- Tie a series of square knots to form each arm of the star, tightening evenly.
- Create a central knot cluster to secure all arms together.
- Trim fringe ends to the desired length and comb lightly for softness.
- Add a small hanging loop at the top center of the star.
Scrabble tile name ornaments with playful letters
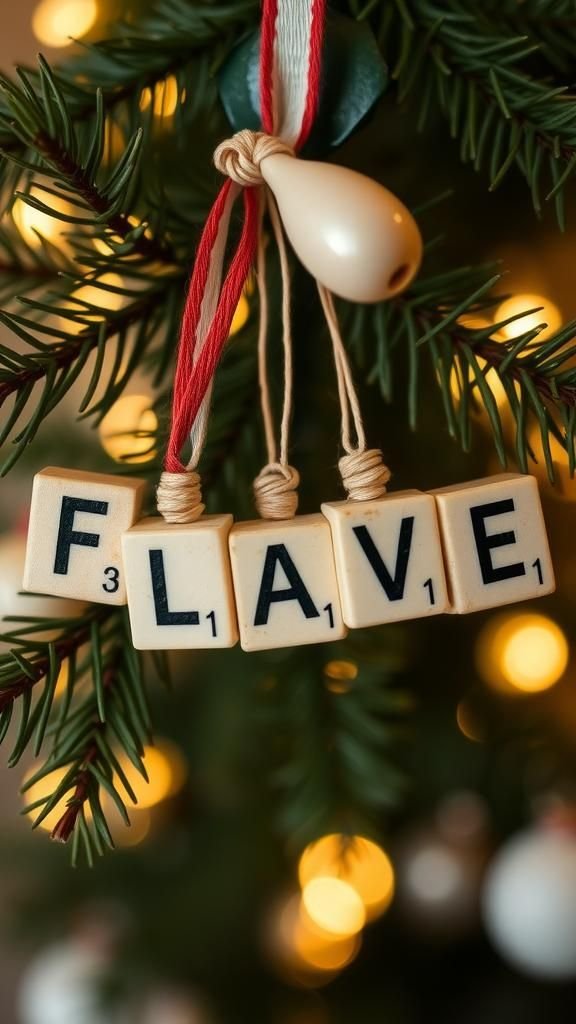
Scrabble tile ornaments feel like tiny word puzzles that hold family names or short messages. The worn letter tiles have an old-gameboard warmth, and their ivory surfaces pick up tiny shadows from surrounding branches.
When threaded onto thin wire or ribbon, the tiles hang like a string of small stories. Seeing a loved one’s name spelled out among twinkling lights always prompts smiles and recollection of shared moments.
The overall look is cheerful and nostalgic, combining graphic simplicity with a personal note that often becomes a tree highlight.
Steps
- Select Scrabble tiles spelling a name or short word.
- Drill or carefully punch small holes through the top of each tile.
- Thread tiles onto a thin ribbon, twine, or wire in the chosen order.
- Secure ends with a knot or crimp to prevent sliding.
- Add a hanging loop and position on the tree branch.
Embroidered hoop houses with cozy details

Small embroidered hoop ornaments feel like tiny staged scenes, with stitched houses and snowy roofs that invite close inspection. The embroidery floss brings color and texture, and running stitches or French knots add delightful dimensionality.
The round wooden hoop frames the vignette neatly, creating a portable snapshot of winter warmth. When placed on a tree, these hoops offer a handcrafted, storybook quality: I often imagine miniature lives inside each stitched home.
The tactile stitches and soft fabric background make them feel intimate, like a secret kept in thread.
Steps
- Stretch a small piece of fabric inside an embroidery hoop and trim excess.
- Sketch a simple house or scene lightly on the fabric as a guide.
- Use a combination of satin stitch, backstitch, and French knots for details.
- Secure the fabric at the back and trim neatly before closing the hoop.
- Attach a loop of ribbon to the hoop for hanging.
Cedar slice ornaments with natural wood rings

Cedar slice pieces feel earthy and grounded, with growth rings and bark edges telling a quiet tree-story. The scent of cedar adds an aromatic layer that feels deeply seasonal and forest-like.
Each slice’s surface shows grain patterns and occasional knots that make every piece unique. When small illustrations or names are added in ink, the combination of wood and handwriting feels like a small, personal talisman.
Hung simply on twine, cedar slices bring a woodland calm to the tree’s shimmer and become keepsakes that age gracefully over time.
Steps
- Select thin cedar slices of even thickness and sand surfaces lightly for smoothness.
- Write or draw a design on each slice with permanent marker or wood-burning tool.
- Drill a small hole near the edge for hanging.
- Apply a light clear coat if extra durability is desired.
- Thread twine or ribbon through the hole and hang on the tree.
Sequin disco balls for playful tree sparkle
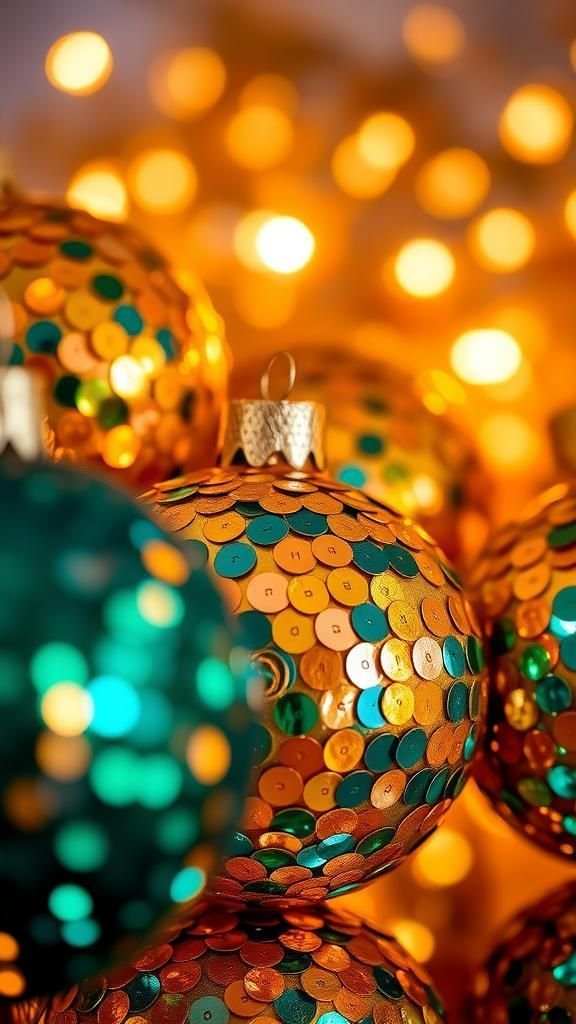
Sequin-covered mini disco balls bring a playful flashiness to an otherwise traditional tree. The mirrored surfaces of sequins create blinking highlights as lights move past, and the tactile layering of tiny discs creates a dense, glittering texture.
They feel lively and upbeat, as if a bit of party energy landed among linen and glass ornaments. Color choices range from metallic silver and gold to playful jewel tones, and when clustered they add kinetic brilliance that contrasts with more subdued decorations.
Their light-reflecting surfaces are undeniably joyful.
Steps
- Start with a lightweight foam or plastic ball as the base.
- Apply adhesive in small sections and press sequins onto the surface in overlapping rows.
- Continue until the entire ball is covered, keeping rows neat and compact.
- Allow adhesive to dry completely to prevent sequin loss.
- Attach a small cap or ribbon loop for hanging.
Mini embroidered felt houses with tiny windows

Mini felt houses embroidered with tiny windows feel like a neighborhood scaled down to palm size. The softness of felt contrasts with crisp embroidered lines that suggest shingles and door frames.
Tiny bead or sequin windows catch tree light like little lanterns inside cozy rooms. Each house carries a handcrafted intimacy, as if it were a wearable memory of a winter walk past lit windows.
The color palette can be quaint pastels or deep jewel tones, and the soft edges make them feel comforting, like a flocked memory pinned to a branch.
Steps
- Cut felt pieces for the front, back, and roof of the house.
- Stitch details such as windows and doors using embroidery floss and small beads.
- Join front and back pieces with a blanket stitch around the edges, leaving a small gap.
- Lightly stuff the interior for dimension, then close the gap.
- Attach a small loop of ribbon at the roof peak for hanging.
Clay handprint ornaments for tiny memory keepsakes

Handprint clay pieces hold a moment in time—a tiny palm pressed into soft material and preserved as a circular impression. The raised lines and creases of a child’s hand appear tender and immediate, carrying an emotional warmth that makes these ornaments heirloom-ready.
The matte surface often accepts paint or left natural for a minimalist look. They feel personal and slightly solemn, prompting reflection when spotted on a branch.
Each one seems to pause a year in miniature, offering a tactile connection across seasons when pulled from storage.
Steps
- Press a small hand into rolled clay to create a clear impression.
- Trim the clay into a circular or shaped outline and smooth edges.
- Make a hole near the top for hanging before drying or baking.
- Bake or air-dry according to the clay’s instructions until fully hardened.
- Paint details or leave natural, then thread a ribbon through the hole for hanging.
Jingle bell garland with bright metallic ring

A jingle bell garland adds audible delight to decorations, the small metal bells offering soft chimes when the tree brushes them. The bells’ metallic sheen ranges from antique brass to shiny silver, and their tiny crescent openings show off the internal clappers.
Tied at intervals along cord, they create a rhythmic visual and sonic pattern. The sound is light and unexpected at moments, bringing a sense of motion even to still branches.
The garland can thread through boughs or wrap the tree, weaving sound into the visual texture of the display.
Steps
- Select a length of cord or ribbon and space small bells along it at even intervals.
- Secure each bell by knotting the cord on either side so the bell stays in place.
- Add beads or small decorative spacers between bells for visual interest.
- Test the garland by giving it a gentle shake to ensure pleasant chimes.
- Drape the garland around the tree or weave it through branches as desired.
Mini terrarium globes with tiny winter landscapes

Mini glass terrarium globes can hold tiny winter scenes that feel like pocket-sized snow domes without the mess. Small bottle brush trees, a dusting of faux snow, and a hint of glitter create a contained frosty world.
The glass sphere refracts light delicately, and peering in invites a quiet moment of wonder. Each globe is a tiny ecosystem of imagination, and hanging several together forms a delicate cluster of miniature landscapes.
The cool smooth glass against warm lights produces a pleasing contrast that feels both modern and whimsical.
Steps
- Gather small glass globe ornaments and miniature winter scene components such as bottle brush trees.
- Layer a small amount of faux snow or fine glitter inside each globe.
- Affix miniature trees or tiny figures to the interior base with a small amount of adhesive.
- Seal or cap the globe and attach a loop for hanging.
- Shake gently to settle inside elements before hanging on the tree.