Disclosure: This post contains affiliate links, which means we may earn a commission if you purchase through our links at no extra cost to you.
I always end up with glitter under my nails and a warm cup of tea when St. Patrick’s Day Shamrock Crafts are on the table.
There’s something about the simple three-leaf shape that invites playfulness, whether I’m fiddling with paper, felt, or glass beads. St.
Patrick’s Day Shamrock Crafts have been my go-to for quick weekend projects when friends drop by or when I need a pleasant, hands-on break.
These little projects bring a cozy, green energy that feels both playful and calming. The crafts often spark conversation and laughter, and they make small, cheery pieces that brighten a shelf or a windowsill without much fuss.
Paper shamrock garland for a cheerful mantel
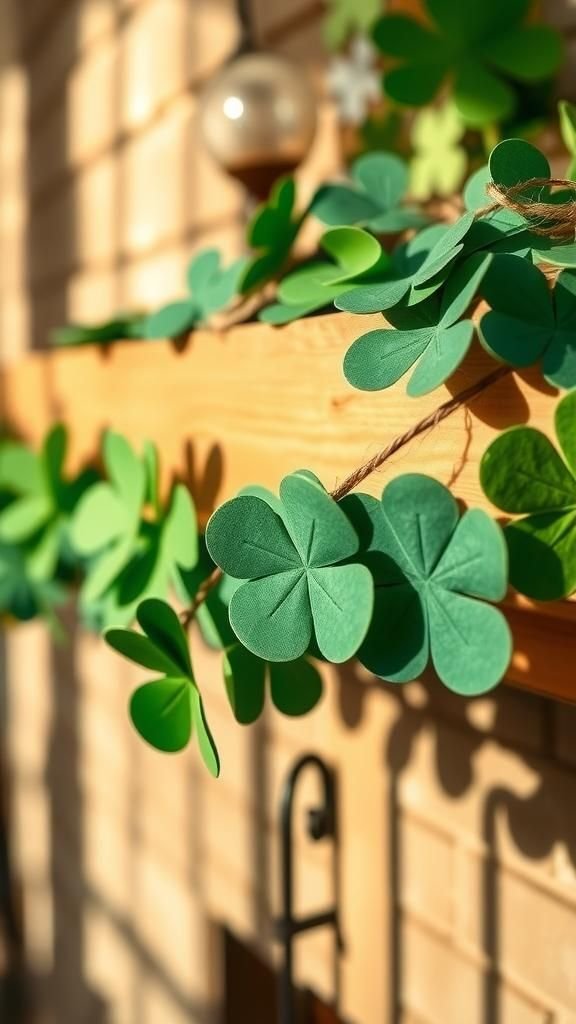
I remember stringing simple shamrocks across my fireplace and smiling at how such humble paper shapes could lift the room. The paper has a matte, slightly fibrous feel, and when sunlight hits the garland the edges cast fine shadows that add warmth.
I liked mixing textured craft paper with glossy scrapbook sheets for a little contrast. The finished garland sways gently when the heat from the hearth rises, and that slight movement turned a plain mantel into something quietly festive.
Guests often paused to trace the trio of leaves with a fingertip, appreciating the tactile mix.
Steps
- Choose a variety of green papers and trace shamrock shapes onto each sheet.
- Cut out each shamrock and arrange them in an alternating pattern along a length of twine.
- Affix the shamrocks to the twine with a light dab of adhesive on the back of each shape.
- Hang the garland across a mantel or a window frame and adjust spacing for an even look.
Felt shamrock pins that feel soft and homey

Felt always feels like a soft exhale in my hands, and sewing small shamrock pins became a favorite late-night project. The woolly surface picks up tiny specks of lint and the stitches look charmingly irregular when done quickly, which adds personality.
I enjoyed layering different shades so the edges created a subtle outline. The pins sat lightly on a sweater lapel and made passing compliments feel like a quiet shared smile.
The scent of laundry detergent from the felt blended with faint thread oil, which somehow made the crafting session feel domestic and comforting.
Steps
- Choose two shades of felt and trace matching shamrock shapes onto each one.
- Cut out the shamrocks and sandwich a small pin back between the layers.
- Sew around the edges with a running stitch, leaving a small opening to add a tiny scrap of stuffing if a slight puff is desired.
- Close the opening with final stitches and trim any loose threads for a neat finish.
Stained glass look shamrock suncatcher for windows

I love how colored light pools on the windowsill when a suncatcher hangs there, and the shamrock shape feels playful in that glow. The translucent pieces catch the sun and throw emerald highlights onto nearby surfaces, while the edges have a glassy shimmer that looks delicate from a distance.
On rainy afternoons the colors deepen, bringing a little cheer to a gray day. The thin lines between the colored sections create a slight metallic glint, and when a breeze nudges the suncatcher, the shifting reflections feel quietly alive.
Steps
- Select translucent craft glass paint or thin colored acetate sheets and trace a shamrock outline onto a clear backing.
- Fill in each leaf area with chosen colors, leaving thin borders to mimic leading lines.
- Allow the color to dry fully and reinforce edges with a dark outline for structure.
- Attach a small suction cup or ribbon at the top for hanging in a sunny window.
Button shamrock collage that’s delightfully tactile
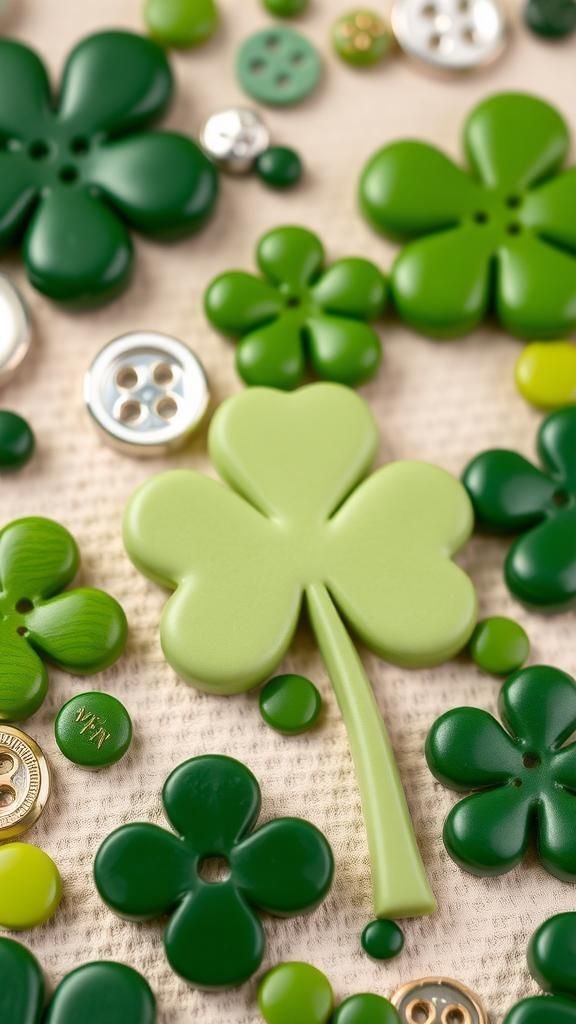
A jar of mixed buttons became a palette of little treasures on a rainy afternoon, and arranging them into a shamrock felt like piecing together a tiny mosaic. The buttons clicked against each other with a small, satisfying sound, and the variety of finishes—matte, pearlescent, glossy—created depth across the leaves.
I liked the occasional metallic button catching the eye amid soft greens. The collage sat on a backing board with a slight raised texture from the layers, and running my finger along it revealed an interesting landscape of shapes and edges.
Steps
- Choose a sturdy backing board and sketch a shamrock outline lightly on it.
- Sort buttons by size and color, arranging them within the outline to balance texture and tone.
- Adhere each button to the board, filling gaps with smaller buttons for a cohesive surface.
- Let the piece dry flat until all buttons are firmly set before displaying.
Shamrock wind chime with jingling charm
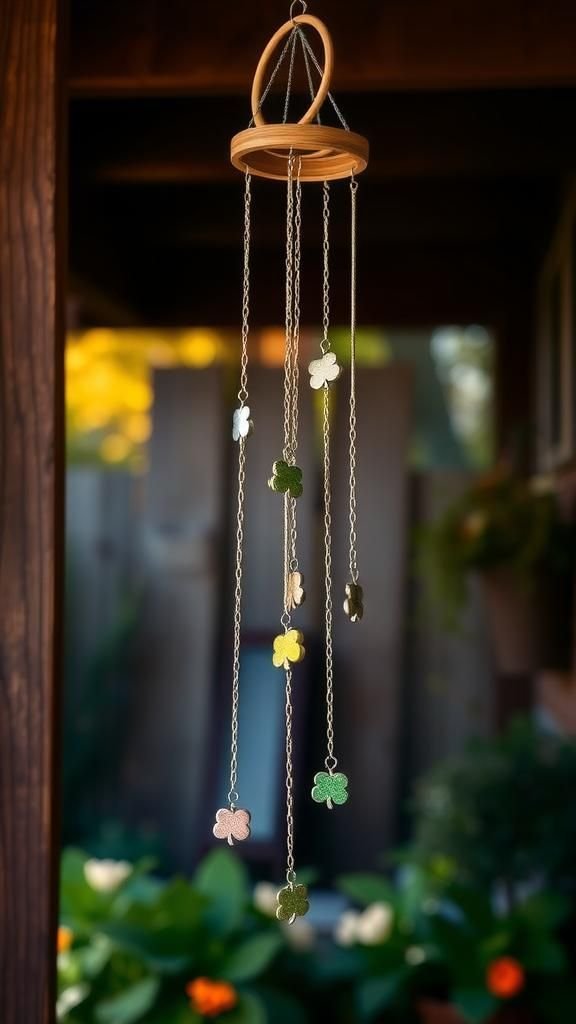
Hanging a shamrock wind chime by the porch turned ordinary breezes into a gentle soundtrack for a lazy afternoon. The small metal pieces made a soft, chiming sound that felt airy and a little nostalgic.
The shamrock elements had a lightly reflective finish that caught late afternoon sun, creating tiny flashes on the porch floor. I liked how the sounds were never the same twice; a sudden gust brought a quick tinkling while a light breeze produced a slow, melodic rhythm.
It became a small ritual to pause and listen whenever I stepped outside.
Steps
- Gather small metal shamrock charms or cut shamrocks from thin sheet metal and finish edges smoothly.
- Arrange charms at varying lengths along durable string or thin chain, spacing them for pleasing movement.
- Secure each charm to a wooden or metal ring that serves as the top support.
- Hang the completed chime where it can catch a breeze and enjoy the gentle tones it produces.
Mini shamrock terrariums for tiny green worlds
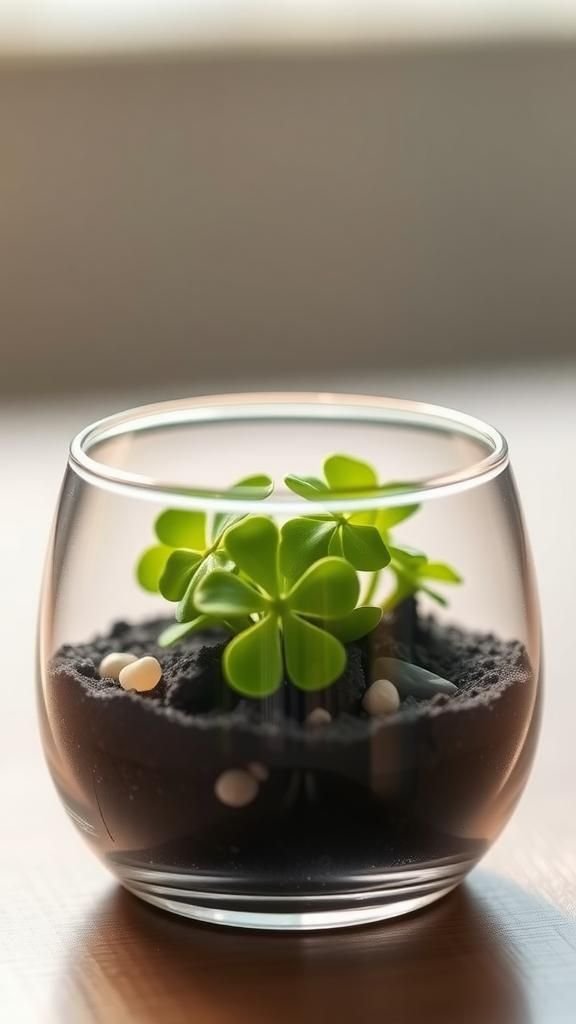
Creating a tiny shamrock terrarium felt like carving out a peaceful nook on my desk. The little plants perked up the glass dome with fresh green shapes, and the soil smelled faintly of earth after a light mist.
The shamrock leaves have a tender, velvety look that invited close-up attention, and the glass magnified each little curve in an almost cinematic way. I often caught myself pausing to admire the tiny scene when a slant of sunlight warmed the terrarium, making the leaves glow and casting soft, rounded shadows across the base.
Steps
- Choose a small clear container and add a layer of pebbles for drainage followed by a thin layer of activated charcoal.
- Add a layer of potting soil and nestle small shamrock plants or clover cuttings into the soil.
- Mist lightly and place the terrarium in bright, indirect light, checking moisture occasionally.
- Keep the terrarium partially covered to maintain humidity for a tender mini environment.
Shamrock stamped tea towels for kitchen cheer

Stenciling shamrocks onto tea towels became a quiet way to change the kitchen’s mood without much fuss. The ink soaked into the fabric and left slightly irregular edges that felt handmade and warm.
I liked the contrast between a crisp white towel and the patchy green prints; the scent of ink mingled with the lingering smell of coffee during the session. These towels dried soft, and the shamrocks faded gently over time in a way that added character, each wash smoothing the design and making it feel lived-in rather than pristine.
Steps
- Choose cotton tea towels and a shamrock stencil of the desired size.
- Place the stencil on the towel and apply fabric ink or pigment with a sponge or foam applicator for even coverage.
- Lift the stencil carefully and let the ink dry completely before heat-setting according to the ink manufacturer.
- Wash gently after setting to allow the towel to soften and the design to settle in.
Clay shamrock magnets that feel pleasantly weighty
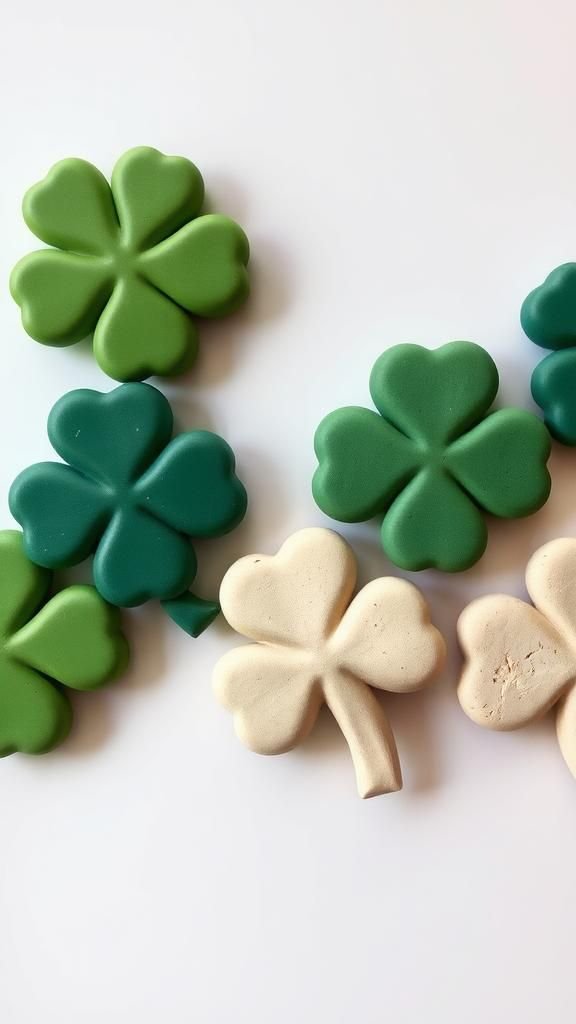
Working with air-dry clay left a faint scent of earth and a cool, smooth touch on my fingertips, and shaping small shamrocks felt meditative. The little leaves had gentle ridges where I pressed a blunt tool, adding a subtle vein-like texture that caught light.
After painting, the little magnets had a satisfying weight on the fridge and the paint finish ranged from satin to slightly crackled when I aged them a bit. I left a few unpainted for a raw, tactile look that guests loved to pick up and admire.
Steps
- Roll out air-dry clay to an even thickness and press shamrock-shaped cutters or templates into the surface.
- Refine edges and add vein details with a blunt tool, then smooth surfaces as desired.
- Allow the pieces to dry thoroughly before painting with acrylics and sealing if a gloss or protective finish is desired.
- Attach small magnets to the back with a strong adhesive and let the bond cure fully.
Shamrock candle wraps for subtle table glow

Wrapping a candle with a delicate shamrock-patterned band added a gentle, green-tinted glow to my evening reading nook. The paper wrap diffused light in a warm way, and the flicker made those tiny leaf silhouettes dance across nearby pages.
There was a faint wax scent mixed with the smell of the paper, and the contrast between soft light and shadow felt quietly cozy. I liked how the wraps transformed ordinary votives into something seasonal without making the space feel overdecorated, and the small lantern effect was especially pleasant on cool nights.
Steps
- Measure the circumference and height of a votive or jar candle to create a band of paper or vellum to fit.
- Cut the band and transfer a shamrock pattern by stamping or printing before wrapping around the candle exterior.
- Secure the ends with a discreet adhesive or double-sided tape so the band stays in place.
- Place the wrapped candle inside a glass holder to shield the paper from direct flame and enjoy the soft glow.
Shamrock garlands from natural leaves foraged locally

Collecting small leaves from a neighborhood walk and arranging them into a shamrock garland felt like borrowing a little of the outdoors for the mantel. The leaves were cool and slightly damp to the touch, carrying faint notes of soil and grass.
As they dried the colors mellowed and took on a papery sound when rustled. I liked the subtle imperfections—tiny nicks and uneven edges—that made each shamrock unique.
The garland had an organic rhythm when it hung and the scent of dried leaves brought back memories of crisp walks and casual conversations under trees.
Steps
- Gather freshly fallen small leaves and allow them to press flat between sheets of paper for a day.
- Arrange three leaves into a shamrock shape and secure gently with thin floral wire or a small dab of adhesive at the center.
- String the assembled shamrocks along twine at even intervals for a natural garland.
- Hang in a cool, dry spot to preserve the leaves and enjoy the organic texture and muted colors.
Shamrock watercolor cards with soft color washes

Painting shamrocks in watercolor felt like letting the brush wander with little intention and enjoying the gentle surprises that followed. The pigment bled into damp paper, creating soft gradients from lime to deep green, with tiny blooms where pigment pooled.
The edges of the leaves had a feathered look that made each card feel airy and personal. I wrote small notes inside and mailed a few, enjoying the tactile contrast between the smooth envelope and the slightly textured card.
The scent of wet paint and paper in a quiet room made the whole afternoon feel almost ceremonial.
Steps
- Fold watercolor paper into card format and lightly sketch a shamrock outline on the front.
- Wet the leaf areas and apply diluted green pigments, allowing color to blend and create soft transitions.
- Add darker pigment accents near the base of leaves for depth and let the paint dry completely.
- Write a short handwritten message inside and pair with a matching envelope for giving.
Shamrock keychains that jingle with personality

A small shamrock keychain felt like a cheerful companion each time I reached for my keys. The material options—leather, metal, acrylic—each offered a different sensory note: leather was warm and slightly yielding, metal cool and weighty, acrylic smooth and glossy.
I liked the tiny movement and the faint sound when it hit other keys, a small daily punctuation that made me smile. The shamrock silhouette looked friendly against the ring, and over time the surface gained fine marks that mapped where it had traveled, from pockets to purse corners.
Steps
- Select the shamrock material and cut or punch out the shape in a size suitable for a keyring.
- Smooth edges and add a small hole at the top for a jump ring or eyelet.
- Attach a jump ring and secure the shamrock to a keyring or short chain.
- Polish metal pieces or condition leather if desired for a finished look.
Upcycled denim shamrocks with a lived-in feel

I enjoyed cutting small shamrock shapes from old denim and watching the edges fray into soft threads that added character. The denim had a cool, sturdy feel and faint indigo dye marks that created subtle color variation across each leaf.
When layered onto a lighter backing the contrast highlighted the playful silhouette. The texture was pleasantly rough under fingertips and the scent of washed fabric made the session feel domestic and familiar.
These shamrocks felt like tiny echoes of past jeans and added a comfortable, worn-in note to cushions and bags where they landed.
Steps
- Gather worn denim and draw shamrock shapes directly onto the fabric.
- Cut out the shapes and optionally layer them onto a lighter fabric backing for contrast.
- Secure the layers together with stitching along the edge using a matching or contrasting thread.
- Trim loose threads to encourage gentle fraying for a rustic appearance.
Shamrock felt garland with soft, plush leaves

A felt shamrock garland draped across a bookshelf made the room feel cozy and inviting. The plush felt held its shape and had a soft, velvety touch that contrasted nicely with the smooth spines of books.
I preferred slightly mismatched greens which created a playful rhythm along the strand. When the garland caught a draft it moved with a gentle buoyancy, and the soft sound of felt brushing felt pleasantly muffled.
The garland’s handmade stitches peeked out like little signatures, each one a reminder of the slow, quiet time spent making it.
Steps
- Cut multiple shamrock shapes from felt in varying green shades.
- Layer two pieces for each shamrock and sew around the perimeter, adding a small amount of stuffing if a puffed look is desired.
- Attach finished shamrocks to a length of twine or ribbon at even intervals.
- Hang the garland across a shelf or window and allow light to highlight the felt texture.
Shamrock mosaic stepping stone for garden whimsy

Placing a shamrock mosaic into a garden pathway felt like leaving a small, cheerful marker for wandering feet. The stones and tiles were cool to the touch and the grout created a subtle contrast that highlighted the leaf shapes.
I liked how the sunlight skimmed across the glossy tiles in patches, and tiny pebbles trapped in the grout added a quiet crunch underfoot. Over time the piece softened with weather, picking up faint lichen and the mellow tones of outdoor life.
It became a tiny landmark that guests noticed and commented on during strolls.
Steps
- Choose a mold and arrange colored tiles or broken ceramics in a shamrock pattern inside it.
- Pour concrete into the mold, covering the tiles and smoothing the surface as needed.
- Allow the concrete to cure fully before removing from the mold.
- Clean any excess grout or residue to reveal the mosaic and place the stepping stone in the garden.
Shamrock paper lanterns for a soft evening glow
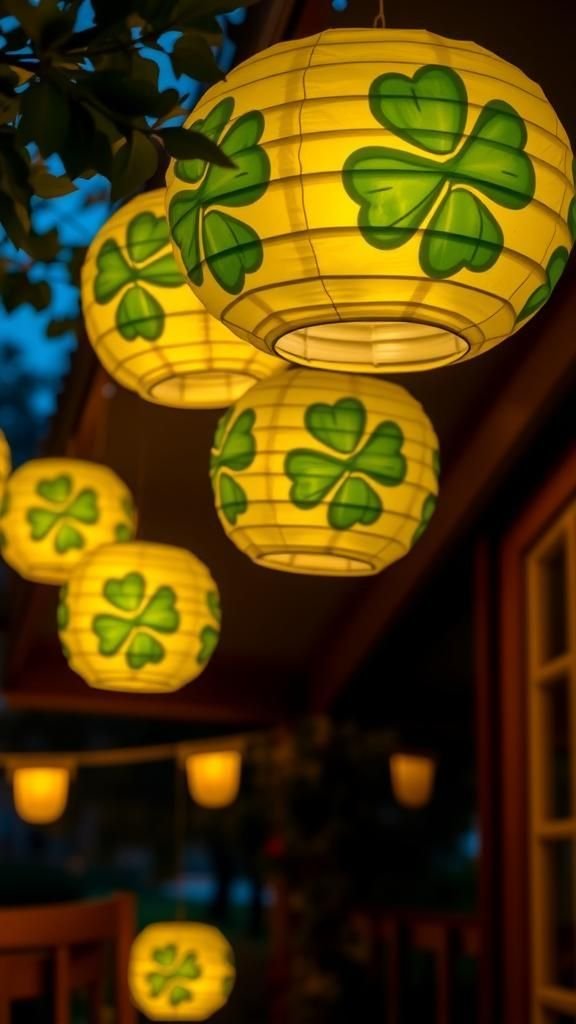
Folding paper into lanterns with shamrock cutouts created a gentle atmosphere for evening gatherings. The light filtered through the cut shapes and made a dappled pattern on nearby surfaces, warming the air with a cozy amber hue.
The paper had a faint creak when handled, and the edges of the cutouts caught the glow and threw thin, leaf-shaped shadows. There was a quiet satisfaction in watching the lanterns illuminate as dusk settled, turning ordinary corners into places that invited lingering conversation and a relaxed pace.
Steps
- Score and fold cardstock or heavy paper into lantern shapes and cut shamrock silhouettes into the panels.
- Assemble the lantern panels together and secure the top with a loop for hanging.
- Place a battery-operated tea light or LED candle inside the lantern to provide a safe, soft glow.
- Hang the lanterns at varying heights to create layered lighting in an outdoor or indoor space.
Shamrock cookie cutters turned clay ornaments

Using cookie cutters as templates for clay ornaments transformed an ordinary baking tool into a crafty companion. The cutter edges pressed cleanly into the clay and left a crisp silhouette that was pleasingly symmetrical.
Once dry and painted, the ornaments had a satiny finish and a faint smell of acrylic that reminded me of rainy afternoons spent indoors. I liked tying thin ribbons through a small hole at the top and watching the ornaments sway slightly on a branch or a doorknob.
They carried a quiet charm that made seasonal decor feel handmade and personal.
Steps
- Roll out air-dry clay to an even thickness and press a shamrock cookie cutter into the surface.
- Create a small hole at the top for hanging and smooth any rough edges.
- Allow the clay shapes to dry completely before painting with desired colors and finishes.
- Thread ribbon through the holes to hang ornaments on branches or around the home.
Shamrock embroidery hoop art with delicate stitching

Embroidery hoops with shamrock motifs created a little gallery of stitched leaves on my wall. The fabric felt taut and inviting beneath the needle, and the small running stitches formed gentle ridges that caught light.
I enjoyed choosing thread colors that faded from pale to deep green, making each leaf appear to glow from within. The wooden hoop added a warm frame, and the overall piece had a calm, domestic presence that quietly brightened the room.
Visitors often leaned in to admire the tiny details, commenting on the slightly irregular stitches that made the work feel lovingly human.
Steps
- Stretch fabric in an embroidery hoop and sketch a simple shamrock outline on the surface.
- Choose thread colors and stitch the outline and interior details using backstitch, satin stitch, or French knots as desired.
- Trim excess fabric around the hoop and secure the back for a neat appearance.
- Hang the finished hoop on a wall or group several sizes together for a composed display.
Shamrock tea light holder with pressed leaves

A small tea light holder decorated with pressed shamrock leaves created a subtle, green halo when lit. The pressed leaves lay flat against the holder’s surface, their veins forming a delicate pattern that glowed translucent when the flame flickered.
The glass took on a soft, mottled look where the leaves overlapped, and the scent of warm wax blended with faint herbal notes from the dried plant matter. The effect was quietly intimate, turning a simple candle into a little altar of light that felt both seasonal and meditative on the tabletop.
Steps
- Press small shamrock leaves between absorbent paper for several days until fully dried and flat.
- Arrange the pressed leaves on the exterior of a clear glass votive and secure with a thin layer of decoupage medium.
- Apply additional sealing layers to protect the leaves and allow each coat to dry thoroughly.
- Place a battery-operated tea light inside the holder to enjoy a soft, leaf-patterned glow.
Shamrock painted rocks for garden markers

Painted rocks with shamrock designs became little surprises tucked among potted plants and along garden edges. The cool stone felt grounding in my palm, and acrylic paint sat vibrantly against the gray surface.
I liked the polish that sealed the designs, making them weather-resistant and adding a faint glossy sheen. Each rock had unique contours that altered the look of the shamrock slightly, turning each piece into a small, imperfect portrait of the shape.
Placing them felt like leaving tiny clues of cheer for anyone wandering through the space.
Steps
- Select smooth, flat stones and clean them to remove dust and debris.
- Sketch shamrock outlines lightly with pencil and fill with acrylic paints in chosen shades.
- Allow paint to dry fully before applying a clear sealer to protect from weather.
- Place the painted rocks among plants or along paths as subtle garden accents.
Shamrock garland made from recycled book pages

Turning book pages into shamrock garlands felt like giving old stories a second life. The paper had a faint papery scent and the printed words peeked through the green-tinted shapes, creating a curious blend of literature and craft.
When the garland hung in a reading corner it seemed to whisper a quiet connection between page and place. The edges of the paper curled slightly with time, which gave the garland a soft, fluttering movement in still air.
Friends who loved books often paused to read snippets visible on a particularly lucky leaf.
Steps
- Collect pages from well-loved books and cut shamrock shapes from the text pages.
- Optional: apply a light wash of diluted green paint for subtle color while preserving text visibility.
- String the paper shamrocks along twine using small holes or adhesive tabs.
- Hang in a reading nook or over a shelf where the paper edges can flutter gently.