Disclosure: This post contains affiliate links, which means we may earn a commission if you purchase through our links at no extra cost to you.
Paper snowflakes have a way of turning a quiet afternoon into something playful. I remember folding a stack of mismatched pages at a kitchen table, watching light and shadow change as each pattern opened up.
Those small surprises are the heart of DIY Snowflake Paper Craft Ideas.
These ideas collect that same sense of wonder in different directions — from delicate doily silhouettes to glowing, painted versions. Each suggestion grew from a messy experiment or a happy accident, and they all feel like swapping notes with a friend over a warm mug.
Old-school cut-paper snowflakes with a twist
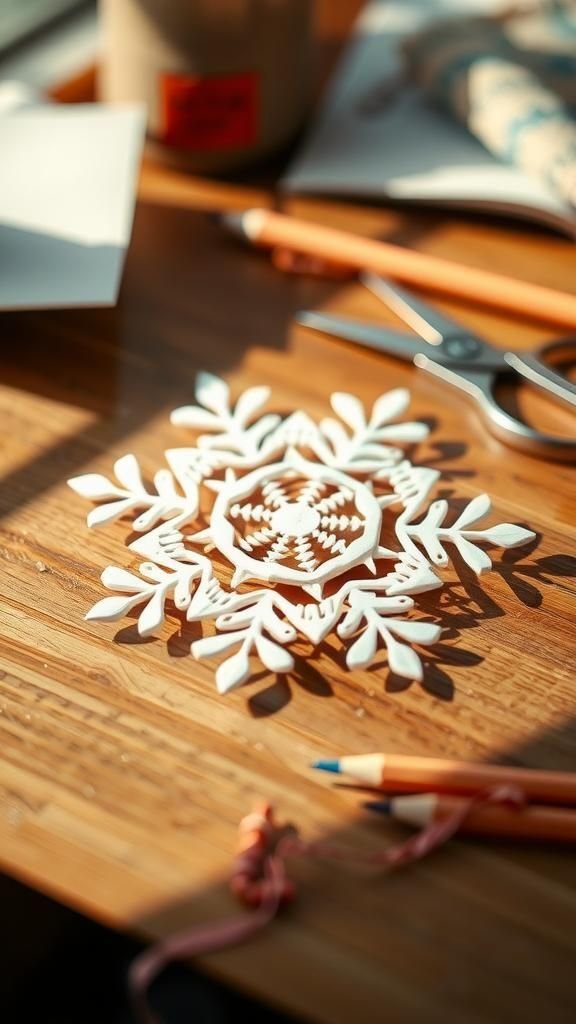
I have a soft spot for the kind of snowflake that starts as a simple square and ends as a lacy surprise. The paper feels crisp under my fingertips, folding into a tiny, impatient bundle that wants to spring open.
When the sheet is unfolded the light plays across small negative spaces, creating little shadows that shift with the room. There is a moment of breathless curiosity I still love, the kind where each open snowflake has an unexpected asymmetry that makes it feel personal and handwritten.
Steps
- Fold a square sheet into a tight triangle by folding twice.
- Draw gentle curves and sharp angles along the long edge as cutting guides.
- Cut along the drawn shapes with small scissors, keeping some folded edges intact.
- Unfold the paper slowly to reveal the full snowflake and press it flat under a heavy book if needed.
Layered snowflakes for depth and texture
Layering paper creates a little landscape of light and shadow that makes a snowflake feel three-dimensional. I like pairing thin tissue paper with a heavier cardstock so the thinner layer ripples slightly, catching light in a softer way.
When hung in a window the stacked layers move independently and produce a gentle rustling, like quiet winter breath. The edges of each layer read differently: one layer appears like lace while another holds crisp silhouettes.
The contrast between softness and structure is what keeps me reaching for another pattern.
Steps
- Cut several snowflake shapes from papers of different weights and textures.
- Stack the cut shapes with offset orientation to reveal each layer.
- Attach the center of each layer with a small dot of adhesive or a brad.
- Hang the layered snowflake by a delicate thread where light can highlight the depth.
Stained paper snowflakes glowing on windows
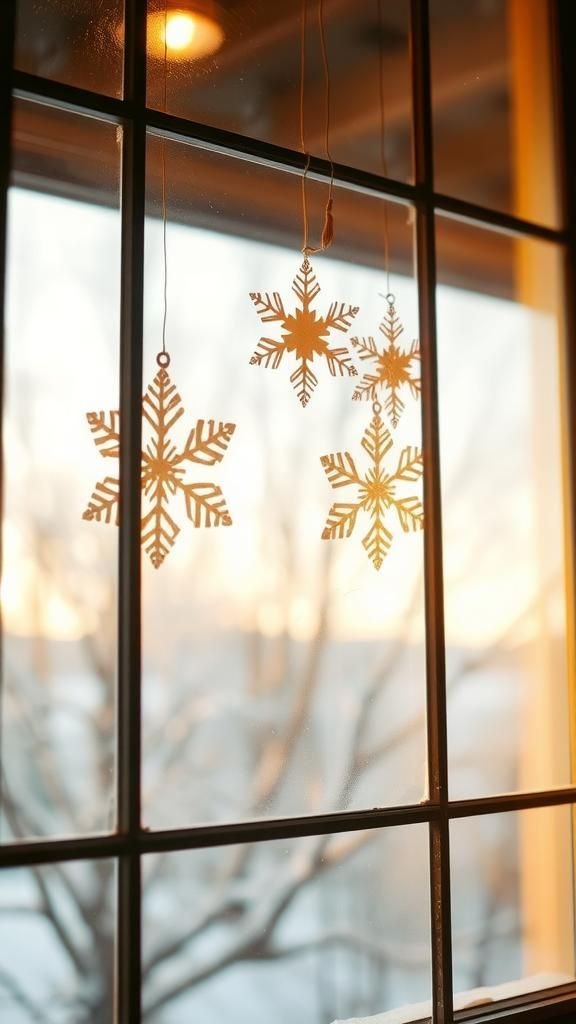
There is a warmth in stained paper that makes a snowflake feel lived-in and calm. I remember experimenting with light washes of tea and tiny pools of color that bled into the fibers, leaving faint rings and soft edges.
Once cut, those imperfections become part of the charm, with coffee-toned veins and watercolor blooms catching morning sunlight. On a cold morning the stained shapes look like old maps of winter, the warm tones balancing the cold scene outside.
The texture of the stained paper gives each snowflake a quiet, aged personality.
Steps
- Soak lightweight paper briefly in tea or diluted watercolor and let it dry flat.
- Fold the dried, stained paper and cut snowflake patterns as desired.
- Gently press the finished snowflake under a book to flatten any warped areas.
- Adhere to a window with tiny pieces of removable tape to catch the light.
Tiny tea-light snowflake lanterns for evenings
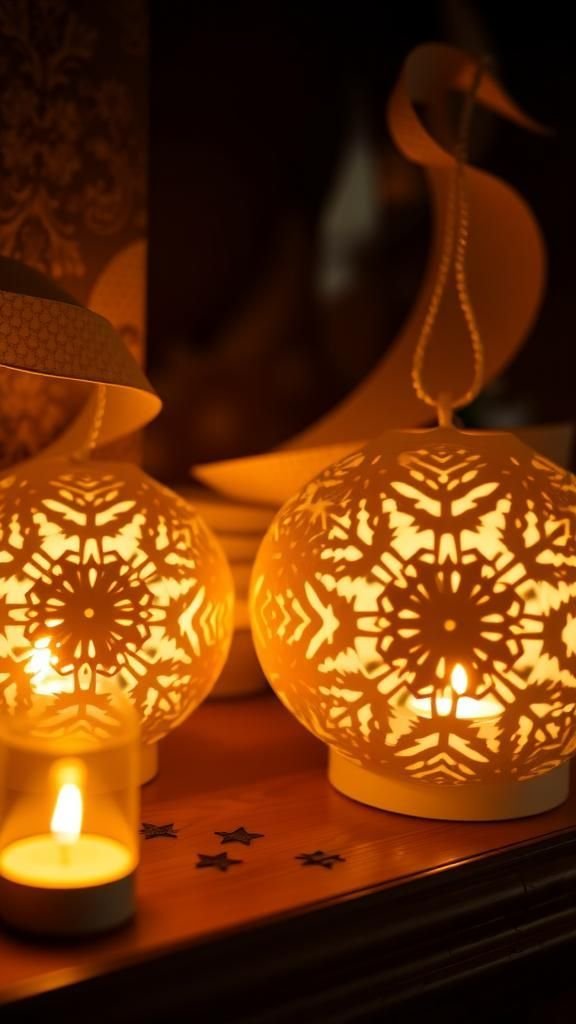
Paper lantern snowflakes bring a hush to an evening, their cutouts turning light into moving patterns. I enjoy the mellow glow as it slips through the arms of a cut snowflake, forming lace-like projections on nearby surfaces.
The scent of warm wax and the hush that follows creates a slow, comforting mood. Placing them on a mantle or clustered on a table makes the room feel intimate, like the craft itself is a small ritual.
The combination of warm light and delicate paper makes each piece softly theatrical.
Steps
- Cut snowflake patterns into thicker paper and shape into small cylindrical lanterns.
- Mount a battery-operated tea light inside each cylinder on a flat base.
- Ensure ventilation by leaving a small open top and avoid open flames with paper.
- Arrange lanterns on a stable surface where the glow can cast patterned shadows.
Lace-inspired delicate snowflake silhouettes for cozy corners
Lace-like snowflakes have the delicate, airy feel of an heirloom textile. I remember tracing a pattern that looked less like a folded paper project and more like a tiny textile fragment, with narrow spokes and tiny loops.
The light through those tiny gaps creates a fragile shimmer that reads almost like fabric. Placed near a lamp or in a shadowed corner, these silhouettes bring a whisper of elegance.
The thin spokes make them feel fragile in the hand, and each breath of air gives the whole piece a soft, living quality.
Steps
- Choose thin but sturdy paper and fold it finely for detailed cutting.
- Transfer a lace-inspired template onto the folded paper as a cutting guide.
- Use fine-tipped scissors to carefully remove tiny shapes and openings.
- Open the snowflake gently and place it where its silhouette can be admired.
Botanical snowflakes with natural elements and earthy textures
Merging botanicals with paper creates snowflakes that feel rooted and calm. I like pressing tiny leaves and petals into paper before cutting so faint impressions appear along the arms.
Those natural textures read like footprints of greenery, and in the right light you can see veining echo through the paper. Mixed with rougher fibers or seeded paper, the whole piece takes on an earthy voice that calls to mind woodland walks.
Hanging a strand of these feels like carrying a small, calm meadow indoors during winter.
Steps
- Press small leaves or petals between clean sheets until fully dried.
- Sandwich the pressed botanicals with a sheet of paper and cut a snowflake pattern.
- Allow any impressions to show naturally and handle gently to avoid tearing.
- Display with natural twine or tuck into a frame for a rustic look.
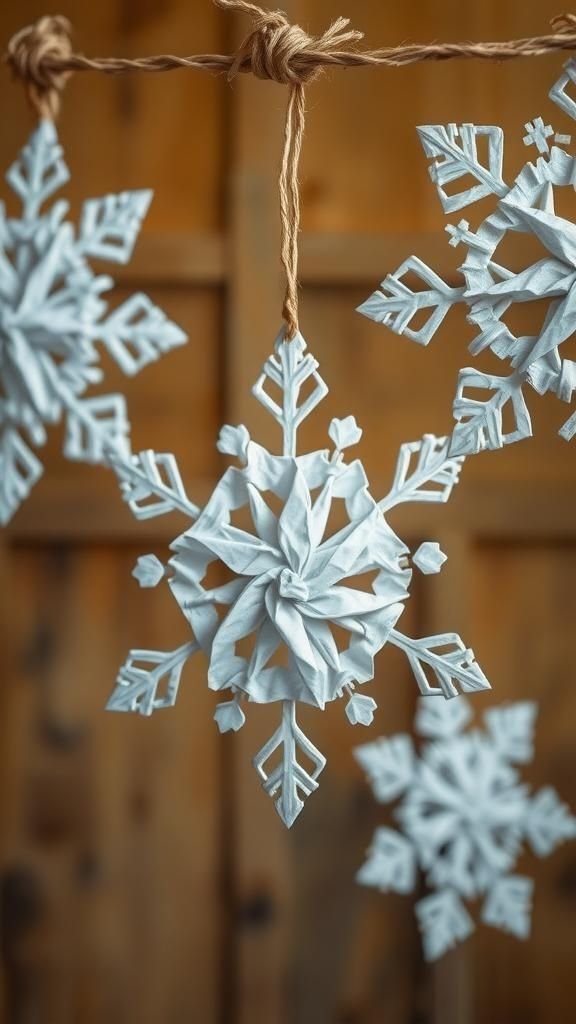
Folded origami snowflake stars with crisp lines
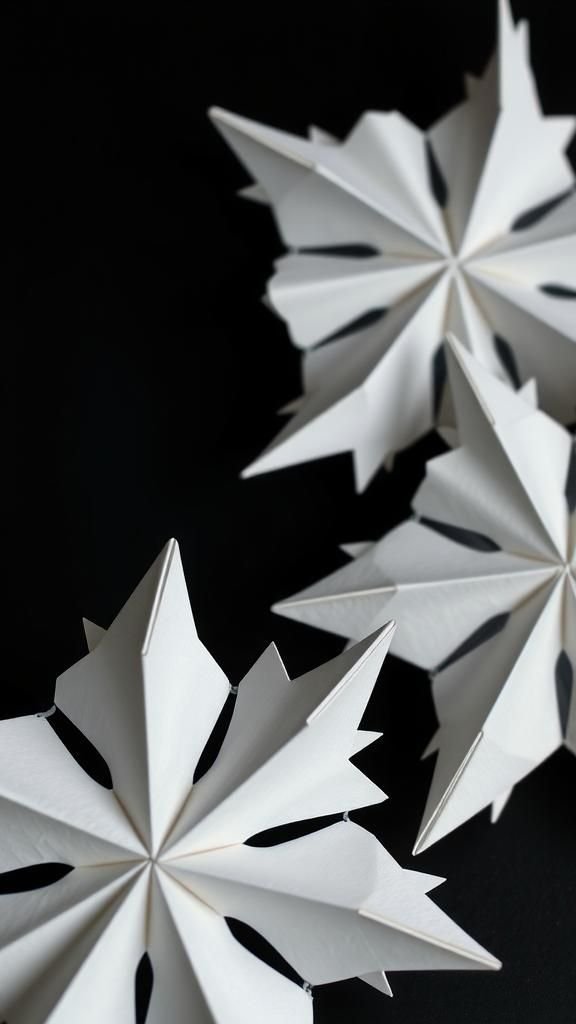
Origami snowflake stars feel precise in a way that makes my fingers go still. The creases hold memories of the folding rhythm, and the finished star has a compact geometry that contrasts with freeform cutouts.
The edges catch light sharply, giving a crystalline glint that feels like paper pretending to be glass. There is a quiet satisfaction in how an originally flat square becomes a faceted star, and the symmetry has a calm discipline that feels almost meditative.
Hung in groups, they build a constellation of little paper points.
Steps
- Start with square paper and follow a chosen origami star folding sequence.
- Make precise, crisp creases to hold the star’s facets in place.
- Tuck and lock the final flaps to form the three-dimensional star.
- Add a thin thread loop for hanging where the sharp edges can reflect light.
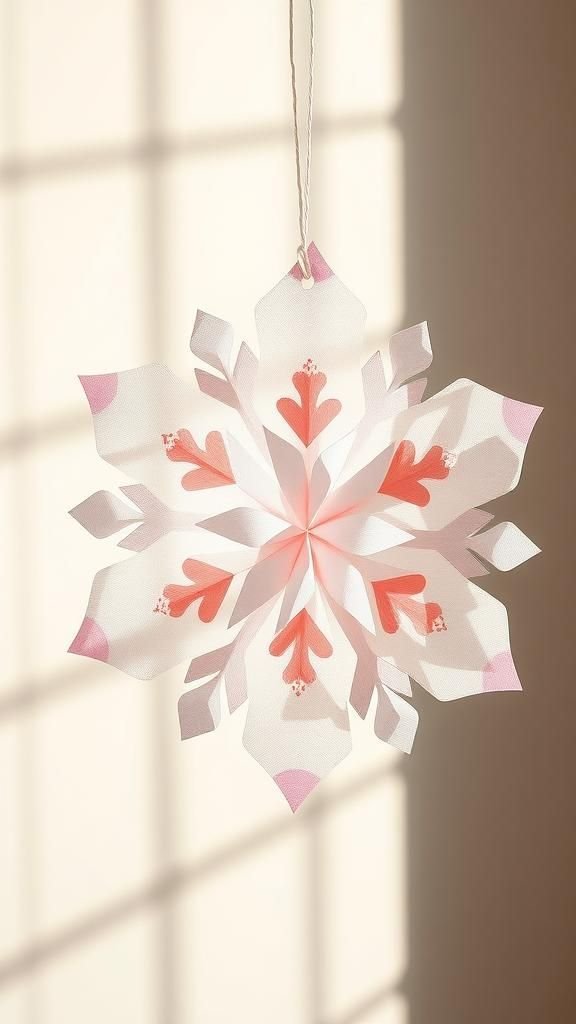
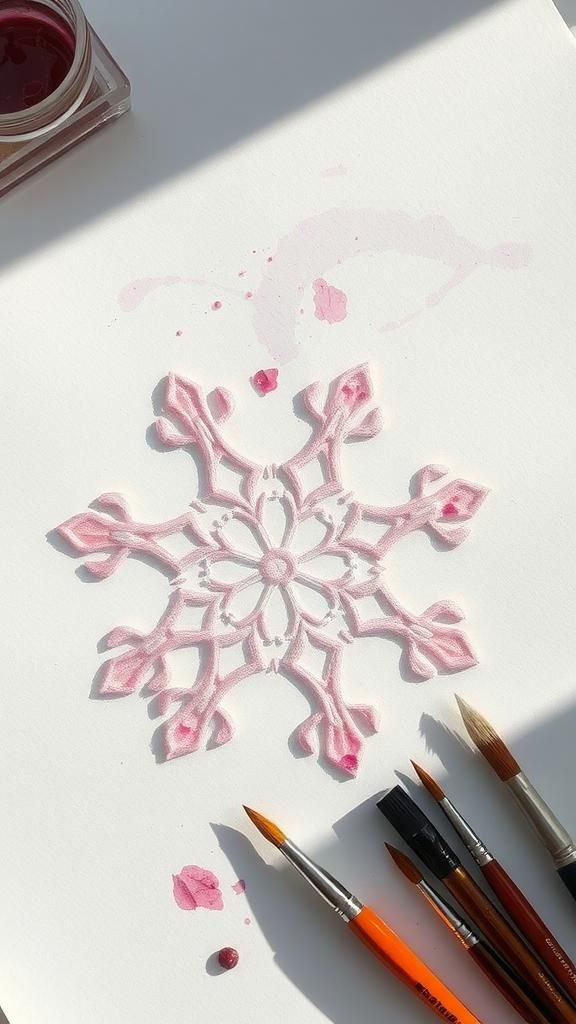
Watercolor-washed snowflakes with soft edges and dreamy color blends
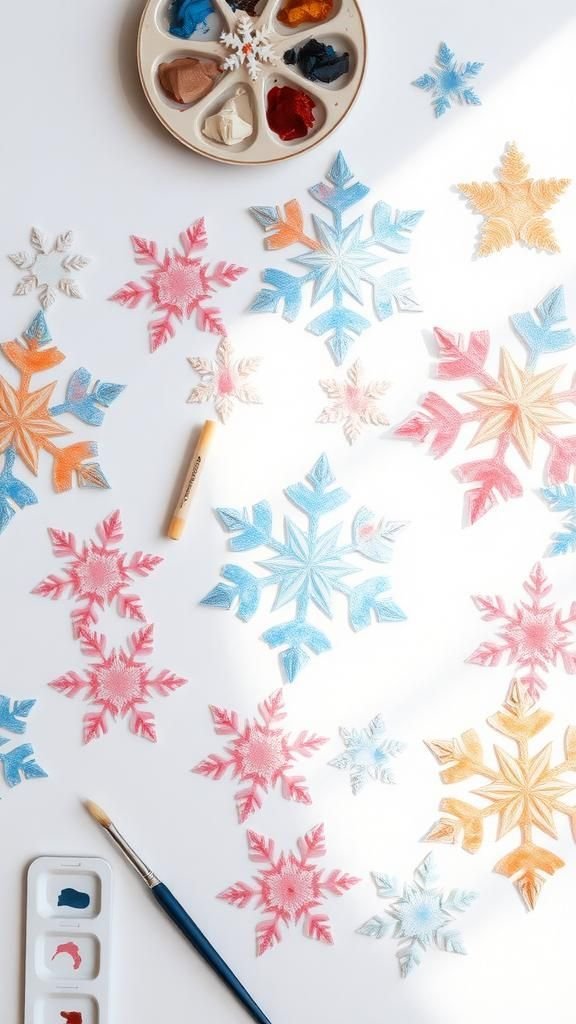
Soft watercolor washes make each snowflake read like a tiny painting. I enjoy seeing pigment bloom at the edges, where color pools and then fades into paler tones.
The wet paper surrenders to chance, creating gentle gradients and tiny granulations that feel organic. Once cut, the snowy silhouettes carry that painterly softness into the air, a contrast to the sharpness of negative space.
When several hang together the palette feels like a small winter sky, each piece contributing a different whisper of hue and mood.
Steps
- Apply diluted watercolor washes to paper, allowing colors to blend naturally.
- Let the painted sheets dry completely before folding for cutting.
- Fold and cut snowflake shapes, revealing the watercolor patterns across arms.
- Display where soft daylight accentuates the painted gradients.
Embossed cardstock snowflakes that catch light beautifully

Embossed snowflakes feel almost like small sculptures; the raised patterns catch a glance and demand a touch. I like running a fingertip across the ridged lines and noticing how the surface changes with angle.
The heavier cardstock gives the piece weight and presence, so each arm sits confidently rather than flopping. When angled toward a lamp the embossing picks up highlights, turning the paper into a quiet metal-like glint without losing softness.
They look delightful freestanding on a mantel where the texture can be admired close up.
Steps
- Score and press patterns into heavy cardstock using an embossing tool or stylus.
- Fold the embossed sheet for cutting, taking care not to flatten raised areas.
- Cut out the snowflake shape, preserving embossed details across the arms.
- Lightly buff the raised surfaces to emphasize highlights and display accordingly.
Sparkly glittered snowflake ornaments for trees
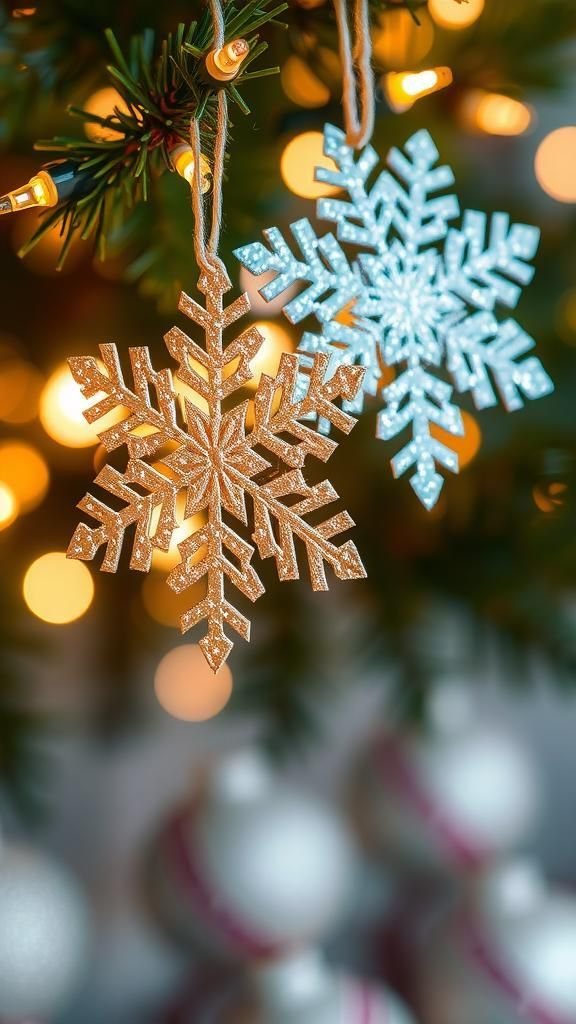
Glitter adds a playful, celebratory edge to paper snowflakes that I can never resist at holiday time. The tactile contrast between matte paper and shimmering glitter is delightful when held up to the lights on a tree.
Tiny flecks catch and scatter pinpricks of color, and close inspection reveals the hand that applied them, which feels charming rather than polished. Hanging these among evergreen boughs they become small stars that wink as branches sway.
There’s a childlike glee to watching them sparkle and shed a trail of tiny dust in the air.
Steps
- Apply a thin layer of adhesive to chosen snowflake areas.
- Sprinkle glitter over adhesive and tap off excess onto a tray to reclaim spillover.
- Let dry fully and shake gently to remove loose glitter.
- Attach a loop and hang among branches where lights will make them shimmer.
Embroidery hoop snowflake wall hangings full of charm
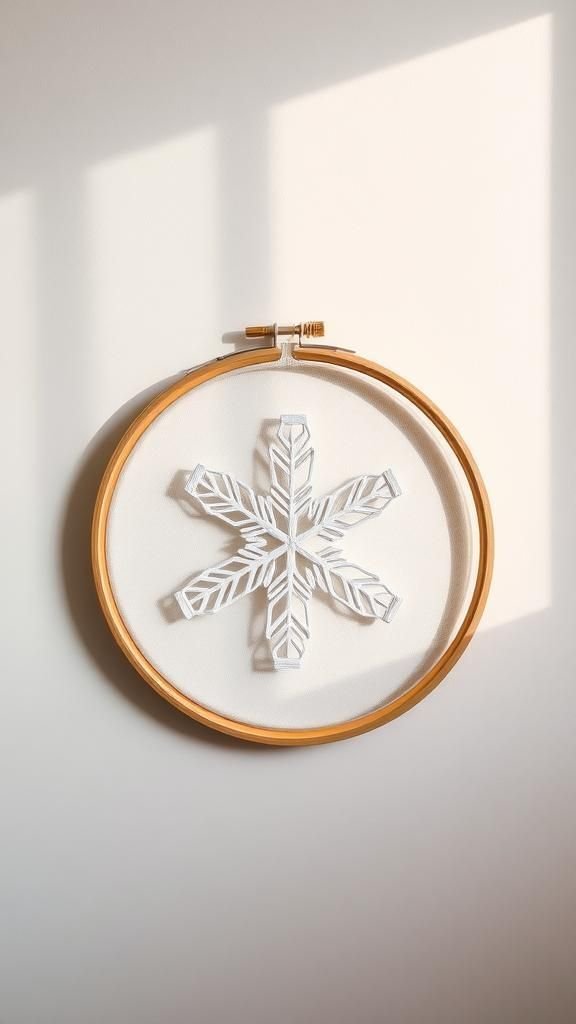
Turning snowflakes into hoop art makes them feel like small rituals of needle and thread. I remember stitching a tiny paper lace into a wooden hoop and marveling at how the frame gave the snowflake context and calm.
The round frame softens the geometry, and the contrast between raw wood and delicate paper is quietly pleasing. Suspended against a wall the piece reads like a small talisman, absorbing light and changing with the day.
The tactile mix of materials invites a long look and a few appreciative touches.
Steps
- Secure a paper snowflake inside an embroidery hoop, centering the design.
- Optionally add stitched details around the edges to anchor the paper.
- Trim excess paper outside the hoop for a clean frame.
- Attach a hanging loop and place on a wall where light accentuates the layers.
Mixed-media snowflakes with fabric scraps and paper accents
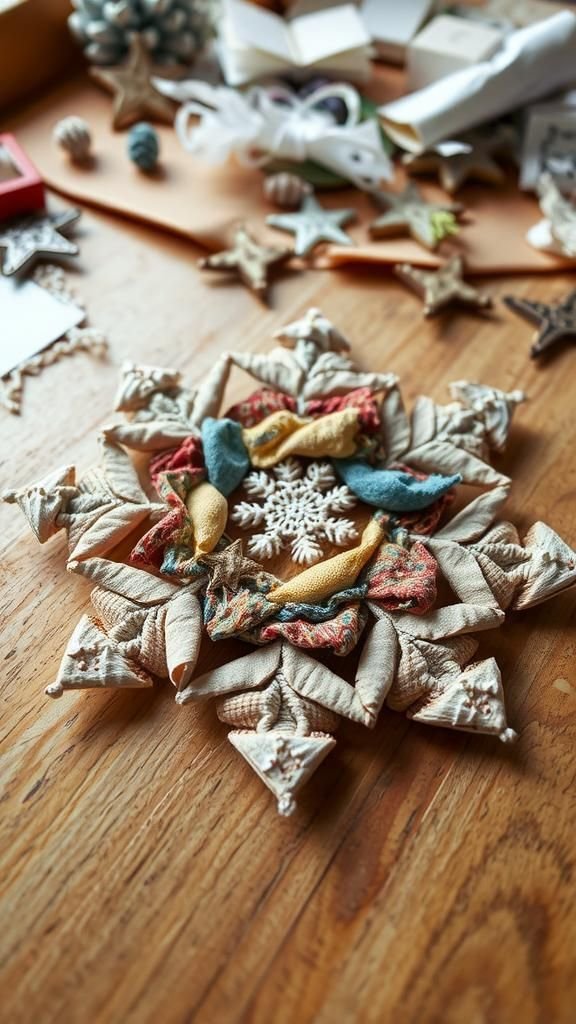
Combining fabric scraps with paper yields snowflakes that feel cozy and tactile. I’ve layered frayed linen and printed cotton under thin cut-paper arms, and the result reads like a small textile collage.
The fabrics add softness at the center while paper provides crisp extension outward. The seams and raw edges give a domestic, handcrafted warmth that feels familiar, like a patchwork memory.
Hanging these in a cluster creates a little quilt of winter shapes, where texture and pattern compete pleasantly for attention rather than matching perfectly.
Steps
- Cut a basic snowflake shape from sturdy paper as the top layer.
- Back the paper shape with fabric scraps, securing with adhesive or stitching.
- Trim the fabric neatly at the edges and add decorative accents if desired.
- Hang where the mix of textures can be appreciated up close.
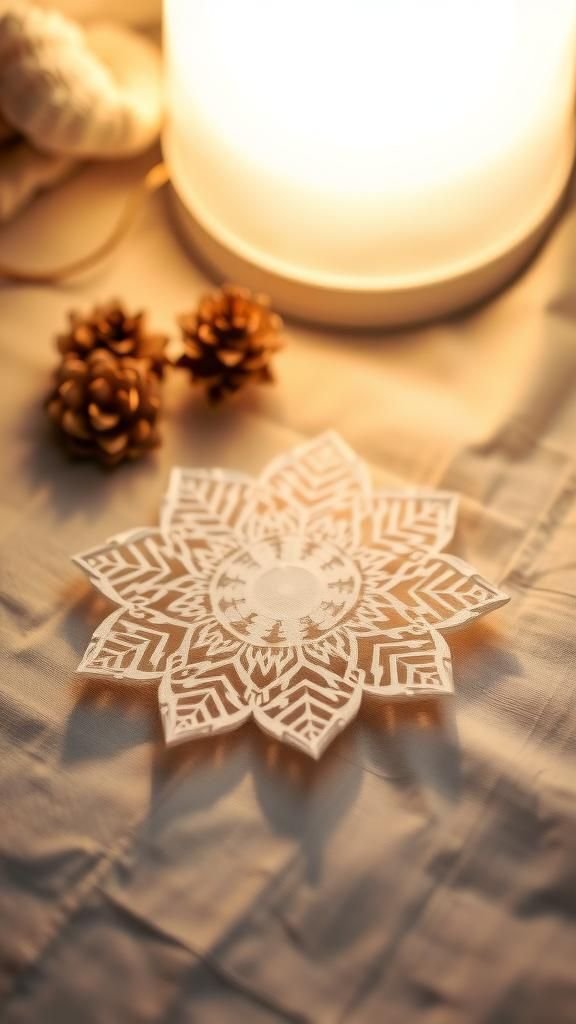
Paper doily snowflakes with vintage charm and soft edges
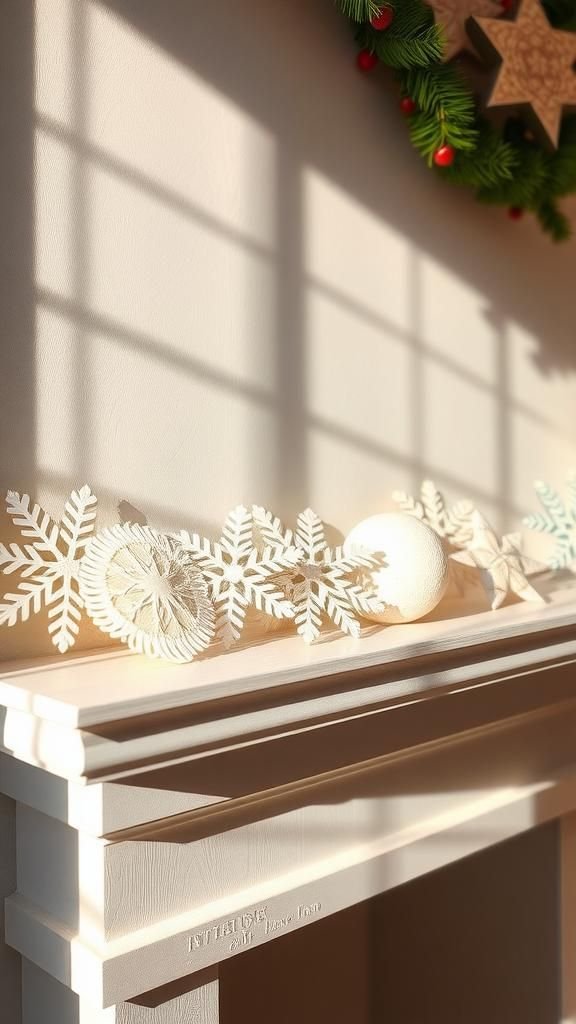
Doily snowflakes carry an old-fashioned softness that always makes me smile. The scalloped edges and tiny perforations transform into delicate arms, each little hole becoming a star of its own.
There is a tactile fragility to them, like a memory pulled from a drawer, and the faint off-white tones read like a subtle sepia. When grouped together the doilies create a vintage collage that feels both genteel and playful.
They respond lovingly to light, throwing faint, lacy shadows that make a mantel look as though it’s wearing heirloom jewelry.
Steps
- Select paper doilies and layer if a fuller look is desired.
- Trim into snowflake silhouettes while preserving delicate edge patterns.
- Flatten gently under a book if any curling occurs.
- String together or tape to surfaces for a nostalgic display.
Geometric hexagon snowflake mobiles for modern decor
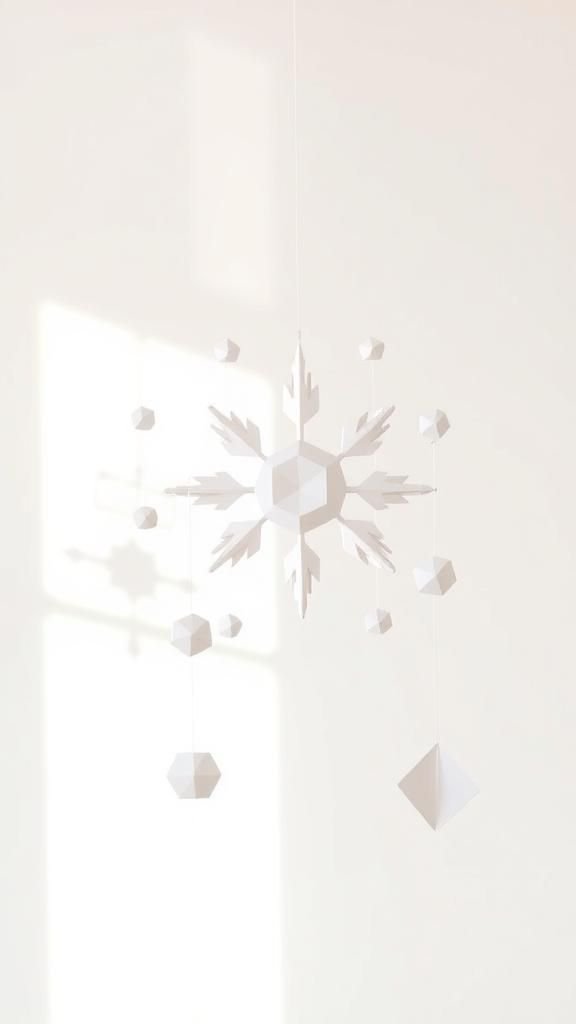
Geometric mobiles bring a crisp, architectural voice to paper snowflakes. I enjoy how hexagons and straight lines contrast with the idea of soft snowfall, turning a seasonal motif into modern geometry.
Suspended from thin threads the shapes rotate slowly, catching light and creating a moving shadow composition across walls. The precision of angles feels satisfying, like small origami architecture, and grouping different sizes makes a playful skyline.
In a minimalist room these mobiles read like sculptural elements that change subtly as air moves through the space.
Steps
- Cut hexagonal and angular snowflake shapes from heavyweight paper.
- Attach each piece to thin clear thread at various lengths to create a mobile.
- Balance the mobile by adjusting thread positions for smooth rotation.
- Hang where gentle air movement will animate the shapes.
Paint-resist snowflakes using masking techniques and soft washes
Paint-resist methods give snowflakes a graphic contrast that still feels soft at the edges. I like drawing a stencil and covering it with resist medium before laying down a wash, so the preserved areas read as crisp, bright paper arms.
The surrounding watercolor bleeds are gentle, creating a halo effect that suggests frost. When peeled away the reserved shapes pop cleanly, and the bleached areas around them have a dreamy quality.
These pieces look especially good when kept flat beneath glass, the crisp snowflake floating inside a wash of color.
Steps
- Apply a masking fluid in the snowflake design onto paper and let it dry.
- Paint soft watercolor washes over the masked area, blending colors gently.
- Once dry, remove the masking fluid to reveal the crisp snowflake silhouette.
- Trim or mount the finished piece for display.
Textured crumpled-paper snowflakes with rustic feel
Crumpled paper adds a lived-in texture that turns a snowflake into a tiny relic. I like scrunching paper, flattening it slightly, then cutting; the surface keeps faint creases that catch highlights.
Those irregularities read as character rather than flaw, giving each arm a gently rugged personality. When strung up, the crinkled planes reflect light in little patches and create a tactile warmth that feels handmade in a comfortable, honest way.
These pieces sit well in a casual kitchen or entryway where imperfection is welcome.
Steps
- Crumple paper lightly and then smooth it until some texture remains.
- Fold and cut the textured paper into snowflake shapes.
- Press gently to maintain the crinkles while preventing tearing.
- Hang with twine in a casual display where texture can be enjoyed.
Calligraphy-drawn snowflake patterns on kraft paper
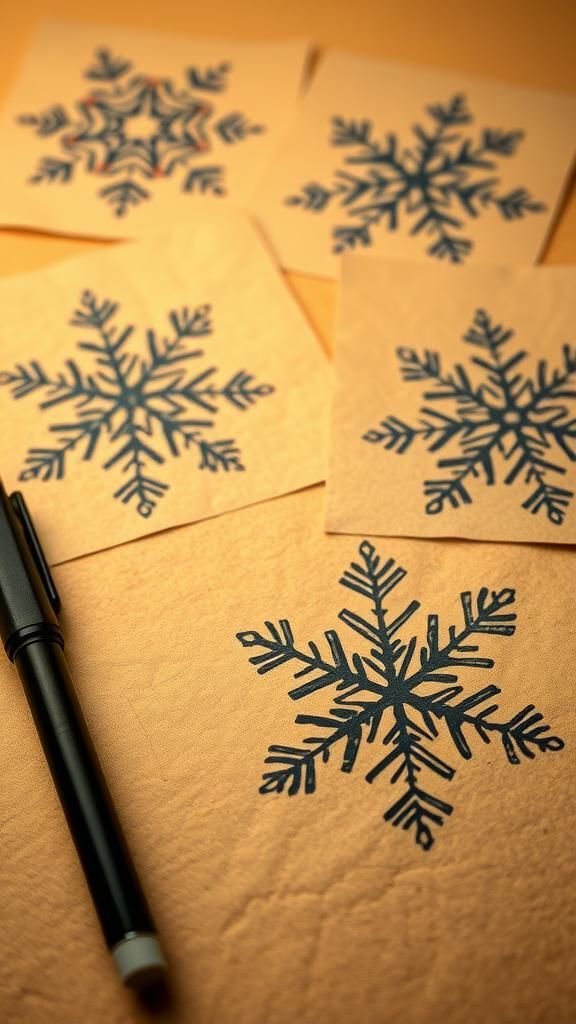
Drawing snowflakes with ink on kraft paper gives them an elegant, graphic presence. I like the contrast of dark ink against warm brown, the way each stroke becomes part of a tiny, inked landscape.
The tactile grain of the kraft paper soaks ink differently across strokes, creating little variations that feel alive. These snowflakes read like small prints or illustrations, and lining them up along a mantel creates a curated, hand-inked gallery.
The whole effect is quiet and refined, with a bit of rustic charm from the paper’s texture.
Steps
- Sketch snowflake designs lightly in pencil on kraft paper.
- Trace and embellish the sketches with calligraphy ink and pens.
- Erase any remaining pencil marks after the ink dries.
- Cut into shapes or leave as illustrated panels for display.
Pressed-flower snowflakes with botanical inserts for delicate displays
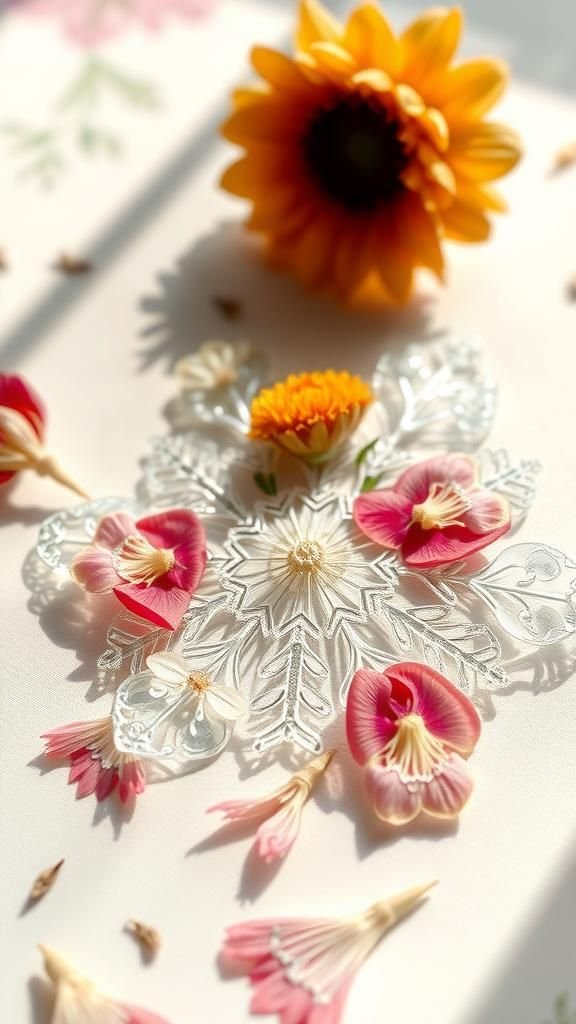
Pressing flowers into paper before cutting creates snowflakes that keep a whisper of summer inside winter shapes. I enjoy seeing the faint color of a petal embedded in a snowflake arm, a jewel of memory against pale paper.
The thinness of the pressed botanicals allows light to pass through, revealing tiny veins and gradients. Displayed in a sunny window they feel like little time capsules, each one holding a small piece of a season that refuses to leave.
The combination of fragility and preservation always feels quietly poetic.
Steps
- Press small flowers and petals flat between absorbent paper until fully dry.
- Sandwich pressed botanicals with a sheet of thin paper and fold for cutting.
- Cut the snowflake shape, keeping botanicals centered where they will show.
- Mount on glass or hang in windows so light reveals the pressed details.
Cut-and-layered silhouette snowflake cards for heartfelt notes
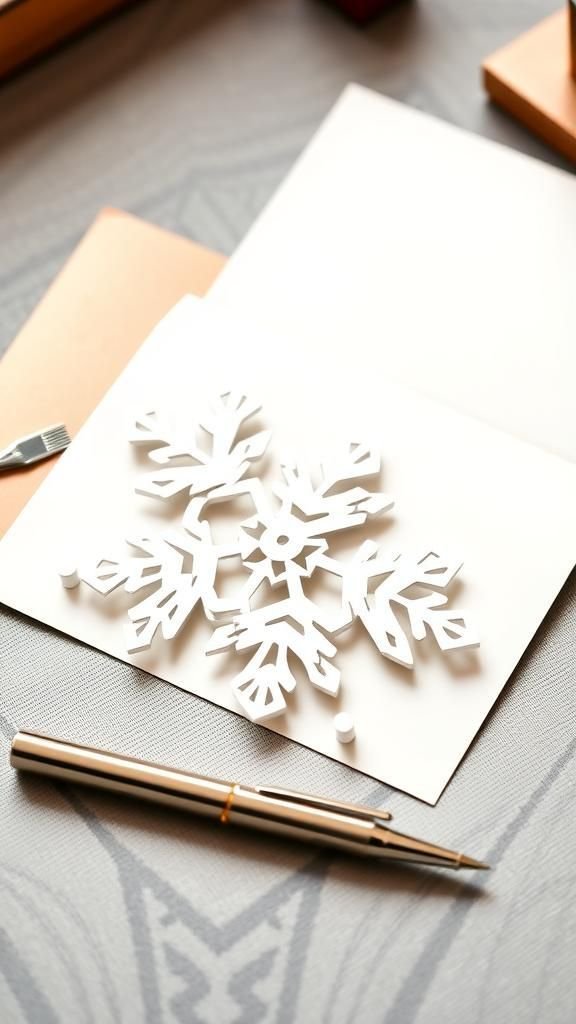
Turning snowflakes into cards gives them a voice that can be shared. I’ve always liked the idea of a peekaboo silhouette where the interior layer reveals a color or pattern behind a crisp white front.
The tactile opening of a card paired with a snowflake silhouette feels intimate, like an envelope holding breath. The contrast between the clean cut and whatever lies beneath — a scrap of patterned paper or a hand-painted wash — elevates the gesture.
Sending one feels like sending a small scene rather than a simple message.
Steps
- Fold cardstock into a card and cut a snowflake silhouette on the front.
- Insert a contrasting paper or painted sheet on the inside to show through.
- Secure the interior layer so it aligns with the cut silhouette.
- Write a note inside and present the card with a matching envelope.
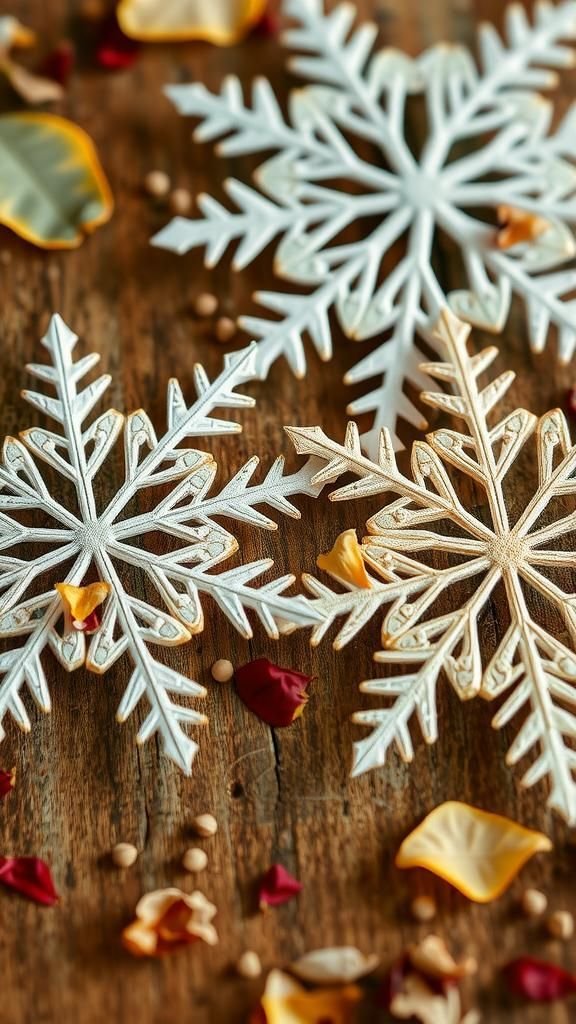
Gilded-edge snowflakes for elegant displays on mantelpieces and tables
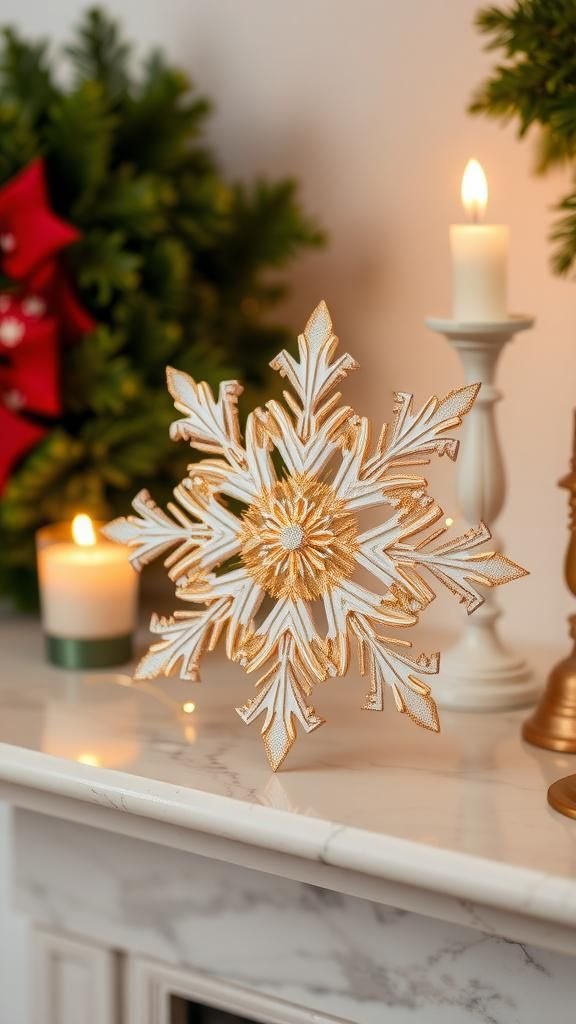
A hint of gilding brings a refined edge to paper snowflakes without making them formal. I enjoy tracing the outer tips with a sliver of metallic leaf so the edges catch light in a warm flash.
The metallic rim outlines each arm and elevates the whole composition, turning humble paper into a small ornament. Placed among candles or simple greenery the gilded highlights pick up surrounding light and lend a low-key luxury to the display.
The technique keeps the central geometry intact while adding a reflective whisper.
Steps
- Apply a thin adhesive along the edges of a cut paper snowflake.
- Lay gold or metallic leaf over the adhesive and press lightly.
- Brush away excess leaf gently to reveal a clean gilded edge.
- Place on a mantel or table where the gilding can catch light.
Glow-in-the-dark snowflakes for midnight magic and whimsy
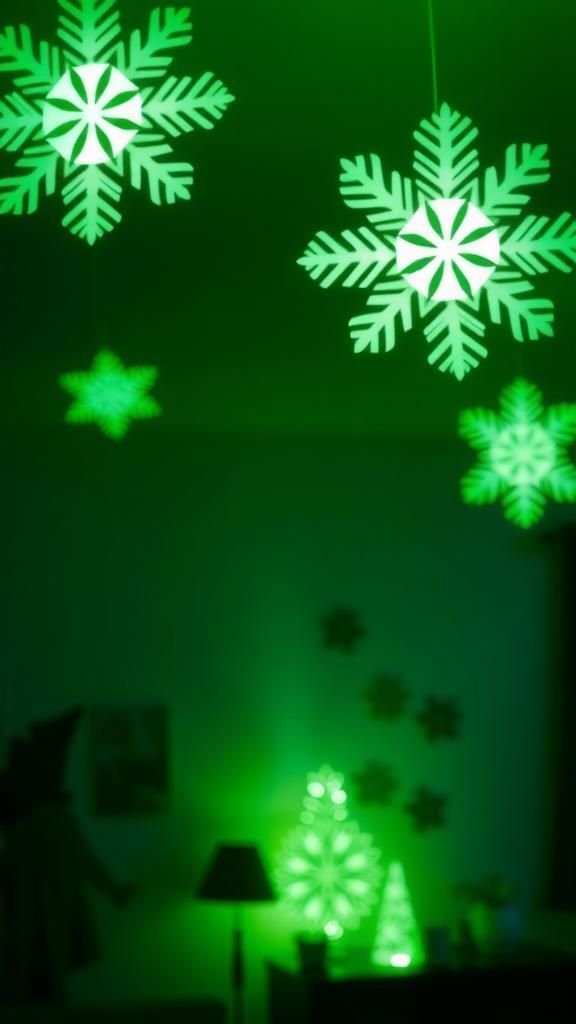
Snowflakes that glow at night have a playful, almost secretive presence. I remember making a handful and switching off the lights just to watch them bloom into pale, ghostly shapes on the ceiling.
The glow is soft and forgiving, turning everyday paper into something a little uncanny. They feel especially enchanting in a child’s room or a dim hallway, where the faint illumination becomes a small companion.
When mixed with non-glowing pieces the lit ones become little beacons, creating a quiet constellation that livens a dark room.
Steps
- Paint cut paper snowflakes with glow-in-the-dark paint on both sides and let dry.
- Charge them under bright light for several minutes so they absorb luminance.
- Hang where they can shine in darkness, avoiding direct contact with open flames.
- Re-charge under light as needed to maintain glow intensity.