Disclosure: This post contains affiliate links, which means we may earn a commission if you purchase through our links at no extra cost to you.
I always gravitate toward small, hands-on projects that brighten a weekend, and Easy Easter Egg Decorating Crafts have become my go-to for that. There’s something about glossy shells, gentle colors, and tiny imperfections that turns a dull afternoon into a playful experiment.
These egg projects feel relaxed rather than precious.
I’ve learned to enjoy the odd smudge or unexpected streak while trying different techniques from marbling to pressed flowers. Easter egg decorating crafts invite curiosity and a little bit of kitchen chaos, which I find strangely comforting.
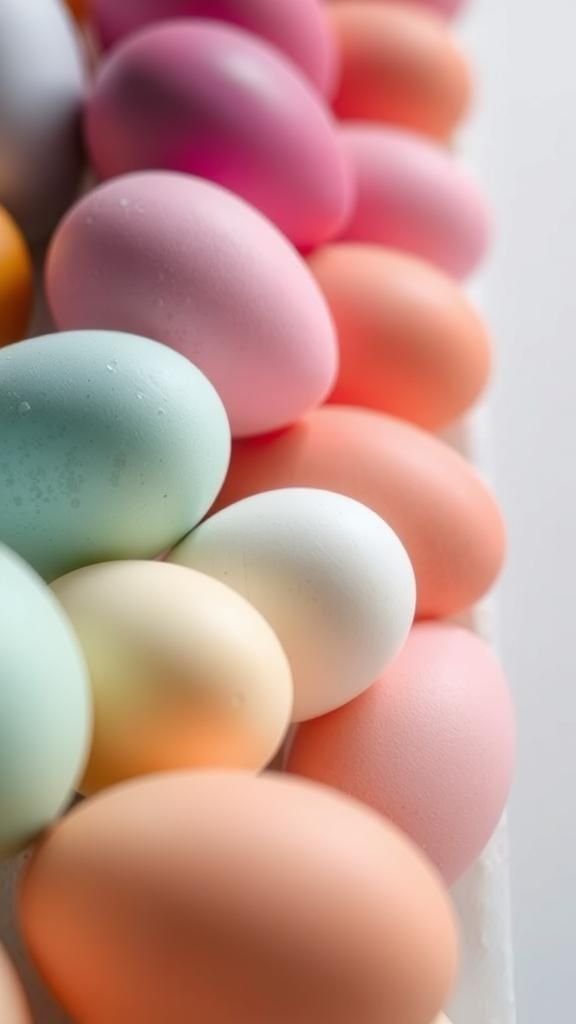
Soft pastel eggs from a mild vinegar bath

I remember the first time I left a pale pink egg on the windowsill and it looked like a tiny sunrise. The colors arrive like whispers, settling into the shell with a soft translucence that feels almost painterly.
The faint tang of vinegar in the air mixes with the warm kitchen light, and the eggs pick up the gentlest hues of mint, lavender, and blush. They sit in a ceramic bowl with a linen napkin beside them, each one reflecting subtle variations that feel personal and a little nostalgic.
Steps
- Bring eggs to a gentle simmer for about ten minutes, then cool until comfortable to handle.
- Prepare separate bowls of warm water with a splash of vinegar and a few drops of food coloring until soft shades appear.
- Place eggs into a dye bath briefly, lifting them out to check the color until the desired pastel tone is reached.
- Pat eggs dry on a soft cloth and leave them to air until completely dry and glossy.
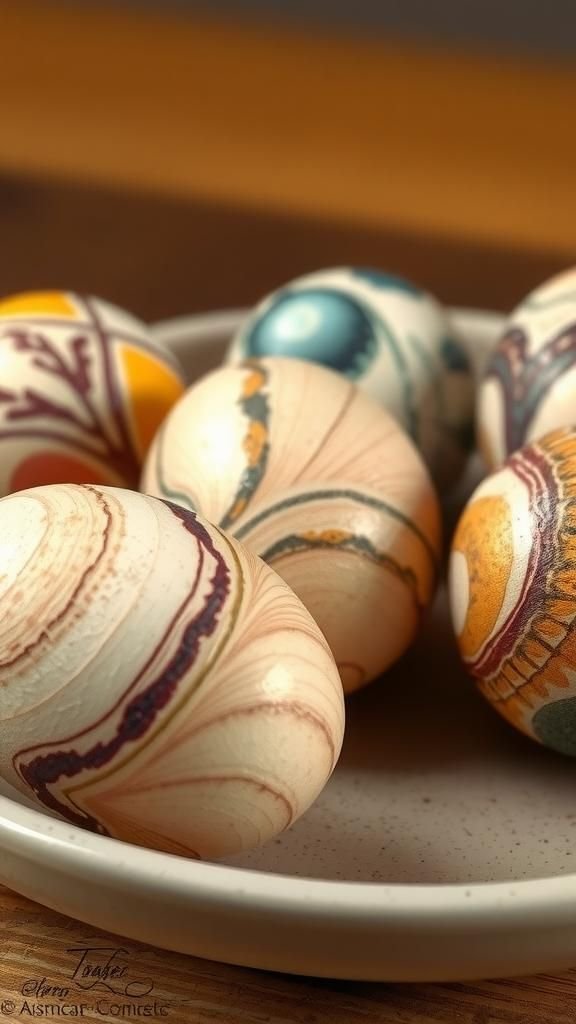
Marbled eggs with swirling fountain-pen like veins

There’s a tiny bit of chaos and a lot of delight in marbled eggs. Tiny lines and pools of pigment slide across the shell like tiny rivers, and each egg becomes wildly different from the next.
The surface catches light where the swirls thin out, giving a glossy sense of movement. I like arranging them in a shallow wooden tray so the colors can play off one another, and I often find myself nudging a stray swirl with a toothpick just to see what happens.
Steps
- Fill a shallow container with warm water and add a layer of shaving cream, smoothing it into an even surface.
- Drip several food coloring shades onto the shaving cream then swirl gently with a stick to create marble patterns.
- Press an egg onto the colored foam briefly, roll to transfer the pattern, then lift away and wipe off excess cream.
- Rinse the egg lightly and air dry to reveal glossy marbled veins and subtle color shifts.
Speckled robin-egg style with tiny flecks
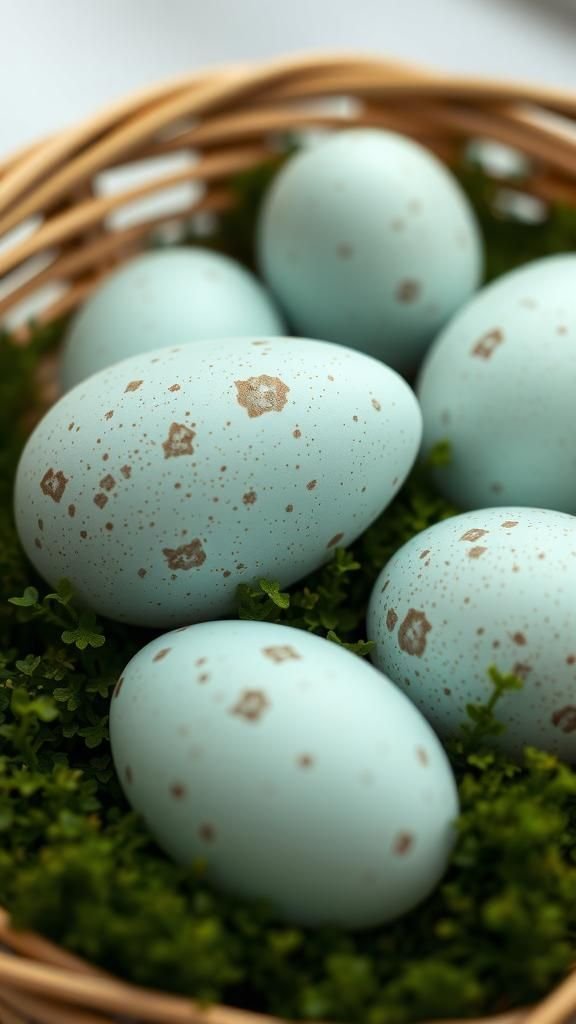
Speckled eggs always remind me of finding little treasures in the grass. Tiny flecks sit like freckles across a smooth, pale background, adding personality and a slightly wild look.
The contrast between the soft base color and the darker speckles creates a rustic, natural feeling that pairs well with moss and wicker. The spots vary in size and density, which makes each egg feel as though it has its own gentle story to tell when placed in a nest-like bowl.
Steps
- Prepare a pale base dye for the eggs and let them dry completely until the surface is matte.
- Mix a small amount of darker dye in a separate cup and transfer to a small stiff-bristled toothbrush.
- Flick the toothbrush over the eggs to create a scatter of tiny flecks, adjusting distance for larger or smaller spots.
- Allow the speckles to set and dry before arranging the eggs in a natural fiber basket.
Silk-tie dyed eggs with intricate fabric transfer

Silk-tie eggs always feel a little mysterious, like a secret borrowed from grown-up wardrobes. The patterns from the fabric move across the shell in tiny, elegant motifs and the colors deepen in unexpected places.
Handling them feels silky even after the transfer, and the surface carries a vintage charm. I like the idea that a fragment of an old tie or scarf can wrap around an egg and become a miniature textile portrait, each one carrying the memory of color and weave.
Steps
- Wrap each egg tightly in a small piece of patterned silk, securing it with a strip of plain cotton fabric.
- Place the wrapped eggs into simmering water with a splash of white vinegar for color transfer.
- Simmer gently for a set period, then remove and cool before unwrapping to reveal the transferred patterns.
- Let the shells dry fully on a soft towel, revealing rich, fabric-like motifs.
Delicate pressed-flower eggs with botanical charm
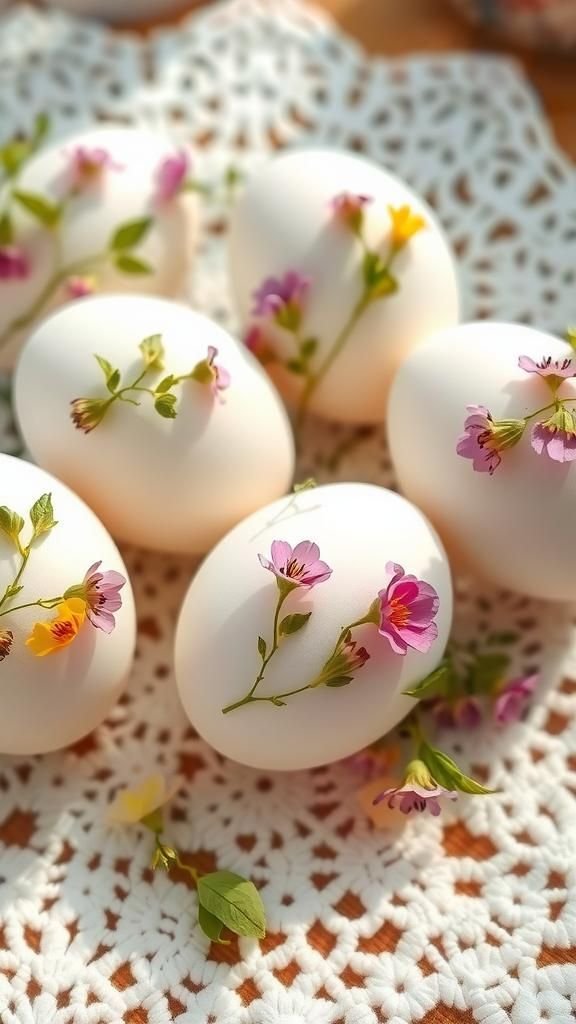
Pressed-flower eggs feel like pocket-sized weddings of spring. Tiny petals and leaves flatten against the shell, their veins visible like miniature topography.
The petals add soft, translucent patches of color and lend a fragrant, garden-like idea even when the scent is faint. I love arranging a cluster of these on a lace doily; the contrast between fragile botanicals and firm shells creates an unexpected harmony that looks gentle and thoughtfully assembled.
Steps
- Select small, thin flowers and press them until fully dry and flat between heavy books or a flower press.
- Lightly moisten the egg surface and position the pressed petals onto the shell with tweezers for careful placement.
- Seal the floral pieces gently with a clear satin medium applied in thin layers until smooth.
- Allow the eggs to dry completely before displaying on a soft fabric nest to protect the delicate botanicals.
Metallic leaf eggs with warm golden shimmer

There’s a quiet luxury to eggs speckled with metallic leaf. Warm flashes of gold or copper catch the light, creating little twinkles when the bowl shifts.
The leaf sits thin and almost ethereal, interrupting the matte shell with tiny gleams. I find the effect pairs beautifully with rougher textures like burlap or reclaimed wood, the contrast making the metallic sections feel like little pieces of treasure whose edges catch trace amounts of sunlight.
Steps
- Prepare the eggs with a thin coat of clear adhesive suitable for metal leaf, waiting until it becomes tacky.
- Lay small pieces of metallic leaf onto the tacky areas, pressing lightly with a soft brush to transfer the shimmer.
- Remove excess leaf with a clean brush and smooth any edges gently.
- Finish with a thin top coat of clear varnish to protect the metallic sections and enhance shine.
Tiny confetti eggs with colorful sticker dots
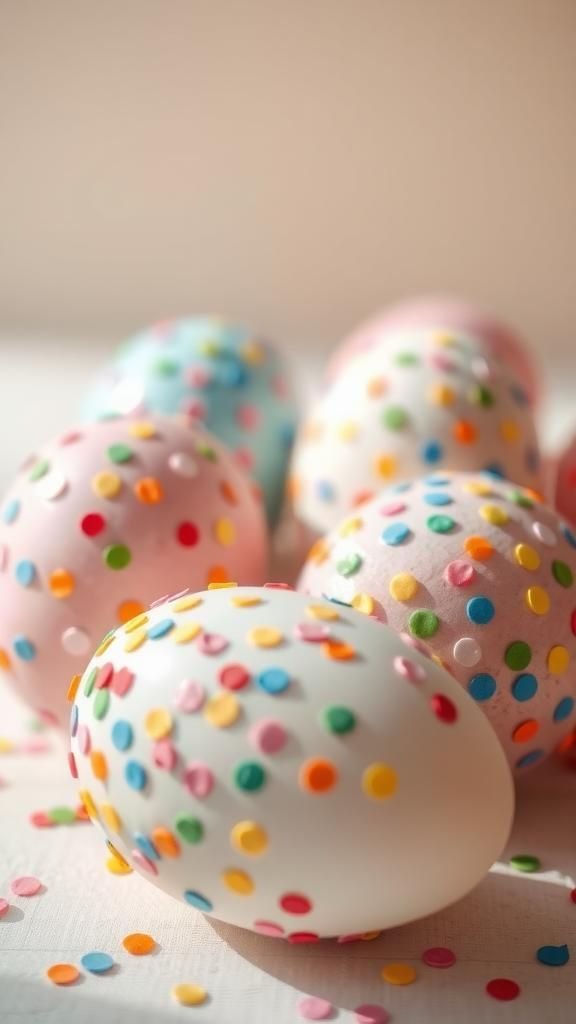
Confetti eggs feel cheerful without being overwhelming. Little rounds of color pop like candies against a neutral shell, and the texture invites a playful touch.
I enjoy arranging a gradient of dots across the curve so the eye follows the topography of each egg. They sit like miniature party favors in a shallow bowl, and the bright stickers give the whole group a casually joyful vibe that seems ready for a picnic or a sunny mantel.
Steps
- Select matte or glossy circular stickers in a palette that complements the base egg color.
- Apply the stickers to the shells in a loose pattern, spacing them with varying density for visual interest.
- Gently press each sticker to ensure adhesion and smooth any wrinkles.
- Optionally seal with a clear spray to help stickers remain secure over time.
Chalkboard eggs for handwritten notes and doodles
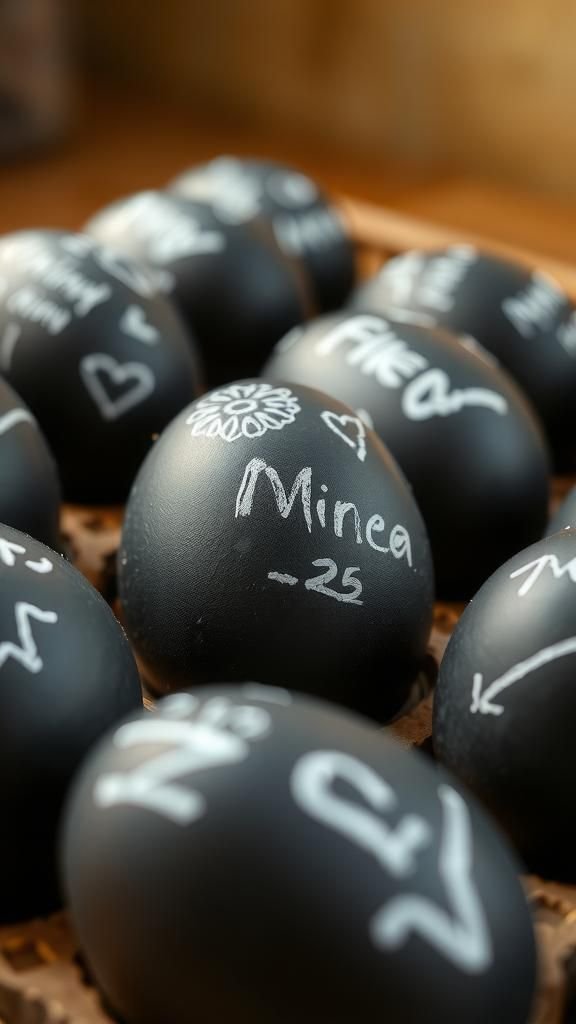
Chalkboard eggs have a rustic, interactive appeal. The matte, velvety surface absorbs chalk marks with a dusty quality that invites scribbles and tiny messages.
There’s a small satisfaction in tracing a doodle across a curved surface and watching the white line soften against the dark backdrop. I often leave one on the breakfast table with a tiny heart or a smile; the mood feels casual and personal, like a tiny canvas that can change with each morning.
Steps
- Apply a couple of thin coats of chalkboard paint to clean eggs, allowing full drying time between coats.
- Lightly condition the surface by rubbing a piece of chalk over the eggs and wiping away the dust.
- Write or draw with chalk or chalk markers, erasing and reworking designs as desired.
- Store gently to avoid scuffs and refresh with chalk when ready for new messages.
Glitter-dipped eggs with subtle sparkle gradient

Glitter-dipped eggs catch light like tiny ornaments. The sparkle feels celebratory but can also be gently understated when applied as a gradient toward the bottom of the egg.
From some angles the sheen looks almost wet, while other glimpses reveal a grainy texture that invites a closer look. I like arranging a cluster with both shiny and matte finishes; the contrast makes the glittered ones feel like they’re winking among quieter companions.
Steps
- Brush a smooth band of clear adhesive around the base area where the glitter will sit.
- Roll the egg through a shallow tray of fine glitter, concentrating more at the base for a gradient effect.
- Tap off excess glitter and allow to dry fully.
- Seal with a clear spray to minimize shedding and enhance shine.
Washi tape eggs with layered graphic patterns
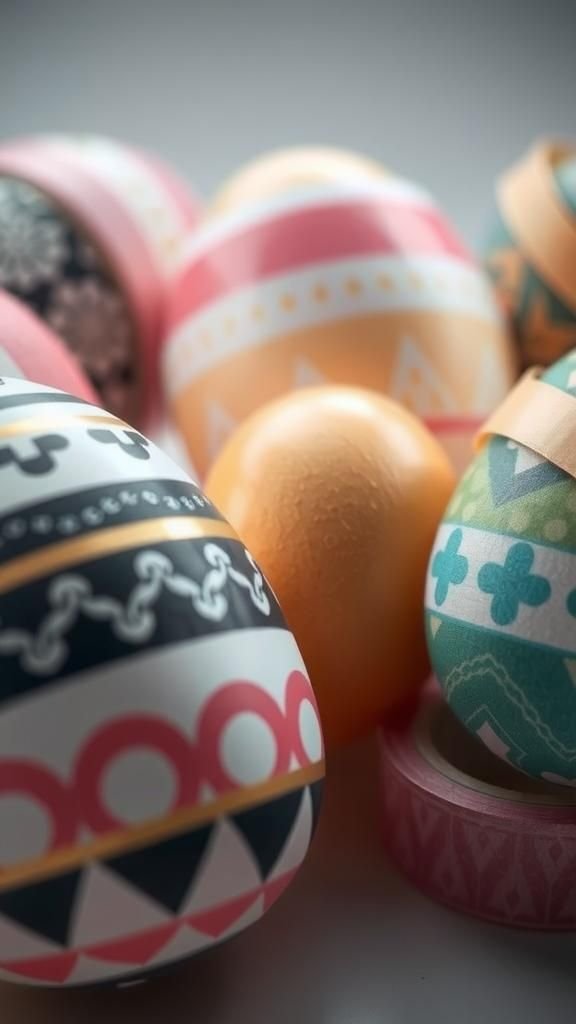
Washi tape brings an immediate graphic lift to eggs. Stripes, dots, and tiny florals wrap around curves with a casual, handmade charm, and the paper texture gives a cozy tactile feeling.
The layers overlap in interesting ways, creating seams that look intentional rather than tidy. I often mix widths and patterns, and the combination looks playful against a neutral background.
The eggs read like small collages, each one showing a different mix of color and rhythm that’s fun to rearrange in a bowl.
Steps
- Select complementary rolls of washi tape in a variety of widths and patterns.
- Tear or trim pieces to desired lengths and apply them across the egg in overlapping bands or geometric shapes.
- Smooth each strip with a finger to remove bubbles and ensure adhesion.
- Trim edges gently for a neat finish and arrange in a decorative display.
Ombre-dyed eggs that fade like watercolor washes
Ombre eggs look like tiny horizons, where color slips from intense at one end to barely-there at the other. The gradient feels meditative, and holding an egg up to the light reveals subtle banding and soft edges that blend like watered paints.
I enjoy lining a small row by color intensity; it invites the eye to travel along the curve. The effect reads elegant without being precious, offering a calm, graduated beauty that pairs well with simple table settings.
Steps
- Prepare a concentrated dye bath for the deepest color and progressively dilute additional bowls to create lighter shades.
- Dip an egg partially into the darkest shade, holding briefly for rich color.
- Lower the egg into progressively lighter baths to achieve a smooth transition of tone.
- Rinse gently and allow to air dry until colors settle.
Wax-resist batik eggs with organic linework
Batik-style eggs carry an artisanal feel, with waxed lines interrupting dye to produce delicate contrasts. The wax ridges hold their own little shadows, creating a tactile outline around patches of color.
There’s a soft ritual in revealing the pattern beneath, and the results often come out with charming imperfections that feel handcrafted. I tend to display these on a matte ceramic plate where the faint ridges and layered dyes show off like tiny maps of careful, patient marks.
Steps
- Create designs on clean eggshells by drawing with melted beeswax or a wax resist tool.
- Dip eggs into a dye bath, then repeat with additional wax and dye layers for more complexity.
- Warm the shell gently to remove wax by wiping with a cloth or letting wax melt away into a safe container.
- Reveal the layered patterns and let the eggs cool before arranging them for display.
Broken-shell mosaic eggs with ceramic-like surfaces

Mosaic eggs look like miniature ceramic artworks. Tiny fragments gleam with their original sheen and sit like scales across the shell, offering a tessellated surface that catches angles of light differently.
There’s an almost archaeological pleasure in laying little pieces down and watching an irregular pattern emerge. When grouped, the mosaic eggs form a complex visual rhythm that feels both historic and playful, as if they were rescued pieces recombined into a new, surprising whole.
Steps
- Crush clean eggshells or ceramic pieces into small shards and sort by color and size.
- Brush a thin adhesive onto the base egg and press shards into place to create a mosaic pattern.
- Once set, fill gaps with grout or a tinted filler and wipe away excess with a damp cloth.
- Allow fully to dry and polish the surface to reveal the gleaming mosaic effect.
Hand-lettered monogram eggs with metallic ink
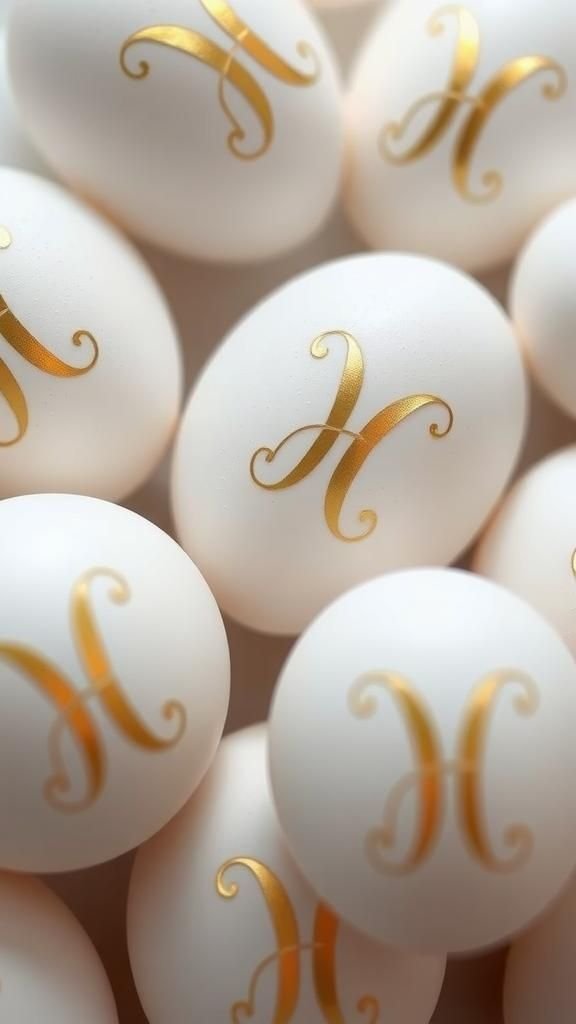
Letters on eggs feel intimate, like tiny notes tucked into a nest. Metallic ink catches light in a refined way, emphasizing sweeping curves and sharp serifs.
The contrast between the bright metal and a matte backdrop makes the script pop without shouting. I’ve left initials at place settings and watched people smile when they pick them up; there’s something quietly thoughtful about a small hand-lettered touch, especially when the ink glints at certain angles under dining room lights.
Steps
- Lightly sketch a monogram on the egg surface with a soft pencil for placement guidance.
- Trace over the sketch with a fine metallic marker or paint pen for clean, reflective lines.
- Allow the ink to dry fully to prevent smudging and protect with a thin clear coat if desired.
- Arrange eggs at place settings or in a decorative bowl to showcase each monogram.
Silhouette eggs with shadowy cutout motifs
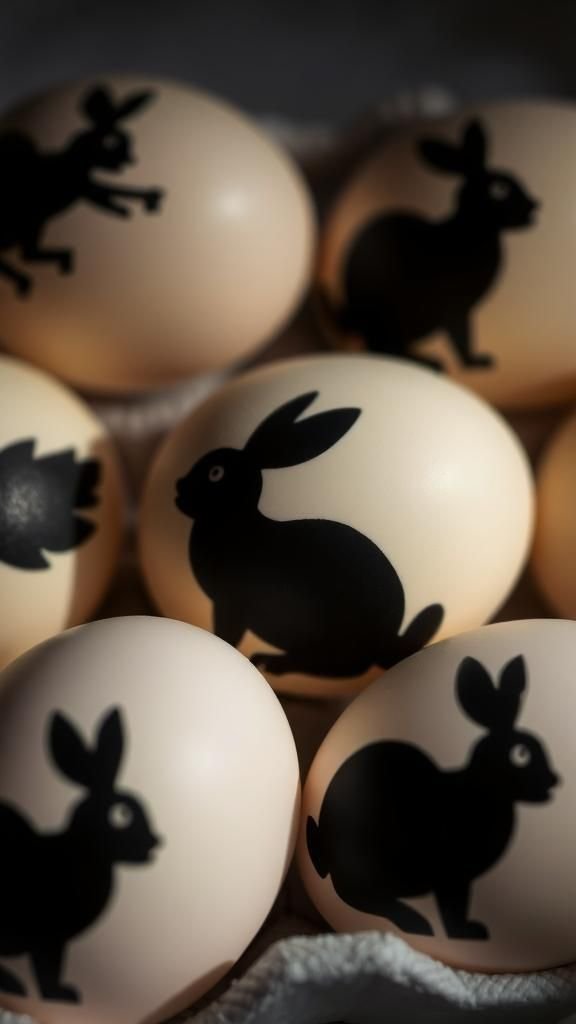
Silhouette eggs feel like tiny stages where bold shapes make an immediate statement. Dark silhouettes of rabbits, leaves, or simple shapes create a strong graphic contrast that reads clearly from a distance.
The crisp edges of the motifs feel modern and tidy, and the play between light and shadow lends a cinematic quality when the eggs sit under soft lamps. I enjoy arranging a few in a row so the eye moves from shadow to shadow, each one a small, quiet icon.
Steps
- Create or print small silhouette templates in desired shapes and trim them to fit the egg curve.
- Adhere the templates gently to the shell surface and dye the exposed areas in your chosen color.
- Remove templates after dyeing to reveal the negative space silhouettes.
- Touch up edges with a fine brush or marker for crisp definition if needed.
Polymer clay accents for sculptural miniatures

Adding tiny polymer clay accents turns an egg into a miniature sculpture. Little flowers, leaves, or geometric beads give a tactile, three-dimensional quality that invites the fingertips.
The clay’s matte or gently glossy texture contrasts with the smooth shell, and the colors remain crisp against softer backgrounds. I like placing clay-accented eggs in a shallow bowl of pebbles so the embellishments can peek out, offering a playful peekaboo effect that feels handcrafted and a bit whimsical.
Steps
- Condition small amounts of polymer clay and sculpt miniature shapes like flowers, dots, or geometric pieces.
- Bake clay pieces according to manufacturer instructions to harden them.
- Attach the baked clay accents to the eggshells with a clear-drying adhesive and allow to set.
- Arrange the finished eggs in a display that lets the sculptural details show.
Stamped eggs with inked botanical impressions

Stamped eggs feel like a printmaker’s delight. Tiny botanical impressions repeat across the curve in crisp, inked lines that feel graphic and composed.
The contrast between the shell’s smoothness and the stamp’s ink creates a tactile illusion as if the surface carries a faint texture. When grouped with plain eggs, the stamped ones anchor the display, offering a calm, patterned presence that reads a little bit vintage and a little bit modern at once.
Steps
- Choose small rubber stamps with botanical or geometric motifs and an appropriate ink pad.
- Press the stamp gently onto the egg surface, reinking between impressions for consistent coverage.
- Rotate the egg and stamp around its curve to create a repeating pattern while keeping pressure even.
- Let ink dry thoroughly before handling and display on a soft surface to avoid smudging.
Crackle-dyed eggs with aged ceramic effect
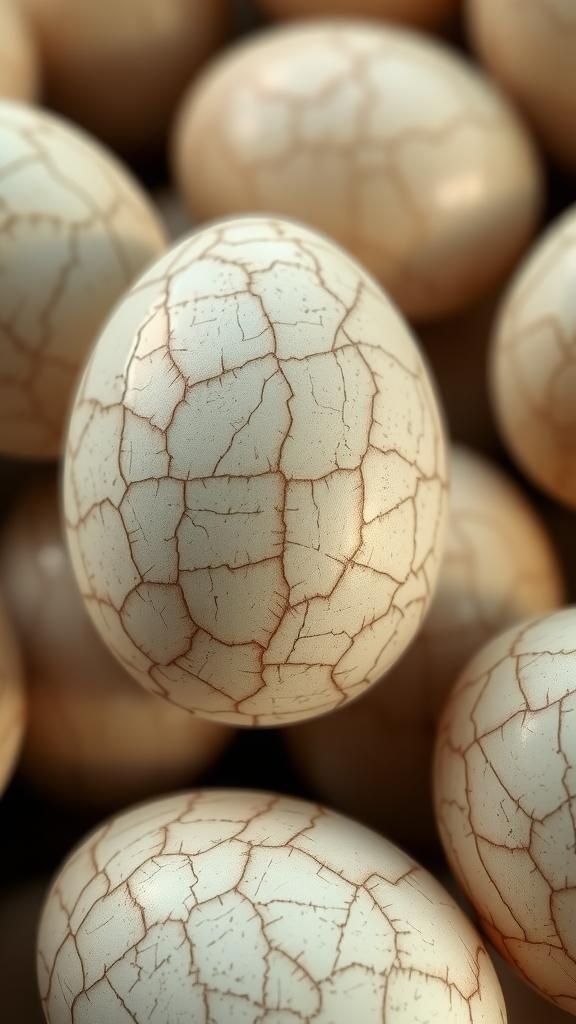
Crackle-dyed eggs evoke the comfort of an old teacup. Fine webbed cracks through a glaze-like finish create a sense of age and texture that feels very tactile.
The tiny cracks catch light and shadow, revealing hints of the underlying hue in a gentle mosaic. I often tuck these among plain, smoother eggs to let the crackle become a quiet focal point.
The surface reads like history condensed into a single small shape, wonderfully imperfect and evocative.
Steps
- Apply a base coat of paint and let it dry fully for a sturdy underlying color.
- Brush on a crackle medium following product directions, then apply a top coat of contrasting color while the medium is tacky.
- Allow the crackle effect to develop as the top coat dries and fractures to reveal the base color.
- Seal lightly with a satin varnish to protect the fragile surface without hiding the cracks.
Ribbon-wrapped eggs with soft fabric accents

Ribbon-wrapped eggs feel gentle and deliberate. Satin, grosgrain, or organza strips add bands of color and soft sheen that catch the eye.
The fabric’s texture contrasts pleasantly with the shell, and tiny bows or knots introduce a domestic, gift-like quality. I imagine a row of these tied to napkins at a spring brunch; they bring a handcrafted sensibility that feels thoughtful without being fussy, and the tactile ribbons invite a small moment of appreciation.
Steps
- Cut ribbons to lengths that will encircle the egg comfortably, leaving extra for a small knot or bow.
- Wrap ribbons around the egg in single or multiple bands and secure ends with a small dab of adhesive.
- Create tiny bows or knots and position them decoratively.
- Trim any excess ribbon neatly and arrange the eggs on a soft cloth to showcase the fabric accents.
Yarn-wrapped eggs for cozy textured ornaments

Yarn-wrapped eggs look like miniature winter mittens for springtime. Layers of soft fibers add warmth and a comforting texture that feels nearly tactile through the eyes alone.
Stripes, tiny pom-poms, or tassels create a homespun aesthetic that pairs nicely with wooden or ceramic displays. I appreciate the slower, rhythmic quality of wrapping yarn around a curved object; the final cluster reads as cozy and approachable, as if they came from a crafting afternoon with a friend.
Steps
- Start by securing the end of a yarn strand to the egg with a small dab of adhesive.
- Wind yarn tightly around the egg, changing colors or thicknesses as desired to create stripes or patterns.
- Secure the final end with another small adhesive spot and tuck any loose fibers neatly.
- Add tiny pom-poms or tassels if desired and display in a soft basket.
Silhouette of pressed herbs for earthy tones

Herb silhouettes feel like tiny foraged maps. Oregano, thyme, and rosemary leaves press flat and leave delicate shadows against a pale shell, suggesting the scent of a kitchen garden even when it’s faint.
The green-brown tones read subtle and organic, and the arrangement of leaves along the curve creates a calm, botanical rhythm. I enjoy grouping them with other natural materials like twine and kraft paper; the whole display has a humble, grounded presence that feels quietly nurturing.
Steps
- Press small herb sprigs until fully dry and flattened between absorbent paper under weight.
- Position the dried herbs onto clean eggshells, pressing gently to lay them flat.
- Secure with a thin coat of clear matte medium and allow to dry.
- Arrange the finished eggs with natural twine and kraft elements for a cohesive display.