Disclosure: This post contains affiliate links, which means we may earn a commission if you purchase through our links at no extra cost to you.
Halloween Nail Art Ideas are everywhere this season, popping up on boards, party invites, and cozy weekend plans. Halloween Nail Art Ideas mix spooky motifs with wearable polish tricks, giving playful looks for trick-or-treat nights, themed parties, or low-effort everyday flair.
These Halloween Nail Art Ideas lean into moody jewel tones, pumpkin-orange pops, and glow-in-the-dark finishes to set a spooky, fun mood.
They suit busy parents, students hunting a festive look, hosts styling a party, or anyone on a budget who wants a quick seasonal refresh.
Classic Pumpkin Patch Accent Nails For Fall Parties

Bring harvest charm to your fingertips with pumpkin patch accent nails that balance bright orange pumpkins against creamy neutrals and deep forest greens. Use glossy and matte finishes for contrast, add tiny gold leaf seeds for shimmer, and try a wooden tray or burlap texture in photos for harvest vibes. This look works for casual trick-or-treat nights, cozy autumn gatherings, or family-friendly events. Tools include a thin brush, dotting tools, and a steady hand for pumpkin faces. The overall palette is orange, cream, olive, and warm gold for a cozy, rustic feel.
Quick Tips
- Start with a durable base coat to prevent staining.
- Use a dotting tool to make round pumpkins fast.
- Seal with matte or glossy topcoat depending on vibe.
Spooky Ghost Tips With Soft Pastel Palette
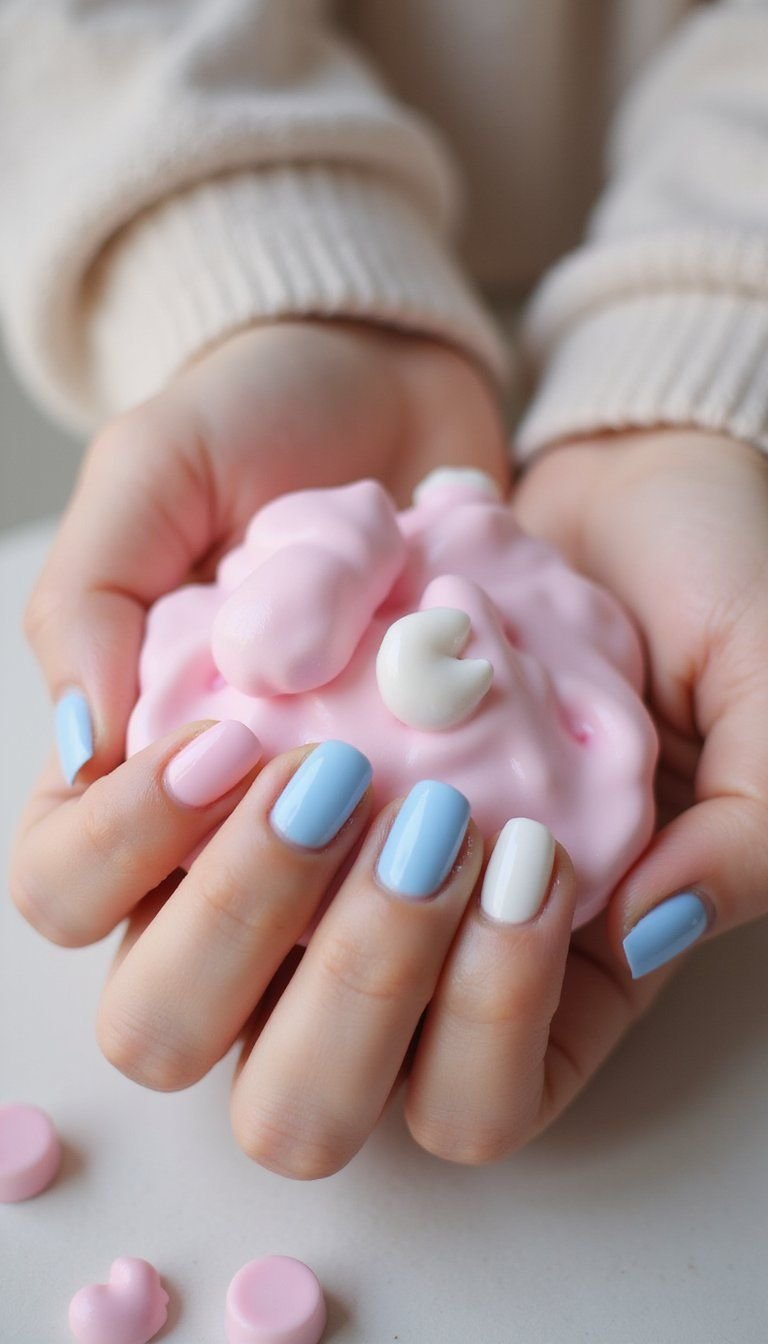
Ghost tips give a playful twist to Halloween with milky whites, baby blues, and blush pinks for a pastel spooky look. Keep shapes simple—curved ghosts, tiny eyes, and smiling mouths—then finish with a glossy topcoat for a candy-shop sheen. This idea suits students, pastel lovers, and anyone wanting less scary and more sweet. Materials include sheer base polish, white nail paint, a micro brush for faces, and optional tiny rhinestones for stars. The vibe is whimsical and light, perfect for daytime events and cozy gatherings where cuteness beats fright.
Quick Tips
- Use sheer base layers to let pastel tones glow.
- Paint ghost faces with a toothpick for tiny details.
- Keep one accent nail per hand for balance.
Black Cat Silhouette Accent Nails For Cute Vibes
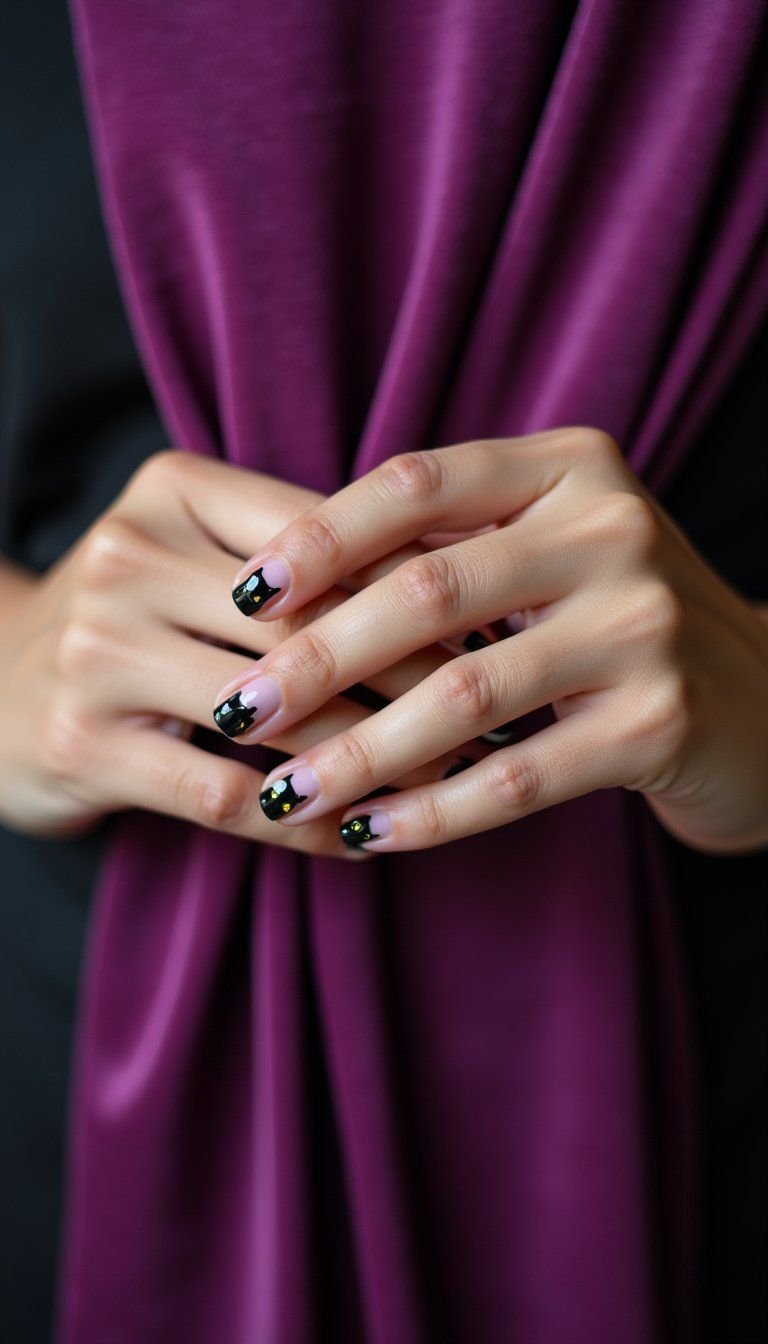
Black cat silhouettes are an iconic Halloween motif that translate beautifully to nails. Combine coal-black silhouettes with moonlit pale yellows and deep purples to create a nighttime scene across tips and accent nails. Use thin brushes to draw tails, ears, and piercing yellow eyes, adding tiny matte and glossy contrasts for texture. This style fits hosts setting a polished party look and anyone who loves subtle spooky elegance. Materials include black gel polish for crisp lines, a pale yellow for moon accents, and a steady topcoat for longevity and shine.
Quick Tips
- Practice cat shapes on a nail wheel first.
- Use a striping brush for clean silhouettes.
- Add a glossy topcoat over matte backgrounds to make cats pop.
Dripping Blood Ombre For Vampire Party Nights

Dripping blood ombre balances sultry reds and deep burgundies with black tips to achieve a dramatic vampire-ready manicure. Start with a gradient base that blends ruby into onyx, then paint soft drip shapes near the cuticle or tip in glossy scarlet for wet-look gore. Pair with chrome studs or a tiny fang decal for extra drama. This look suits evening parties, cosplays, and anyone craving theatrical flair. Use gel polish for saturated color, a small round brush for drips, and a high-shine topcoat to mimic fresh droplets under candlelight.
Quick Tips
- Build the ombre with a sponge for seamless blends.
- Paint drips last with a fine brush and glossy red.
- Cure gel layers between steps for crisp edges.
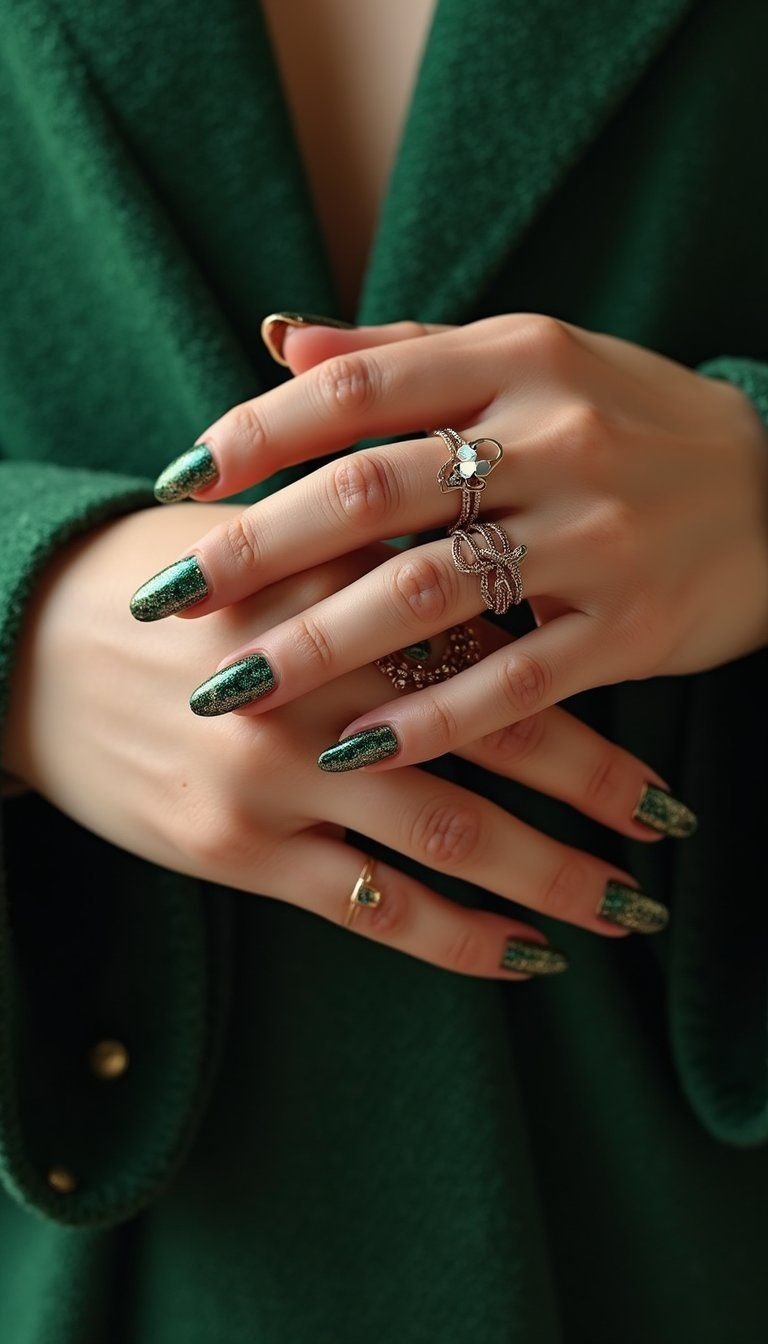
Witchy Green Marble Nails With Gold Foil
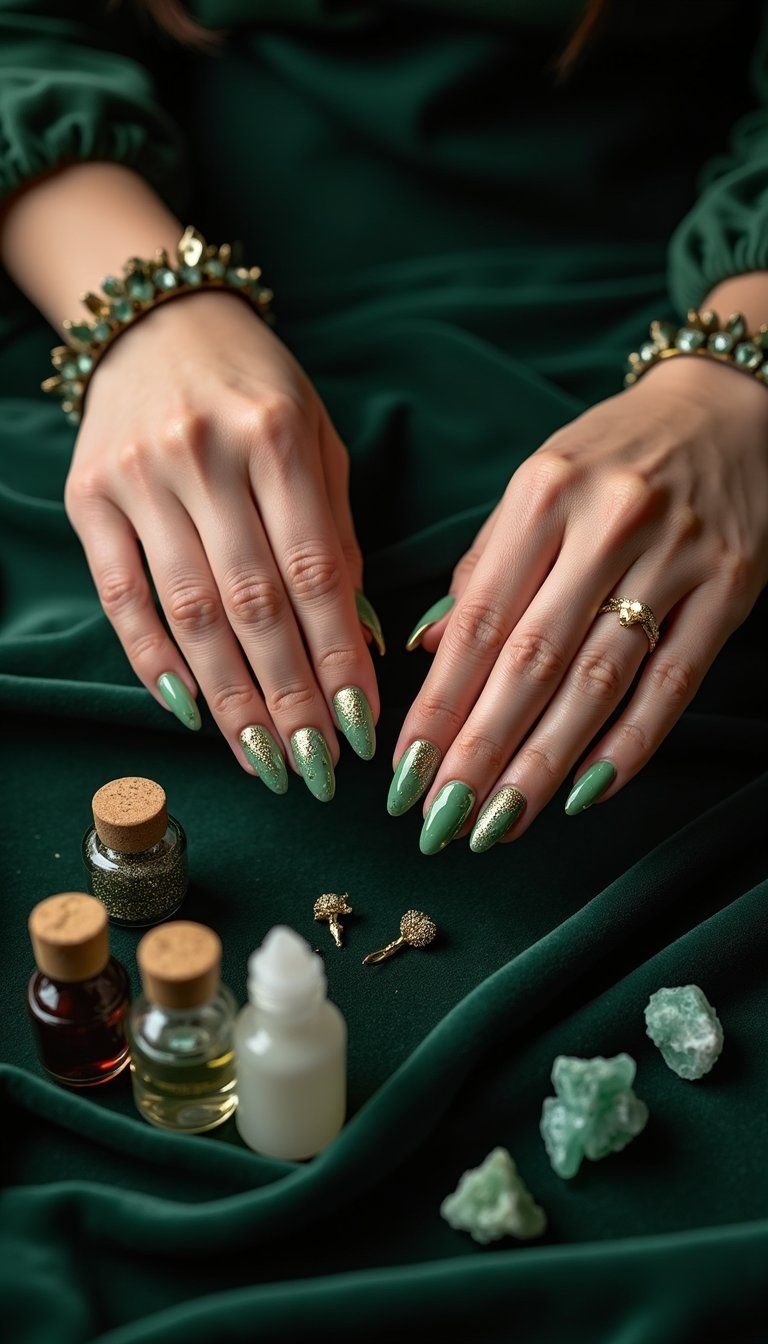
Witchy marble nails combine deep forest greens, teal, and black swirls with irregular gold foil for a mystical, potion-like finish. The marbling effect adds depth, while gold foil or flakes read like tiny magic flecks. Ideal for themed parties, autumn nights, or a moody everyday look, this set reads both chic and mystical. Materials include a marbling brush, translucent glazes, and thin sheets of gold foil. The palette is emerald, teal, onyx, and warm gold—perfect alongside layered rings and velvet accents in photos.
Quick Tips
- Create marble by dragging colors together with a thin brush.
- Apply foil to tacky polish for best adhesion.
- Finish with a gel topcoat to lock the texture in place.
Spiderweb Negative Space Nails With Silver Glitter

Negative space spiderweb nails feel modern and spooky, using the nail bed as part of the design. Paint slender black web lines over clear or sheer bases, then add silver glitter at junctions for a dew-kissed effect. This look is lightweight, chic, and great for hosts who want a subtle nod to the season without full coverage. Tools include a fine nail art brush, sheer nude base, and chunky or fine glitter for highlights. Colors stick to black, clear, and metallic silver to keep the focus on geometry and shine.
Quick Tips
- Use striping tape for straight web guides if needed.
- Seal glitter with a smooth topcoat to avoid rough texture.
- Keep most nails negative space to maintain balance.
Coffin Matte Black Nails With Glossy Accents

Coffin-shaped matte black nails are a go-to goth staple that ooze attitude. Add glossy accents—stripes, tiny moons, or gloss-tipped edges—to create contrast and dimension. This set works for nights out, elegant creepy-chic events, or anyone leaning into darker fashion. Materials include matte topcoat, glossy polish for accents, and optional metallic studs for drama. The palette centers on deep black with hints of silver or burgundy, perfect with leather jackets and smoky eye makeup in images. The overall vibe is sleek, mysterious, and polished.
Quick Tips
- File to a coffin silhouette before applying polish for symmetry.
- Apply matte topcoat last and add glossy details afterward.
- Use tiny studs sparingly for an upscale look.
Skull And Roses Romantic Gothic Nail Set

Skull and roses nails fuse macabre with romance by pairing monochrome skull sketches with deep red rose accents. Use fine liner brushes to render tiny skulls on one or two accent nails, and paint rich cranberry roses on others for contrast. This aesthetic suits date nights, themed galas, or anyone who likes a dramatic floral edge. Supplies include black and white polish for line work, a deep red for flowers, and a glossy finish to make colors pop. The palette is black, white, and blood-red, creating a moody, romantic tableau.
Quick Tips
- Sketch skulls lightly before filling in with polish.
- Layer reds for depth in rose petals.
- Protect fine lines with a thin topcoat layer.
Glow-In-The-Dark Monster Nails For Night Trickery
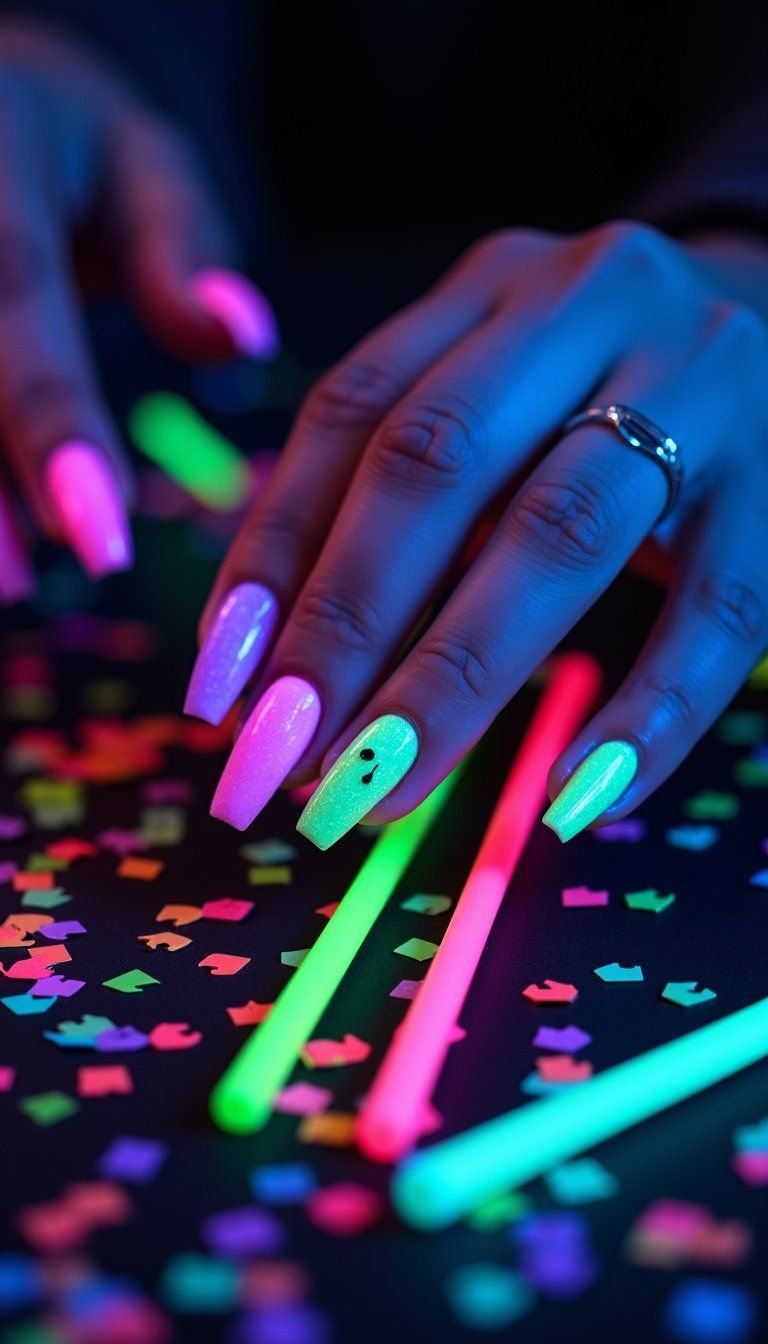
Glow-in-the-dark monster nails are playful and perfect for nighttime fun. Combine neon greens, purples, and electric blues with glow pigments to create eyes, fangs, or silly monster faces that pop when lights go down. This look is ideal for parties, late-night events, or family-friendly Halloween outings. Materials include glow-in-the-dark polish, neon bases, and a topcoat that won’t dim the glow. The vibe is energetic and cheeky, with a palette designed to look vivid under regular light and electric in the dark for maximum playful surprise.
Quick Tips
- Charge glow pigments under bright light before heading out.
- Use bold outlines for monster features so they read in dim settings.
- Layer glow polish over neon bases for brighter nighttime effect.
Candy Corn French Tips With Tiny Confetti

Candy corn French tips mix seasonal sweetness with classic manicure lines: white, orange, and buttery yellow in triangular French shapes. Add tiny confetti or microglitter between color blocks for a fun, sugary sparkle. This set suits casual celebrations, classroom parties, and those who want a festive but simple vibe. Tools include thin striping brushes, a micro sponge for blending, and small confetti pieces sealed under a glossy topcoat. The palette is warm white, bright orange, and pale yellow to echo the candy’s cheerful tones.
Quick Tips
- Use nail guides to get sharp triangular French points.
- Apply confetti while polish is tacky for best adhesion.
- Topcoat twice to flatten confetti and extend wear.
Haunted House Silhouette Nails On Moonlit Gradient

Create tiny spooky landscapes with haunted house silhouettes set against a moonlit gradient—think inky navy fading to twilight purple with a pale moon highlight. Paint tiny windows, crooked roofs, and spindly trees in black for storybook drama. This idea suits hosts styling a haunted table, costume wearers, or anyone who loves miniature scenes. Materials include a sponge for gradients, a thin liner for silhouettes, and a dotting tool for moon craters. The palette leans navy, lavender, and pale ivory to capture a cinematic midnight vibe.
Quick Tips
- Build the gradient first, then add silhouette details.
- Use a matte topcoat for a cinematic night-sky feel.
- Keep silhouettes small to fit the nail length without crowding.
Frankenstein Patchwork Nails With Stitched Details
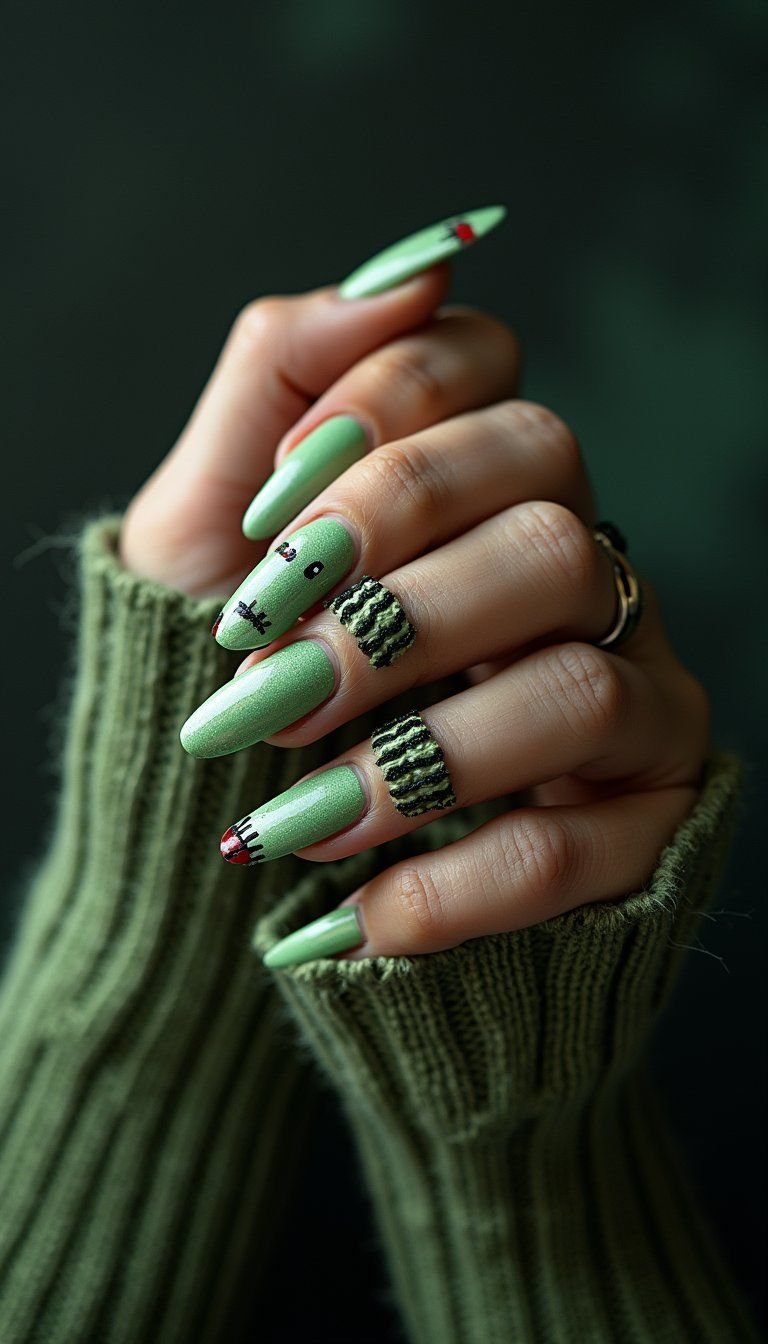
Frankenstein patchwork nails play with stitched panels in muted greens, electric teal, and stitched black lines. Use blocky color patches, stitch-like linework, and tiny bolt decals to channel classic monster vibes. This look suits themed costumes, playful nights, and anyone who likes whimsical accents that still feel polished. Tools include a striping brush for stitch marks, square-shaped nail forms for patchwork balance, and matte or satin topcoats for a stitched fabric mood. The palette centers on moss green, chartreuse accents, and deep charcoal for contrast.
Quick Tips
- Plan patch placement with light pencil marks before painting.
- Draw stitch lines with a thin striping brush for precision.
- Use a satin topcoat to mimic fabric texture.
Mummy Wrap Minimalist Nails With Bandage Texture
Mummy wrap nails use thin ivory bands layered over a neutral base to evoke gauze and age. Add tiny peekaboo eyes on one accent nail or subtle gray shading for depth. This minimalist approach works for low-key Halloween plans, office-friendly looks, and busy people who want a festive nod without over the top detail. Supplies include sheer nude polish, a flat brush to paint bands, and a matte topcoat to sell the wrapped texture. Keep colors in soft creams, warm taupes, and charcoal for shadowing.
Quick Tips
- Paint bands in varying widths for a natural wrapped look.
- Add tiny black dots for eyes on a single nail for whimsy.
- Seal with matte topcoat to enhance gauze feel.
Bat Wing French Nails With Smoky Gradient Finish
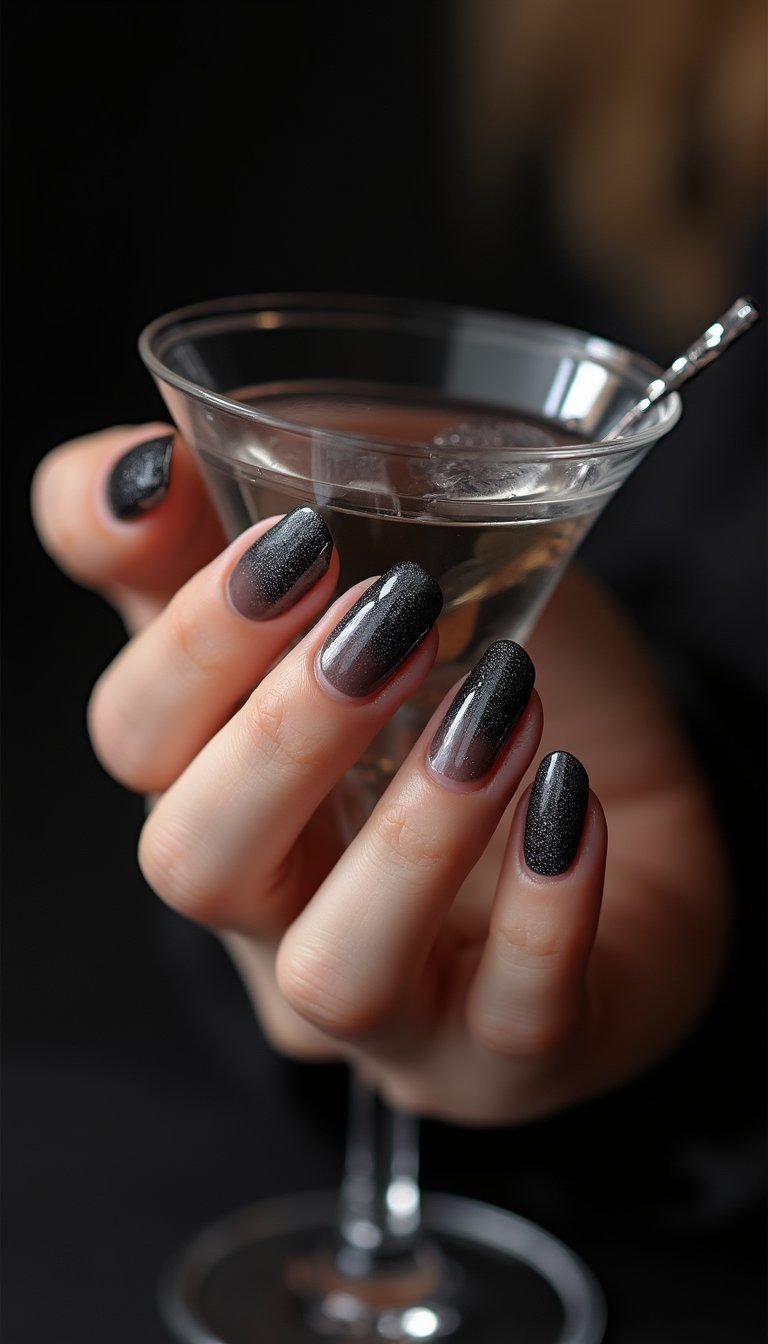
Bat wing French nails twist the classic tip into pointy winged shapes, finished with a smoky gradient from charcoal to slate. Add tiny bat silhouettes or silver studs near the cuticle for a night-flying accent. This design suits evenings out, themed cocktail parties, and anyone who likes a bold, fashion-forward twist on French tips. Tools include a fine brush for wing edges, a sponge for the smoky gradient, and a glossy topcoat to highlight silhouette details. Stick to monochrome shades with hints of pewter for metallic shimmer.
Quick Tips
- Use guides to form crisp bat-wing tips.
- Blend gradients carefully with a soft sponge.
- Add metallic studs sparingly to keep focus on wing shapes.
Vintage Plaid And Leather-Inspired Fall Nails
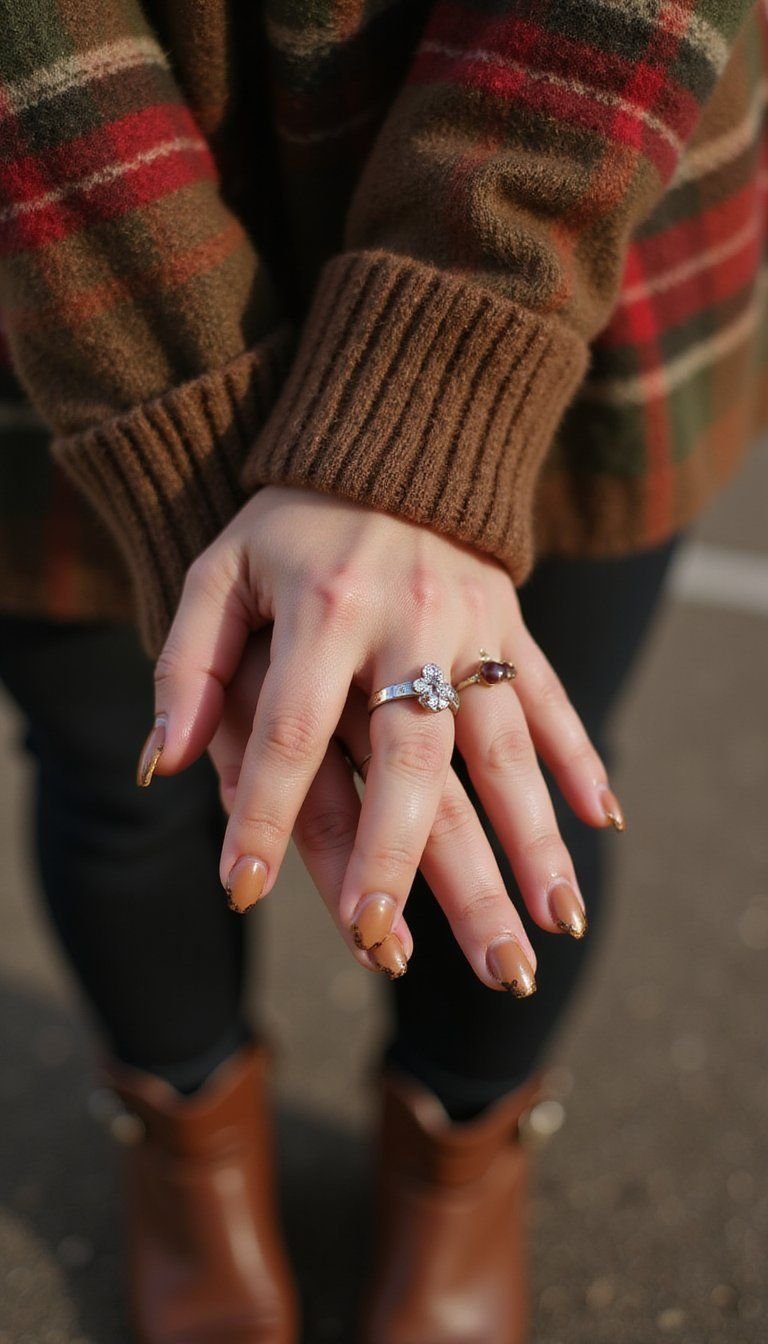
Vintage plaid nails pair autumnal tartan patterns with leather-inspired matte accents for a cozy, heritage look. Use rusty oranges, deep olives, and warm browns arranged in tiny plaid checks on accent nails while keeping the rest matte leather brown. This design fits harvest parties, family photos, or anyone who loves a classic fall wardrobe translated into nail art. Supplies include striping brushes for plaid, matte topcoat for leather texture, and tiny metallic studs to mimic hardware. The overall palette leans autumnal and warm, perfect with knit scarves and boots.
Quick Tips
- Layer thin lines for plaid rather than one thick stroke.
- Use a matte topcoat for realistic leather texture.
- Add a single metallic stud for subtle hardware detail.
Cobweb Accent Nail With Pearl Drop Centerpiece

A cobweb accent with a pearl drop brings elegant spook to any manicure. Paint a delicate web in white or silver on a deep navy or black base, then attach a tiny pearl or bead where the strands meet for a luxe finish. This look suits grown-up gatherings, evening events, and anyone seeking refined spooky details. Tools include a fine liner brush, small adhesive beads, and a gel topcoat to secure embellishments. Colors stick to onyx, silver, and ivory for a chic interplay of shine and shadow.
Quick Tips
- Place pearls on a small dab of gel and cure to secure.
- Keep the web fine for an elegant look.
- Use silver metallic polish for slender shimmering strands.
Holographic Midnight Sky Nails With Star Flakes
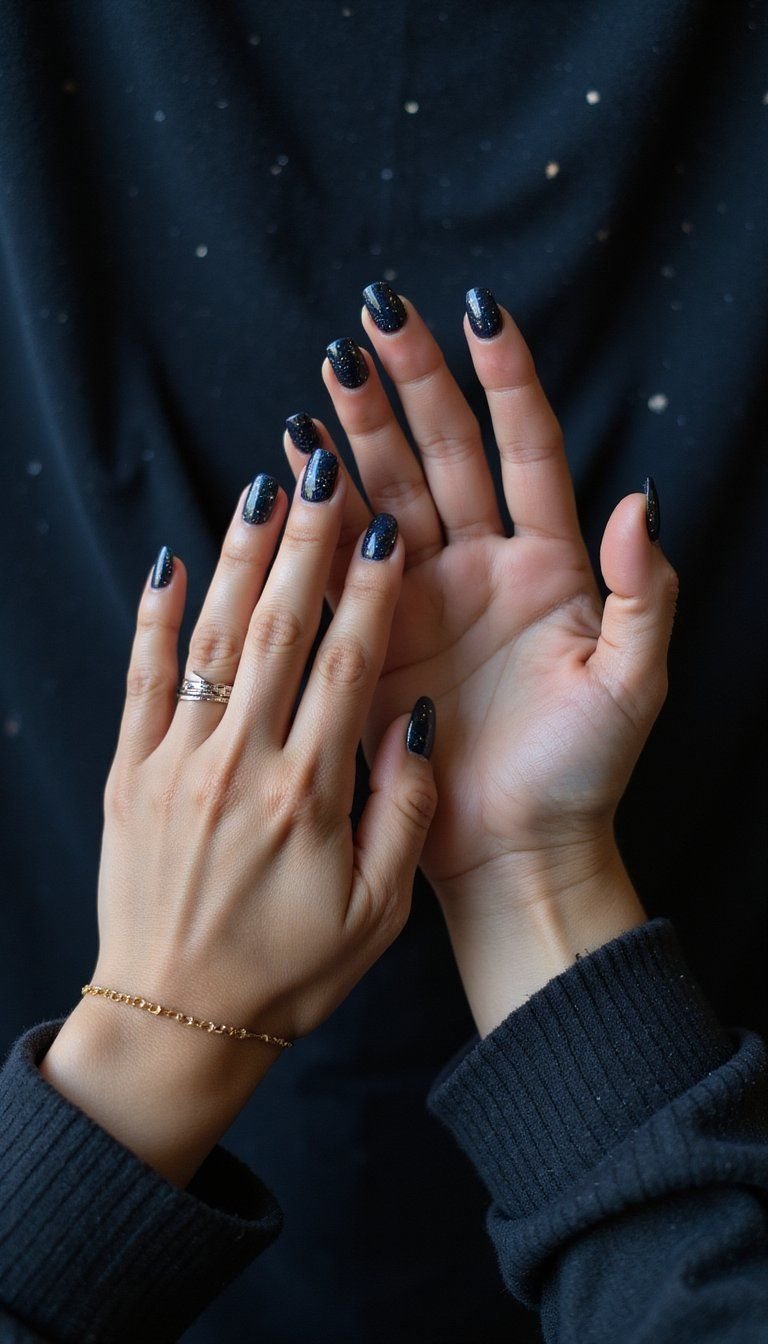
Holographic midnight sky nails capture celestial Halloween energy with deep navy bases and rainbow-shifting holographic foil or polish. Scatter tiny star flakes and microglitter like constellations across tips for a cosmic effect. This set works for glam parties, late nights, and anyone who loves a bit of sparkle with their spooky. Materials include holographic powder or polish, star-shaped glitter, and a glossy topcoat to intensify the shimmer. The palette features midnight blue, silver holographic, and flecks of iridescent color for a dreamy, otherworldly feel.
Quick Tips
- Buff a tacky layer for holographic powder to adhere.
- Place star flakes before the final topcoat to lock them in.
- Layer holographic polish over dark bases for depth.
Sinister Snake Scale Nails With Metallic Shades
Snake scale nails bring a reptilian edge using metallic greens, bronze, and scale stencils for texture. Create layered scale patterns with a stamping plate or hand-painted arcs, then finish with iridescent topcoat to mimic shifting skin. This look suits costume nights, edgy photoshoots, and anyone drawn to high-drama finishes. Supplies include metallic polishes, a scale stencil or stamp, and optional chrome powder for extra glow. Palette-wise, think emerald, oil-sheen bronze, and black accents for contrast and depth that catch light dramatically.
Quick Tips
- Use a scale stencil for uniform patterns across nails.
- Apply chrome powder lightly for a subtle iridescent shimmer.
- Seal with a strong topcoat to protect raised texture.
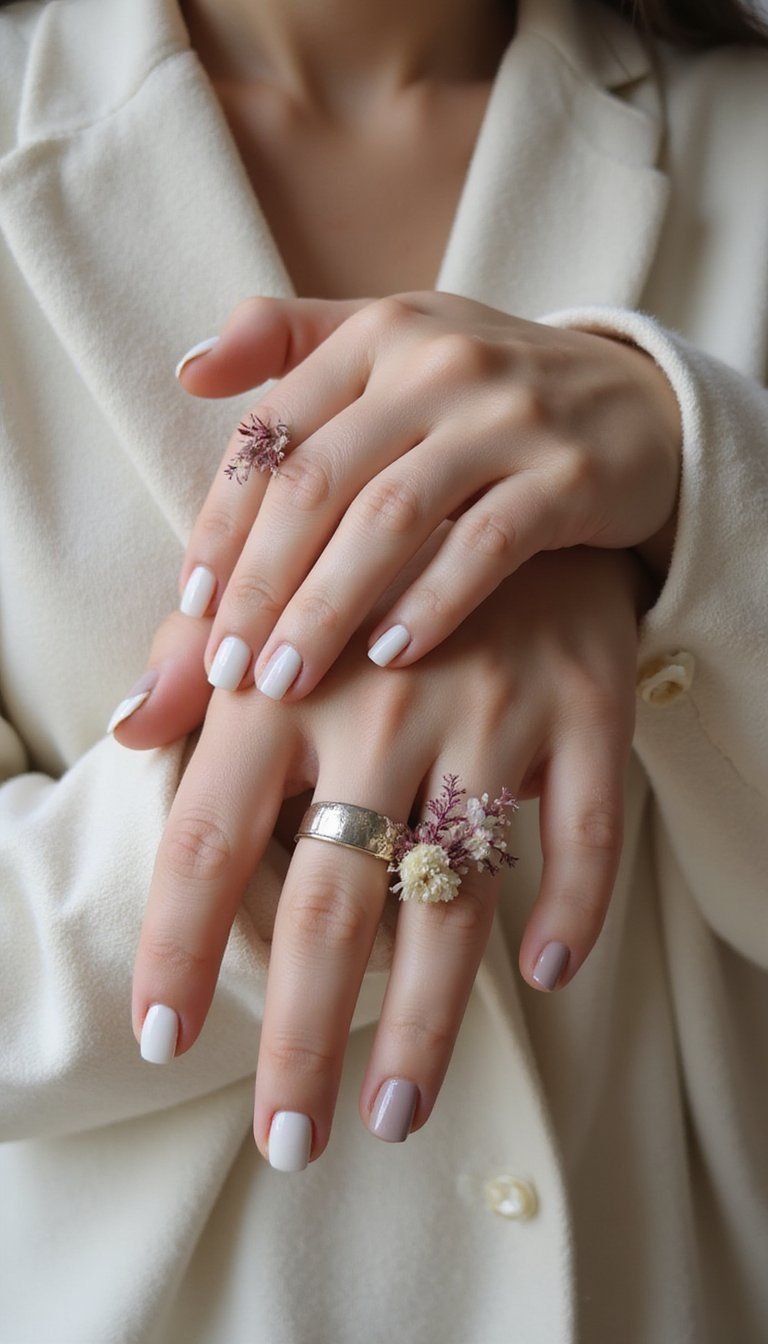
Harvest Floral Nails With Tiny Pumpkin Accents

Harvest floral nails blend miniature floral bouquets with tiny pumpkin accents for a warm autumn feel. Paint daisies, mums, and little orange pumpkins over a creamy beige base for a seasonal garden vibe. This idea is perfect for daytime events, family gatherings, and those who prefer gentle, nature-inspired seasonal looks. Tools include thin liner brushes for petals, dotting tools for pumpkin dots, and a satin topcoat to soften shine. The color story includes cream, mustard, sage, and pumpkin orange, evoking a sunlit late-autumn garden.
Quick Tips
- Paint flowers in layers for dimension and realism.
- Keep pumpkins small as accent details, not the focal point.
- Use a satin topcoat to keep colors soft and warm.
Gothic Lace Stencil Nails In Rich Jewel Tones
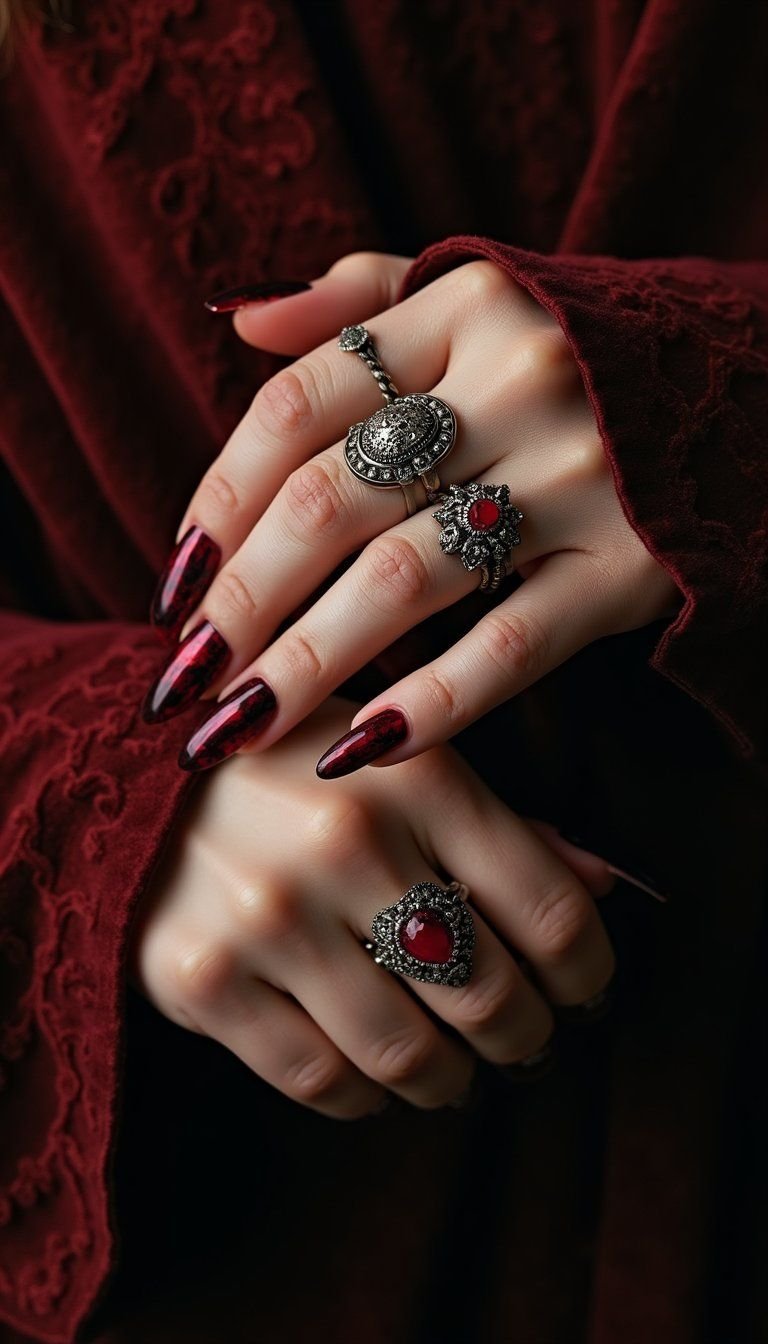
Gothic lace nails use delicate stencils over jewel-toned bases—think ruby, sapphire, and amethyst—for an ornate, vintage look. Apply black or deep charcoal lace patterns to one or two accent nails for high-contrast drama. This manicure suits themed dinners, elegant gatherings, or anyone who loves ornate details with a luxe palette. Materials include lace stencils, jewel-toned polishes, and a thin topcoat to preserve intricate work. The vibe is refined and moody, pairing beautifully with velvet dresses and antique rings in imagery.
Quick Tips
- Press stencils firmly to avoid smudging under paint.
- Use a thin brush to clean up edges for crisp lace.
- Pair with matte or glossy topcoat depending on desired depth.
Kid-Friendly Halloween Stickers And Washable Polish Look
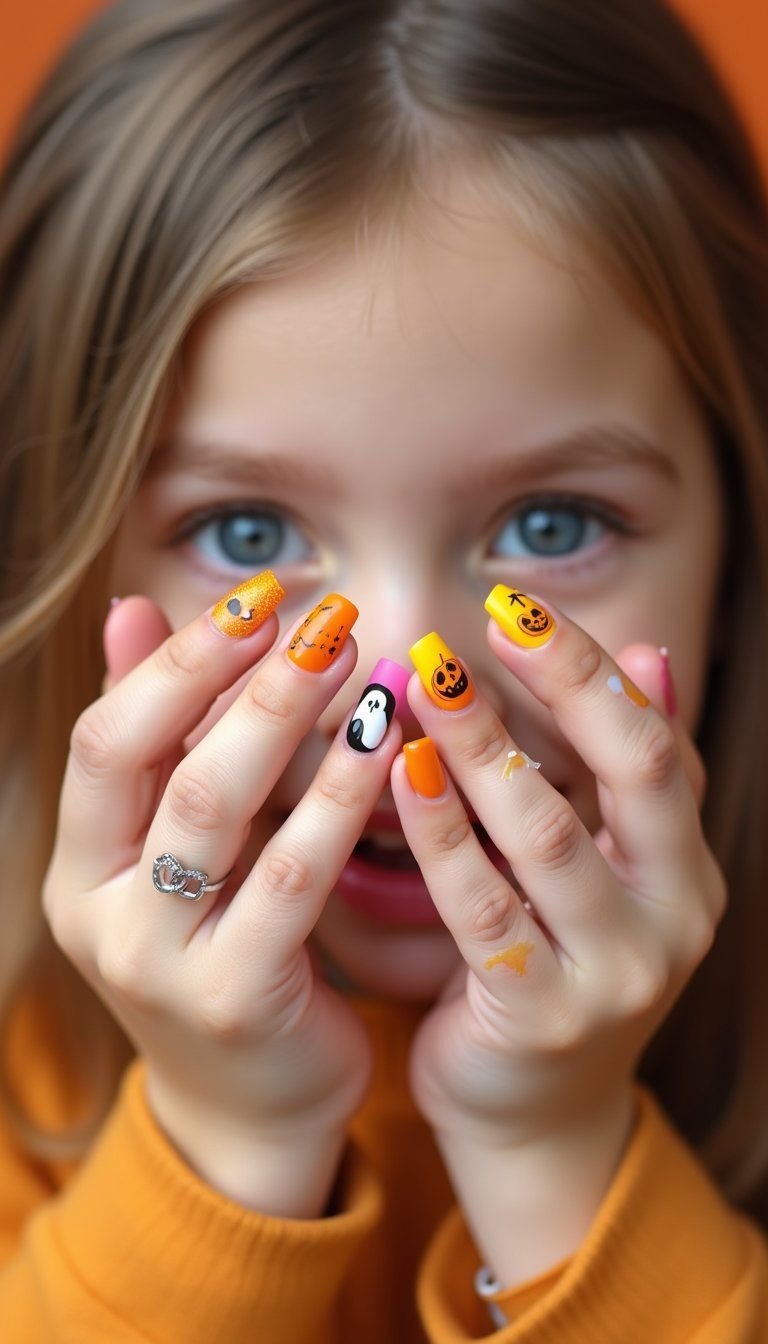
Kid-friendly Halloween sticker nails use washable polish and cute decals—ghosts, pumpkins, and bats—for a quick, no-mess option for little hands. Choose non-toxic water-based or peel-off polishes and apply fun stickers on short, rounded nails for comfortable wear. This idea is perfect for classroom parties, family-friendly activities, and busy parents looking for fuss-free festive flair. The color palette can be bright and cheerful: pumpkin orange, sunshine yellow, candy pink, and sky blue. Keep workstations covered and use sticker seals to extend wear during play.
Quick Tips
- Use peel-off base coats for easy removal after festivities.
- Let kids place stickers to personalize each nail.
- Top lightly with a clear, washable sealer to hold stickers in place.