Disclosure: This post contains affiliate links, which means we may earn a commission if you purchase through our links at no extra cost to you.
I kept a bag of leftover fabric scraps for years, convinced I would stitch everything into neat projects. Somewhere between busy afternoons and lazy weekends I learned that a lot of charm comes from letting those scraps live without a sewing machine.
No Sew Fabric Scrap Crafts became my happy habit, a way to turn odd shapes and mismatched prints into cozy objects and small gifts.
There is a particular pleasure in working with frayed edges, soft cottons and denim that already feels worn in. These no sew fabric scrap crafts brought texture and color into corners of my home where nothing else would have fit, and they made quiet afternoons feel pleasantly creative.
Braided rag rug that warms small corners

I still remember stepping onto one of these braided rag rugs for the first time and liking how the uneven textures told a story. Strips of cotton and denim weave together into a dense, slightly bumpy surface that welcomes bare feet.
The colors mingle in a casual, accidental way, and the frayed edges give each braid a lived-in softness. Holding a length of the finished rug feels pleasantly weighty, and the scent of older fabric brings a familiar, comforting note.
It brightens a hallway without demanding attention.
Steps
- Cut fabric scraps into long strips about two inches wide.
- Gather three strips and begin a simple braid, adding new strips as the braid grows.
- Coil the braid into a spiral and secure each coil edge with hot glue.
- Continue coiling and gluing until the rug reaches the desired size.
- Tuck and glue the final braid end beneath the rug for a neat finish.
Tied fringe blanket perfect for chilly evenings

A tied fringe blanket always feels like an invitation to curl up. Layers of soft fleece and printed cotton meet at a border where knotted fringes create a playful edge.
The fringe is loose and bouncy, making the blanket feel handcrafted and casual. Running fingers along the knots reveals tiny threads and little variations that made me smile; each tie hints at the hands that brought it together.
The weight of the finished blanket feels comforting, and the mix of prints turns it into a patchwork of small memories rather than a rigid pattern.
Steps
- Lay two matching fabric panels with right sides facing out and align the edges.
- Cut slits around the perimeter to create fringe strips about two inches long.
- Tie corresponding fringe strips from both panels together with snug knots.
- Repeat the tying around the entire border until the blanket is closed.
- Fluff the fringe and smooth the blanket for a cozy finish.
Fabric scrap garland for an instant mood lift

Strung across a mantle or hung over a window, a fabric scrap garland has a playful energy that makes a room feel ready for company. Small strips of different prints flutter slightly in drafts, catching light in a way that feels lively without being loud.
The combination of cottons and silks creates a variety of weights that move differently, and I like watching the lighter pieces dance while heavier bits hang steady. The overall look reads handcrafted and joyful, like a tiny celebration that stays up long after the moment has passed.
Steps
- Cut fabric into uniform strips about one inch wide and six inches long.
- Take a length of twine and tie a simple knot around each strip, spacing them evenly.
- Alternate colors and textures along the twine for visual variety.
- Continue until the garland reaches the desired length.
- Hang the garland with small hooks or tape in the chosen spot.
No-sew wreath with rustic tied ribbons

This wreath became my favorite quick craft for unexpected guests. A simple circular base covered in tied fabric ribbons grows fluffy and layered, each knot adding to the volume.
Different materials add subtle contrasts, with linen offering a matte calm and floral cottons lending cheer. When held up against the door the wreath seems to gather light and color, and the edges give a slightly wild, garden-harvest feel.
It feels informal in the best way, like a seasonal snapshot rather than a polished decoration.
Steps
- Start with a foam or wire wreath base and cut fabric into strips.
- Tie strips around the base in tight knots, alternating colors and textures.
- Layer strips densely to create a full, even shape around the ring.
- Trim any excessively long tails to refine the silhouette.
- Adjust knots for balance and hang on a door or wall.
Coiled fabric bowl that holds small treasures

A coiled fabric bowl feels like a miniature landscape of folds and color. Each wrapped coil sits snug against the next, creating gentle ridges that invite there to be small items inside.
The interior is pleasantly soft, so keys and jewelry rest without clinking against hard surfaces. I liked running my hand along the rim to feel the layered textures and to notice tiny pattern repeats.
Set on an entry table it becomes useful and decorative, catching the odds and ends that accumulate at the end of a day.
Steps
- Wrap long fabric strips tightly around a rope or cord, preventing gaps.
- Coil the wrapped cord into a circular base and secure with hot glue at intervals.
- Continue coiling upward, shaping the walls of the bowl as desired.
- Glue the outer edge neatly to finish the rim.
- Allow any glue to set before placing items inside.
Braided fabric coasters for everyday cups

These braided coasters have a lived-in, comforting look that feels right next to a mug. The braided rings are slightly irregular, which gives each coaster character and makes them feel handmade in a pleasant way.
The fabric textures vary, with smooth cottons sitting beside thicker canvas, creating a pleasing tactile contrast when a cup rests on top. The edges are forgiving, so warm mugs don’t feel precarious.
Over time small tea stains add to the personality, turning each coaster into a tiny journal of quiet mornings.
Steps
- Cut fabric into long thin strips and tie several together to create length.
- Braid three long strips tightly and flatten the braid by hand.
- Coil the braid into a small circle and secure with fabric glue along the underside.
- Trim any stray threads for a neat edge.
- Repeat for a set of coasters in matching or contrasting colors.
Playful tassel keychains from tiny offcuts

Making tassel keychains felt like turning tiny leftovers into something portable and bright. Each tassel swings with a small, satisfying weight and makes it easier to find a set of keys in the bottom of a bag.
The bunches of threads whisper against one another and catch light differently depending on fiber and color. I liked customizing lengths and combining prints for a lively contrast.
They feel cheerful clipped to a backpack or handbag, and giving one away always brought a smile because it seemed both small and personal.
Steps
- Gather thin fabric strips and fold them into a tassel shape.
- Bind the top portion tightly with a short strip of fabric or twine.
- Trim the bottom to even out the fringe if desired.
- Attach a keyring loop by threading or securing the bound top.
- Optional: add beads or charms before final assembly.
Soft fabric flowers that never wilt
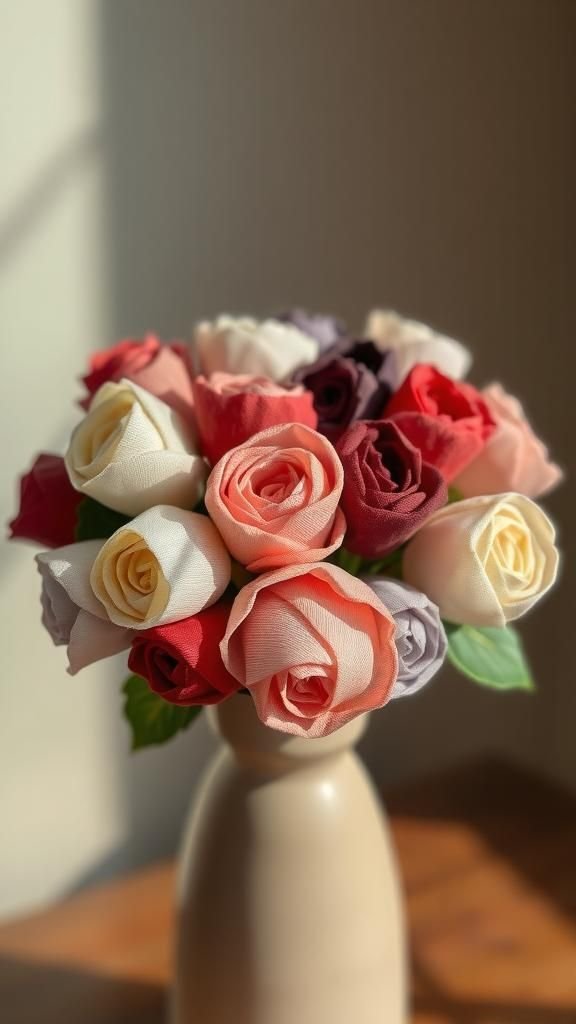
I have a small vase filled with fabric flowers that always makes visitors do a double take. Rolled and layered petals of cotton and chiffon create blooms with gentle curves and soft edges.
The stems are pliant but hold their shapes in a casual, relaxed way. There is no scent, but the visual comfort of a handmade bouquet is strong: patterns that would otherwise be buried in a scrap box become focal points.
Arranging them feels like arranging memories, and they stay vivid without needing water.
Steps
- Roll a long strip of fabric tightly at the center to form a bud.
- Continue wrapping, allowing the outer layers to flare for petal effect.
- Secure the base with a short wire or wrapped fabric strip.
- Attach a stem by winding wire or wrapping a longer strip around the base.
- Trim any excess fabric for a tidy silhouette.
Denim pocket organizer upcycled from jeans

Saving pockets from old jeans felt instantly useful, and arranging them on a board created a little wall of miniature storage. Each pocket has character: a faded curve, a sturdier top edge, rivet impressions.
Together they form a practical grid for mail, tools, or notes. The denim texture resists scuffs and takes on a relaxed, workshop-ready vibe.
Hanging the organizer by the top row makes it easy to glance for small items, and the whole piece brings a casual, repurposed energy to an entryway or craft corner.
Steps
- Collect pocket sections from old jeans and arrange them on a piece of plywood or fabric backing.
- Secure each pocket to the backing with heavy duty fabric glue or staples at the top edge.
- Space pockets evenly and work from top to bottom for balance.
- Add hanging hardware to the backing for wall mounting.
- Allow adhesive to dry thoroughly before filling the pockets.
Patchwork tote that never met a sewing needle

Carrying a patchwork tote made without any stitching felt oddly liberating. The surface is a collage of prints that refuse to match, and the seams are replaced by clever binding and adhesive that keeps the bag soft rather than stiff.
The handles sit comfortably on the shoulder, and the interior gives way as groceries settle in. The tactile variety across the exterior invites fingers to trace from one print to the next.
It has an improvised charm, like a thrifted favorite that turned up in a sunny market day.
Steps
- Plan the tote layout by arranging fabric scraps into the desired front panel pattern.
- Bond panels together with iron-on adhesive sheets between fabric layers.
- Attach a pre-made canvas tote shell or fabric base with strong fabric glue.
- Secure handles by gluing or stapling them to the interior seam allowance.
- Reinforce stress points with extra adhesive patches and allow to dry.
Scrunchie made from stretchy fabric scraps

A scrunchie crafted from elastic-friendly scraps feels gentle on hair and pleasantly nostalgic. The gathered fabric forms a ruffled ring that bounces and compresses, and the stretch of the inner elastic offers a forgiving hold.
Textures vary from silky slips to cottons that add a cozy matte look. Sliding one onto a wrist feels decorative as well as functional, and the little bulk of fabric is an easy mood booster.
Each scrunchie holds the colors of a memory of fabrics salvaged from other projects.
Steps
- Cut a fabric strip long enough to wrap around elastic comfortably with extra for gathering.
- Insert a length of elastic into the fabric tube and join elastic ends with a secure knot or stitch.
- Gather the fabric evenly around the elastic and close the fabric tube seam with fabric glue.
- Wrap a small scrap around the seam area and glue it in place for a neat finish.
- Allow glue to cure before wearing.
Braided headband with a gentle, lived-in feel

The braided headband has a softness that feels like a quiet nod to relaxed afternoons. Strands of printed and plain fabrics weave into a crown that sits lightly against hair, with edges that show fraying like a worn ribbon.
Wearing it feels comfortable for long stretches, and the braid flattens slightly over time into a subtle curve that fits the head. It brightens a simple outfit without demanding fuss, and making one felt like giving old scraps a cheerful second act.
Steps
- Cut three long equal-length fabric strips and knot them together at one end.
- Braid the strips firmly to the desired length for the headband.
- Trim the ends evenly and join them by overlapping and securing with fabric glue or a small stitch.
- Optional: cover the seam with a small wrapped scrap for a smooth finish.
- Adjust the braid to sit comfortably when worn.
Chunky bracelet braided from leftover strips
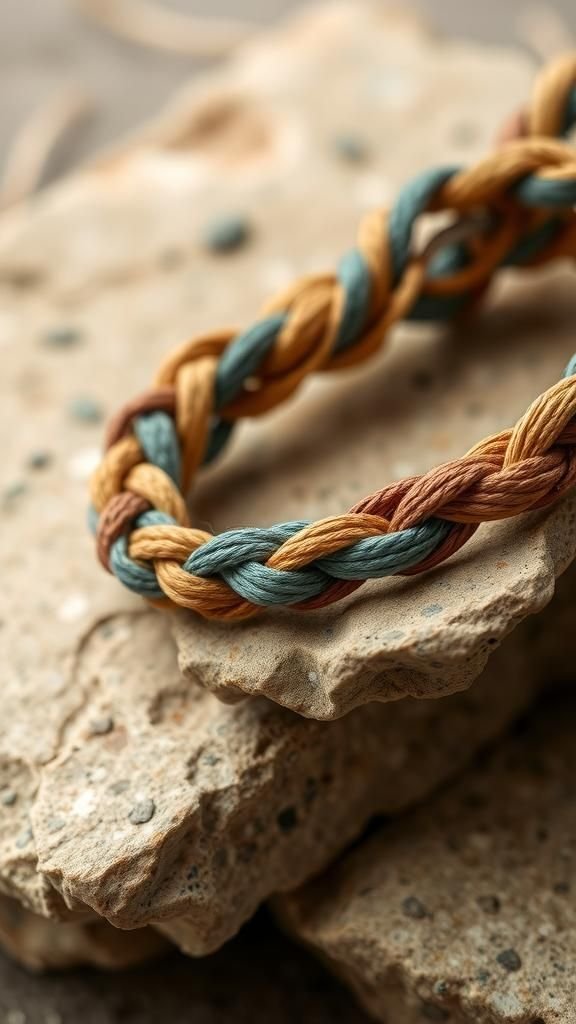
A chunky braided bracelet sits pleasantly on the wrist, a humble cuff made of intertwined scraps. The texture is tactile and slightly uneven, which makes each wristful feel like a small handmade talisman.
Tying the ends creates a casual closure that moves with the body, and the colors blend into a compact, wearable palette. The bracelet earned compliments more than once during walks, and slipping a couple on became an easy way to add personality to simple outfits without fuss or a jewelry box.
Steps
- Cut three or more fabric strips to wrist length plus extra for tying.
- Braid the strips tightly and flatten the braid by pressing with hands.
- Join the ends with a secure knot or wrap a small strip around and glue it down.
- Trim any excess fabric and tuck ends neatly beneath the wrap.
- Fit the bracelet to the wrist and adjust the knot for comfort.
Napkin rings with frayed charm and pattern play

Napkin rings made from tiny fabric loops added a small, personal touch to a casual table. The frayed edges and mismatched prints gave the setting a relaxed, friendly tone that welcomed lingering conversation.
Each ring felt light and easy to move, and pairing different colors across settings made the table feel curated rather than formal. The texture of the fabric against smooth ceramic plates created a pleasant contrast that I still think about when setting a quick dinner for friends.
Steps
- Cut fabric strips to comfortable ring length and width.
- Form a loop and overlap the ends slightly, securing with fabric glue or staple.
- Optionally wrap a small contrasting strip around the seam for decoration.
- Allow adhesive to dry fully before placing around napkins.
- Arrange sets on the table for a coordinated look.
Tassel garland that swings with every breeze

A tassel garland adds movement and a friendly rhythm to a room. The clustered fringes create a soft skyline of color that shifts whenever air moves through a window.
The texture is layered and cheerful, and the repetition of little shapes across the length of cord reads as a design element rather than clutter. It felt festive without ceremony when I hung one above a casual breakfast nook, and the gentle swaying made mornings feel lighter.
Strings of tassels are an easy way to introduce a season’s palette.
Steps
- Create several tassels by folding fabric strips and binding the tops tightly.
- Trim the bottoms for even length and fluff each tassel.
- Attach tassels to a length of twine by tying or threading their bound tops.
- Space tassels evenly and secure the ends of the twine for hanging.
- Adjust tassel positions after hanging for a balanced look.
Ribbon-wrapped vase with a cottage feel
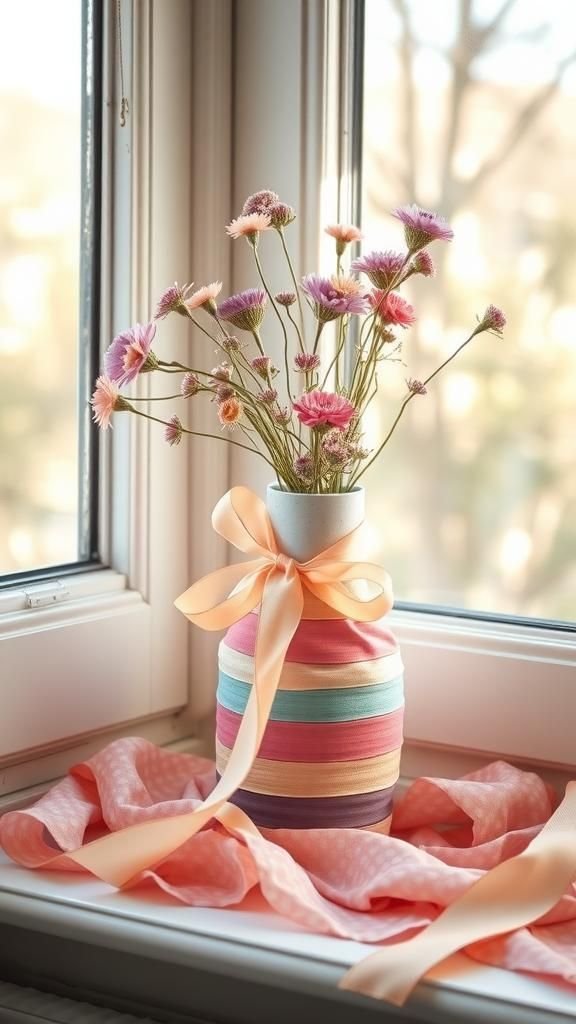
Wrapping a vase with narrow strips of fabric transformed a plain jar into a cottage-ready vessel. The layered ribbons created a soft banded surface that refracted light through small gaps, and the tactile result was surprisingly elegant for such a simple alteration.
The mixture of cottons gave a matte finish that paired well with fresh stems, and the color banding read like a tiny landscape. Resting on a windowsill the vase seemed to echo fabrics from around the room, tying elements together in an unforced way.
Steps
- Clean a glass jar and dry it completely.
- Wrap narrow fabric strips around the jar, overlapping slightly and adhering with fabric glue.
- Continue until the jar is fully covered and patterns align pleasingly.
- Secure the final end neatly and allow the glue to set.
- Place dried or fresh stems inside for a finished look.
Fabric-covered journal with textured spine

Covering a small journal in scrap fabric felt personal in a way that store covers rarely are. The cover gained a soft texture that invited fingers to open it, and the spine wrapped in a contrasting strip added a tactile anchor.
The fabric absorbed faint pencil smudges and fingerprints gracefully, each mark becoming part of the object. Carrying the journal in a bag it offered a small visible difference from others, and writing in it felt like adding another layer to a growing patchwork of small thoughts.
Steps
- Measure the journal cover and cut fabric with an allowance for wrapping edges.
- Apply a thin layer of strong adhesive to the journal cover and smooth the fabric over it.
- Fold and glue the excess fabric around the inside covers for a neat finish.
- Reinforce the spine with a narrow wrapped strip glued in place.
- Allow the adhesive to cure before writing in the journal.
Lampshade fringe that softens harsh light

Adding a fringe of fabric around a lampshade changed the light quality in the room, softening edges and creating a halo of color when the lamp was on. The tiny dangling strips catch the bulb’s glow and cast gentle, irregular shadows that feel calming at night.
The tactile fringe also gives the lamp a handmade silhouette, turning a simple fixture into a focal point. I enjoyed watching the light through different fabric weights, noting how sheer materials created a warm wash while thicker cottons shaped shadowed bands.
Steps
- Cut strips of fabric to the desired fringe length.
- Attach the strips along the bottom edge of a plain lampshade by wrapping and gluing or pinning.
- Overlap strips slightly for fullness and adjust spacing for even coverage.
- Trim the ends if needed to create a uniform hemline.
- Switch the lamp on to check the light effect and make final tweaks.
Pillow with playful tied-edge detail
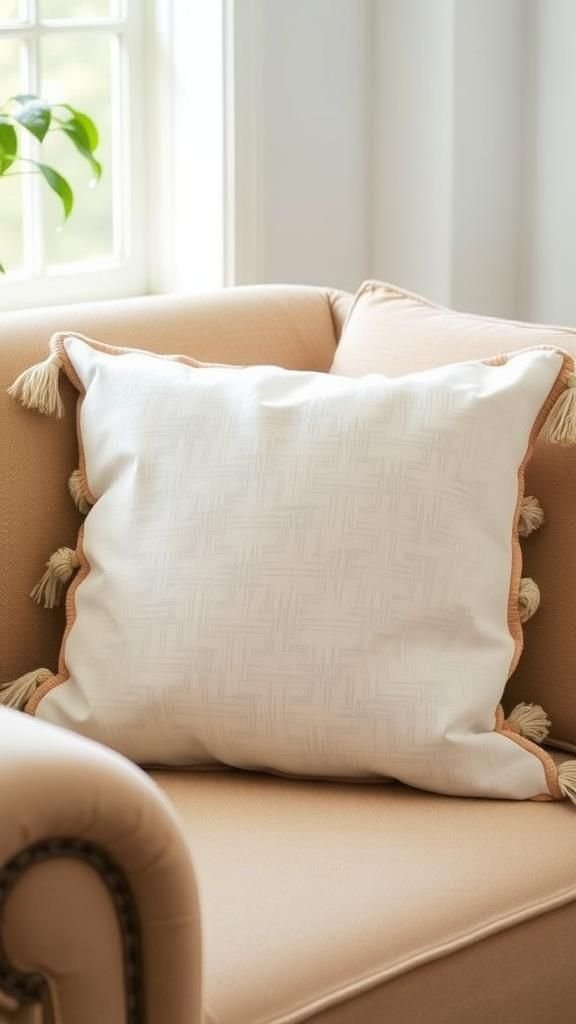
A pillow finished with tied edges felt invitingly informal on a sofa. The tie fringe framed the cushion like a soft halo, and each knot gave the piece a rhythm that brought movement to a static object.
The mix of prints across different pillows made arranging them feel like composing a small scene. Lying against one, the texture at the edges felt pleasant and slightly rustic.
The overall effect was relaxed and approachable, like a living room that wanted guests to stay a while.
Steps
- Place two pillow panels together with right sides facing out and align edges.
- Cut fringe slits around the perimeter and tie corresponding strips from both panels together.
- Secure any loose knots with a dab of fabric glue if necessary.
- Fluff the pillow and adjust ties for even fullness.
- Arrange on the sofa or bed for a casual look.
Rolled fabric beads for a soft statement necklace

Making rolled fabric beads felt like small meditative moments, twisting strips until little rounded forms emerged. The beads have a softness that contrasts nicely with harder jewelry elements, and stringing them creates a tactile rhythm along the neck.
Patterns peek out from beneath outer wraps, creating layered glimpses of color. Wearing a strand feels effortless and casual, a handmade accent that invites a closer look.
They balance warmth and structure, lighter than metal but more present than a simple cord.
Steps
- Cut long narrow strips of fabric and roll them tightly starting from one end to form beads.
- Secure the end of each bead with a small dab of fabric glue.
- Thread beads onto a strong cord or waxed thread, spacing them as desired.
- Finish the ends with a knot or a jewelry clasp for closure.
- Trim any stray fibers for a polished look.
Bunting flags that bring a gentle celebration
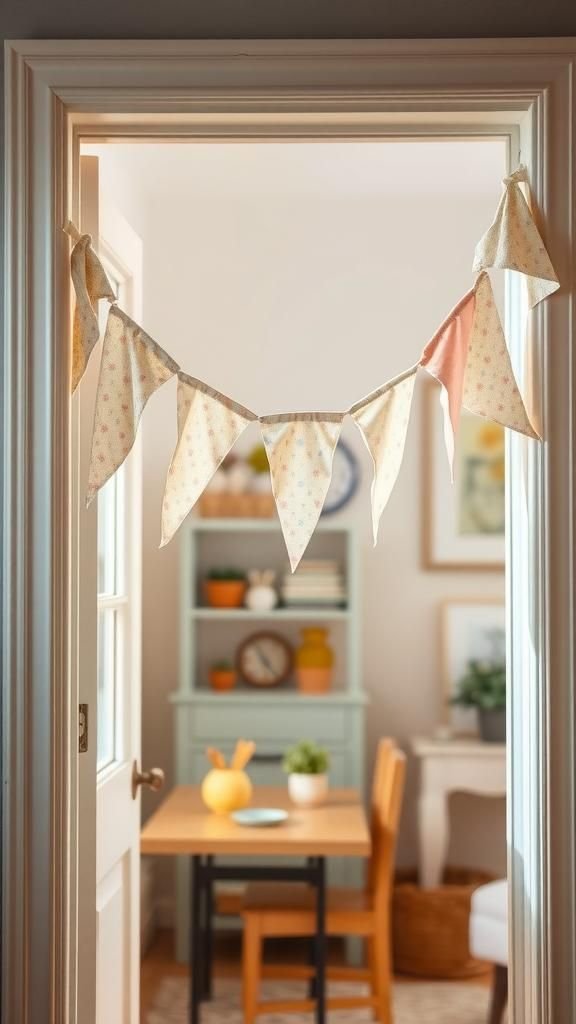
A string of fabric bunting flags made the room feel ready for something pleasant without demanding the day be special. Triangular and soft-edged flags fluttered and layered, each a small patch of color that collectively lightened the wall.
The edges sometimes frayed in a way that looked intentional and comforting, and the arrangement could be adapted to fit any doorway or shelf. It added a subtle festive note to quiet afternoons, a visual low-key cheer that stayed long after the impulse to hang it had passed.
Steps
- Cut fabric into uniform triangular flag shapes.
- Fold a length of fabric or bias tape over a cord to create a casing.
- Slide each flag into the casing and space evenly along the cord.
- Secure the ends of the cord for hanging and trim any loose threads.
- Hang the bunting and adjust flag positions for even spacing.