Disclosure: This post contains affiliate links, which means we may earn a commission if you purchase through our links at no extra cost to you.
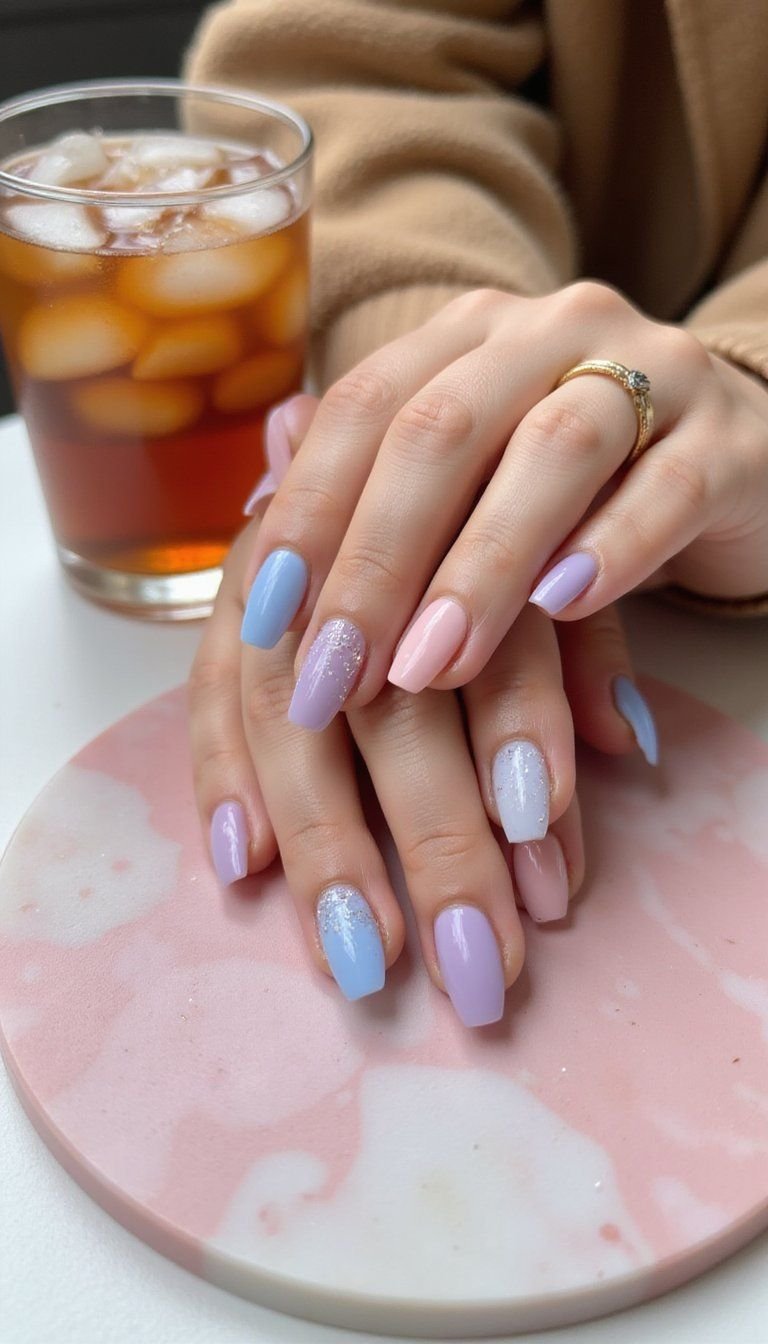
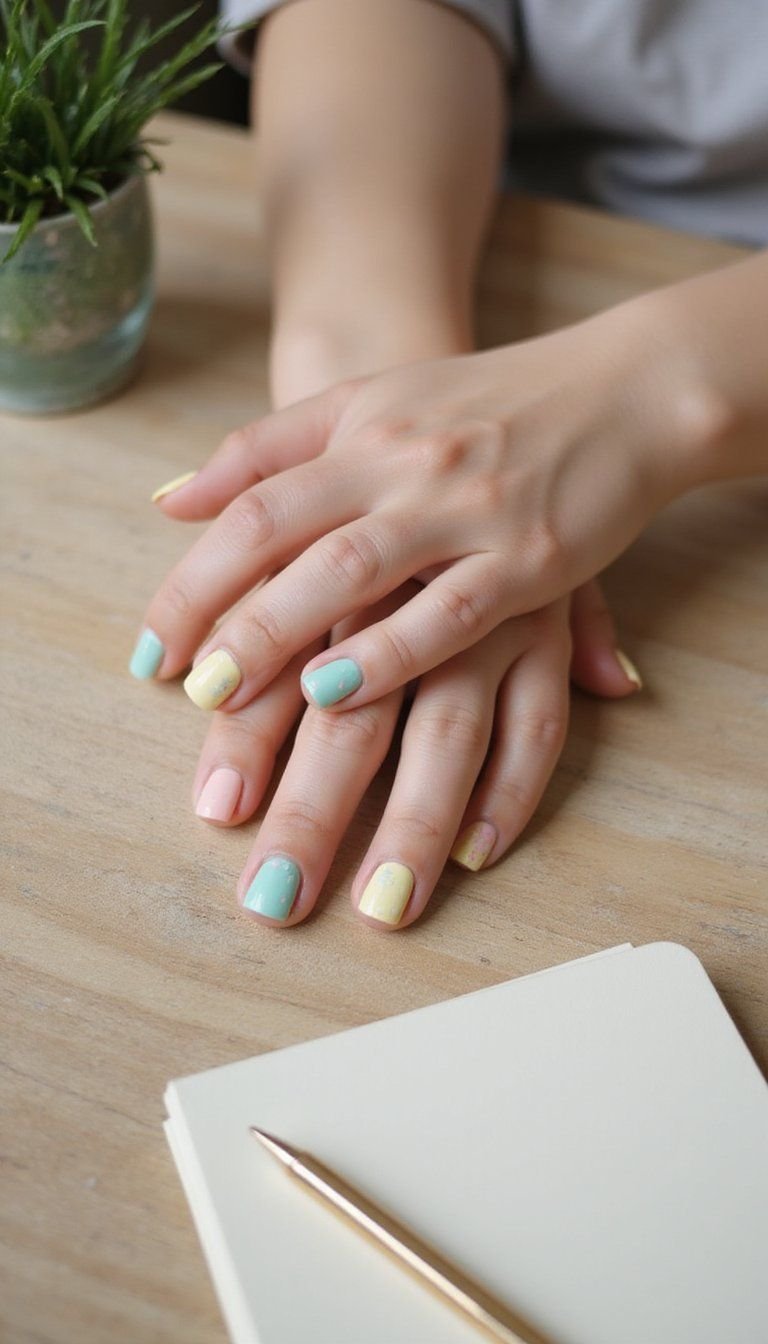
Pastel Spring Nail Art Designs are popping up everywhere this season, offering soft color mixes and playful accents that feel fresh after winter. Pastel Spring Nail Art Designs create a light, cheerful mood that works for brunches, weddings, campus life, and everyday wear — especially for anyone craving a gentle uplift.
These pastel nail ideas trend now because lighter hues pair beautifully with spring outfits and florals.
They suit busy parents who want simple chic, students who love fun details, and hosts planning seasonal gatherings, all while keeping looks easy to wear and photo-ready.
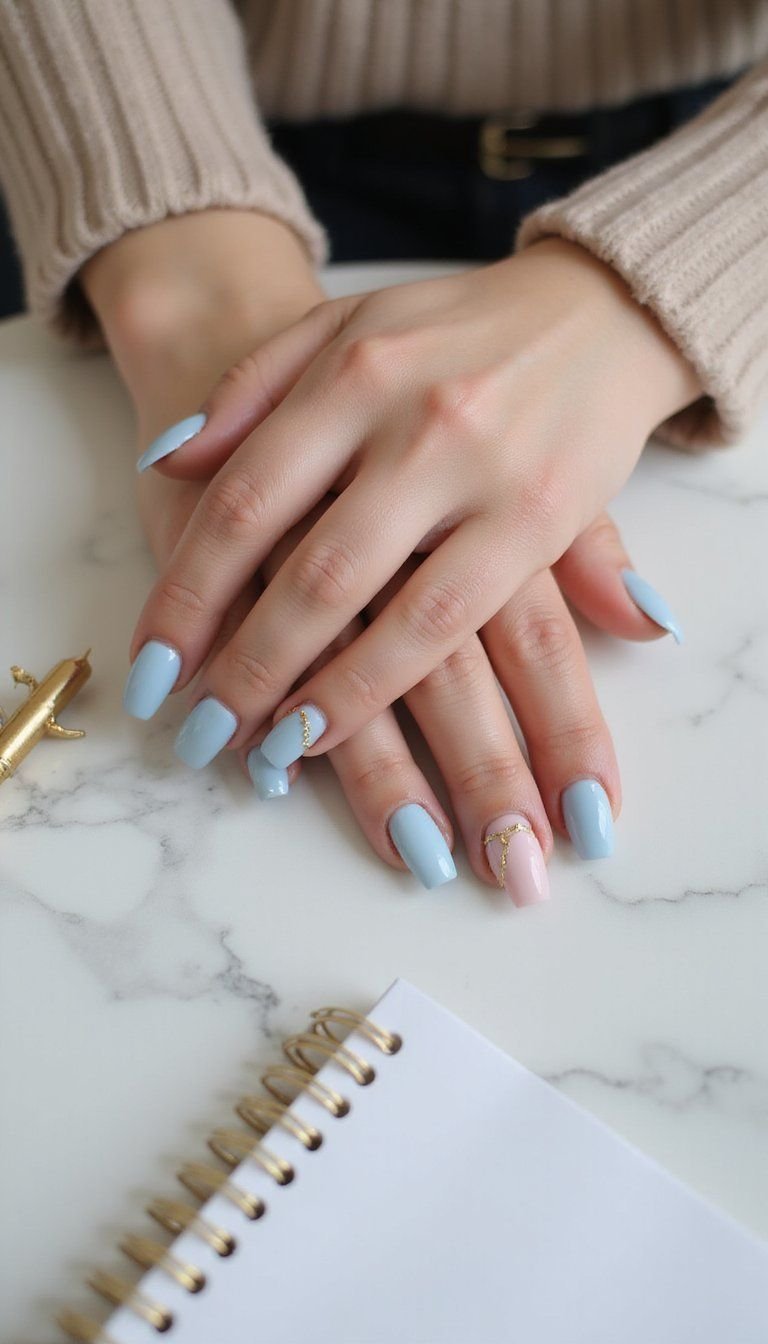
Soft Ombre Pastels With Glitter Accent
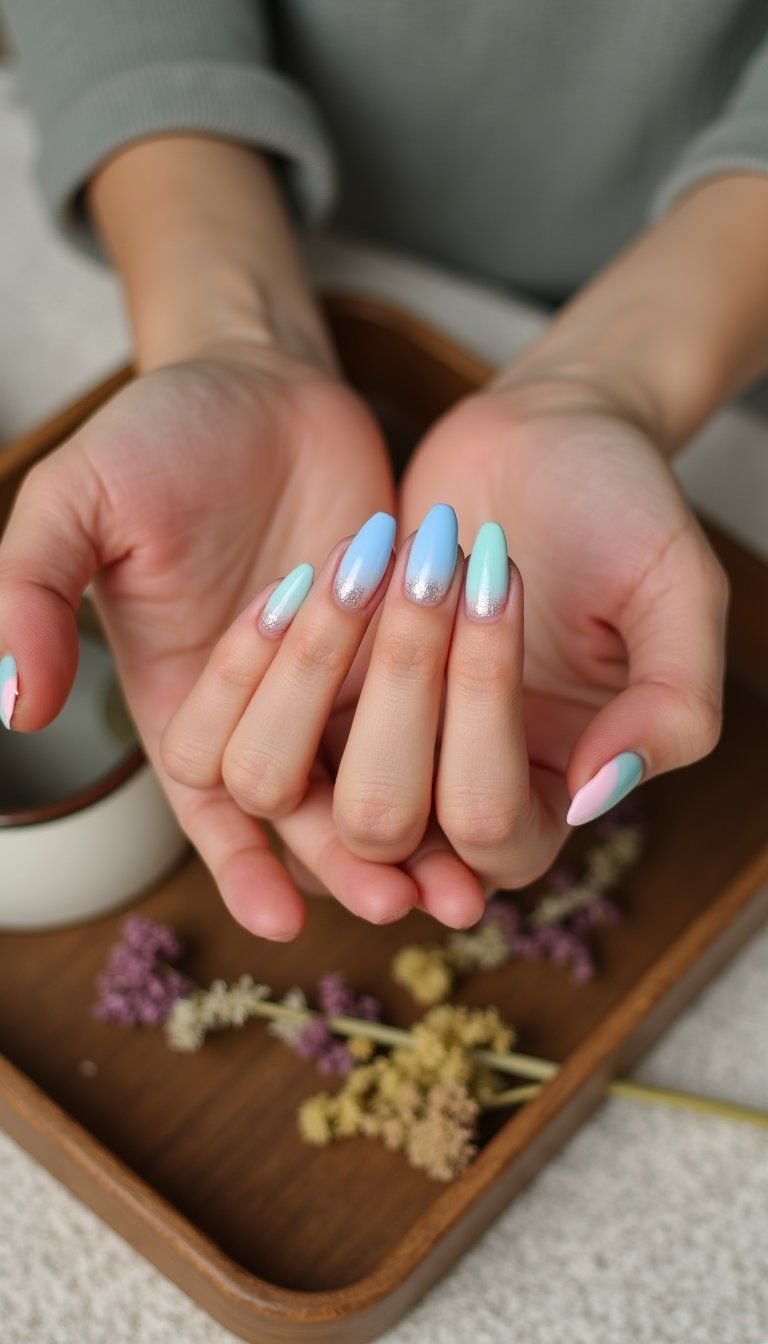
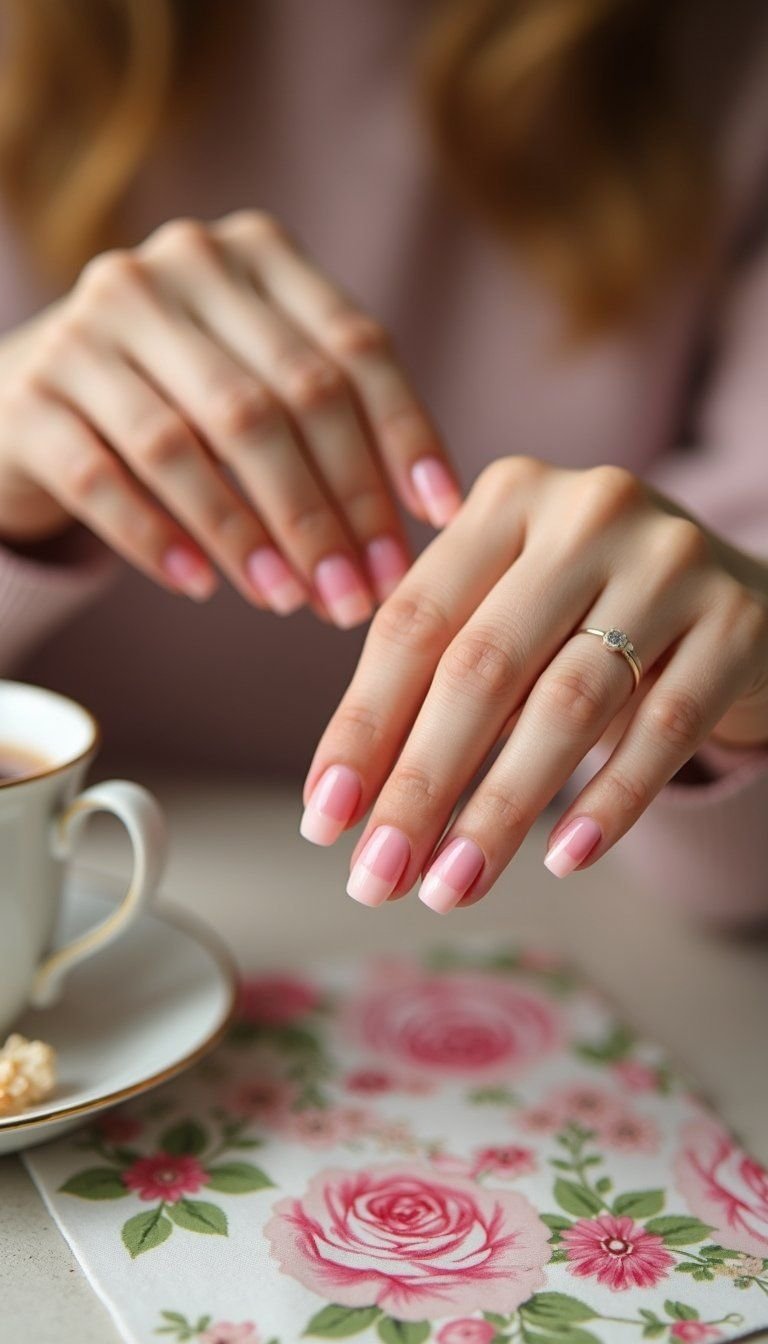
Fade three complementary pastel shades—baby blue, blush pink, and mint—across almond-shaped nails for a dreamy ombre look. Add a single glitter-filled accent nail or a thin tip of iridescent glitter to catch light. Use gel polish for a smooth gradient and a glossy topcoat to enhance sheen; for a softer finish swap in a matte topcoat. This vibe reads romantic but playful, perfect for spring dates or casual weekends. Materials: sponge or brush for blending, fine glitter, gel polishes, and UV lamp if using gel.
Quick Tips
- Blend colors while polish is tacky for seamless fades.
- Keep one or two glitter accents to avoid overpowering the pastels.
- Finish with a good topcoat to lock in shimmer and smooth texture.
Tiny Hand-Painted Cherry Blossom Nail Designs
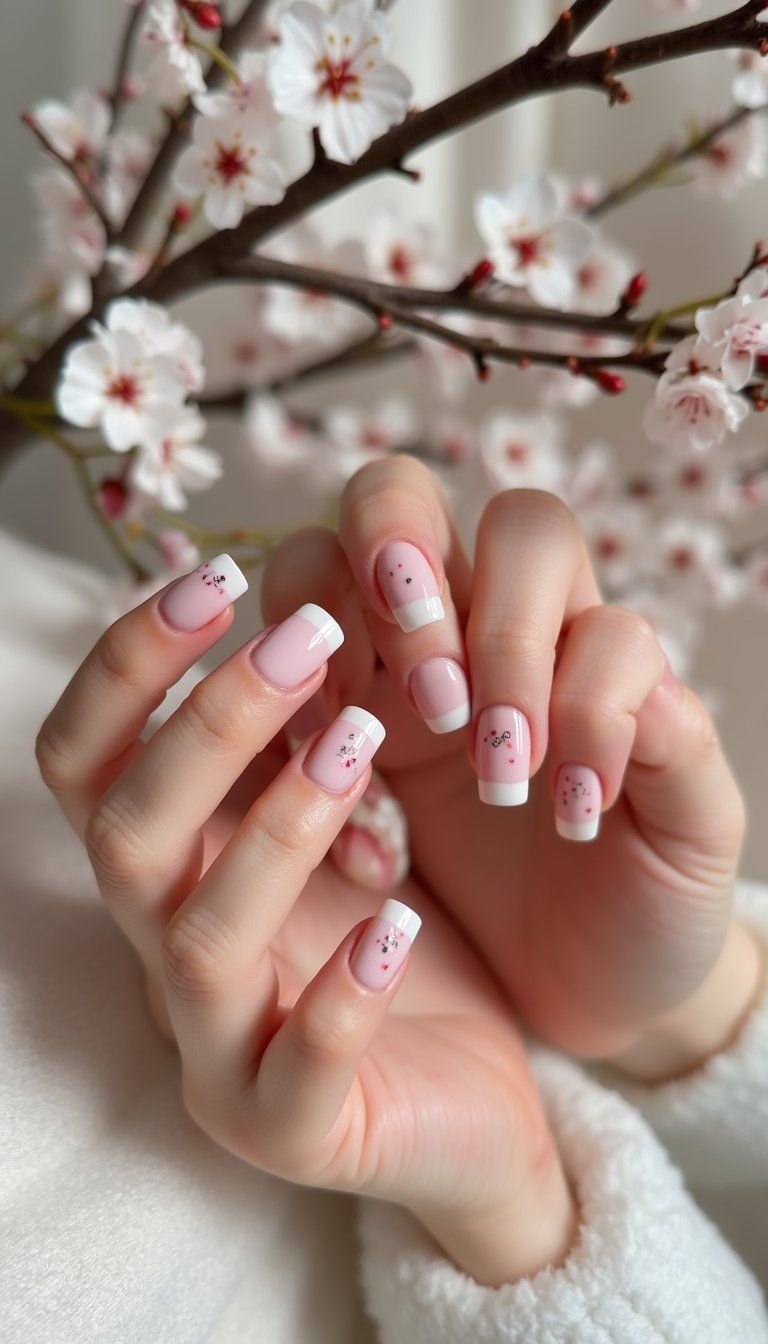
Hand-paint delicate cherry blossoms on a pale pastel base like petal pink or creamy lavender for a fresh, springtime manicure. Keep most nails a solid soft pastel and add small floral clusters on one or two accent nails. Choose thin brushes and a dotting tool to create tiny petals in white and pale coral, with a gold or brown dot center. The overall vibe is feminine and garden-ready—ideal for spring weddings, picnics, or anyone who loves floral details. Materials: detail brush, dotting tool, thin topcoat for protection.
Quick Tips
- Practice small petals on paper before painting on nails.
- Use a quick-dry topcoat to prevent smudging.
- Scale flowers to nail size—keep them petite for elegance.
Pastel French Tips With Negative Space

Modernize the classic French tip by swapping stark white for soft pastels—think powder blue, lemon chiffon, and mint—and leaving a crescent of natural nail showing for negative space. Shape can be squoval or almond, and alternating pastel tips on each finger keeps the look youthful. This approach feels minimalist yet playful, perfect for students or anyone wanting a subtle pop. Use striping tape or a thin brush for clean smiles and finish with a glossy topcoat. Materials include striping tape, pastel gel or regular polish, and a steady hand.
Quick Tips
- Start with a half-moon guide to preserve negative space evenly.
- Alternate colors across fingers for a fun set.
- Seal edges with topcoat to prevent chipping at tips.
Watercolor Pastel Floral Accent Nail Set

Create a soft watercolor effect using diluted pastel polishes layered on a sheer milky base. Paint abstract floral shapes in lavender, peach, and mint, then blur edges slightly with a damp brush to emulate watercolor. Keep most nails in the milky base and place the floral watercolor on one or two accent nails for a subtle, artsy vibe. This look suits creative types and wedding guests who prefer understated elegance. Materials: sheer base polish, thinned pastel polishes, fine brush, and glossy topcoat to enhance the soft pigment effect.
Quick Tips
- Thin polish with a tiny drop of acetone for watercolor blending.
- Work quickly—watercolor looks best with soft, wet edges.
- Top with a glossy coat to make colors pop while keeping softness.
Sheer Jelly Pastels With Tiny Sparkles
Sheer jelly polishes give nails a translucent, candy-colored finish—try pale melon, baby blue, and soft lilac. Layer two thin coats for a glassy look and add pinprick glitter or micro-sparkles near cuticles or randomly for a subtle twinkle. The outcome is fresh, youthful, and perfect for festival season or spring break vibes. Materials: jelly polishes, fine glitter or glitter topcoat, glossy topcoat for shine, optional UV lamp for gel jelly. This style reads lighthearted and ideal for anyone who loves a playful manicure without heavy coverage.
Quick Tips
- Use thin layers to keep the jelly’s translucent quality.
- Place glitter sparingly to maintain the sheer vibe.
- Cure gel jellies under a lamp for longer wear.
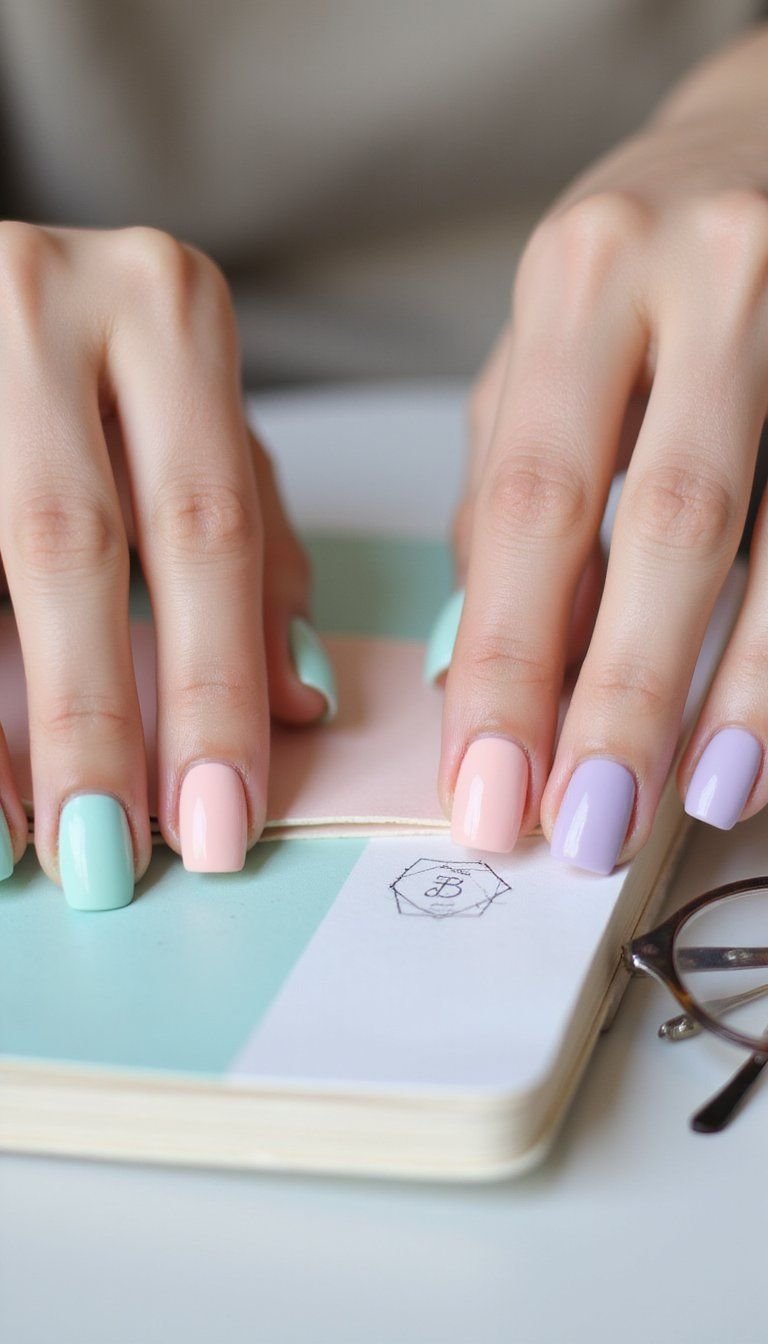
Minimalist Pastel Lines And Dot Patterns
Keep nails simple with single pastel line accents and tiny dot motifs on a neutral or pale base like cream or marshmallow. Use colors such as soft mint, baby pink, and butter yellow to create minimal stripes and tiny polka dots that feel modern and chic. This pared-back style suits busy lifestyles, office-friendly looks, and anyone who prefers low-maintenance art. Materials include fine striping brush, dotting tool, and long-lasting topcoat. Vibe: Scandinavian simplicity meets spring whimsy—subtle enough for everyday wear, yet polished for brunch plans.
Quick Tips
- Use a toothpick if you don’t have a dotting tool.
- Keep dots and lines small for a cleaner minimal look.
- Seal with matte or glossy topcoat depending on vibe.
Pastel Marble Swirls With Gold Foil

Combine two or three pastel shades like sky blue, pale mauve, and soft peach to create marbled swirls on accent nails. Add tiny flakes of gold foil to bring a luxe touch that contrasts the soft palette. Keep other nails singe-tone in coordinating pastel hues to balance drama and subtlety. Materials: thin brush, toothpick or water-marbling setup, gold foil, and glossy topcoat to lock everything in. The vibe is elegant with a hint of artistry—great for special occasions such as showers or spring parties.
Quick Tips
- Work one nail at a time when creating marble swirls.
- Press gold foil gently into slightly tacky polish for adhesion.
- Use a thick topcoat to smooth uneven foil edges.
Matte Pastel Almond Nails With Pearl Detail
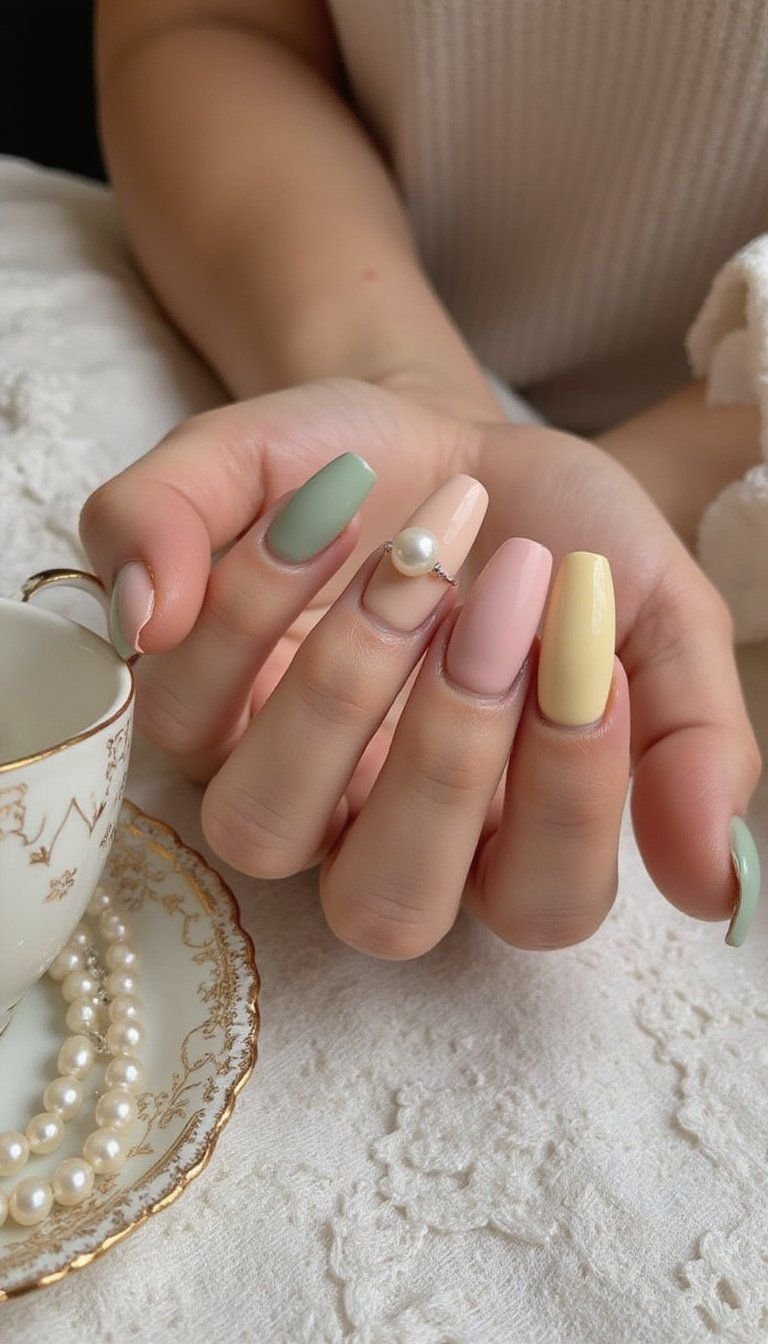
Choose a matte finish in dusty pastel shades—sage, dusty rose, pale lemon—and shape nails into a soft almond silhouette. Add a single small pearl or pearl cluster on one accent nail for an upscale, bridal-friendly touch. The matte texture pairs beautifully with the soft sheen of pearlescent embellishments, creating a chic juxtaposition. Materials: matte topcoat, tiny faux pearls, nail glue or gel adhesive. Vibe: understated luxury, perfect for bridesmaids, special brunches, or anyone who likes refined spring looks with minimal sparkle.
Quick Tips
- Attach pearls before curing if using gel for best hold.
- Use tweezers to place tiny pearls precisely.
- Protect edges with topcoat around embellishments to prevent snagging.
Playful Confetti Speckle Pastel Nail Designs
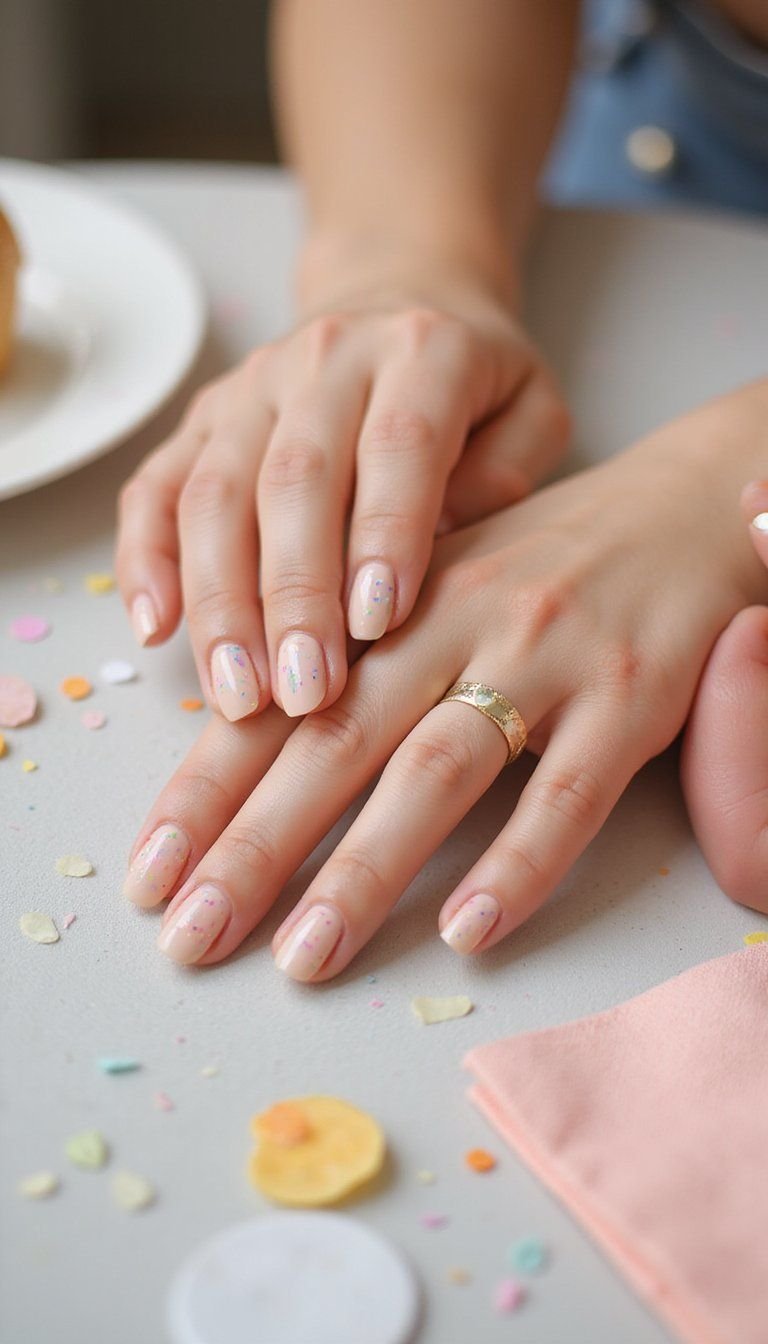
Confetti speckle nails mimic paint splatters in tiny, colorful dots over a soft pastel base like creamy peach or mint. Use a spatter or speckle polish layered lightly so the base peeks through. This joyful look is ideal for birthday parties, casual weekends, or anyone craving a fun, youthful manicure. Materials: speckle polish or micro-glitter mix, base pastel polish, and glossy topcoat. The vibe is celebratory and easygoing—pair with spring dresses and denim for a carefree, picture-ready style.
Quick Tips
- Tap a small brush to flick speckles for a DIY effect.
- Layer speckles lightly to keep the pastel base visible.
- Seal with a thick topcoat to smooth texture and lock glitter.
Spring Garden Nail Art With Tiny Leaves

Celebrate spring by painting dainty leaves and vines across a soft pistachio or pale mint base. Alternate full-leaf accents with single-leaf tips to create visual interest while keeping an overall cohesive palette. Use a fine liner brush and muted green tones with hints of chartreuse for dimension. The vibe is earthy and fresh, perfect for garden parties, outdoor weddings, or green-conscious folks who love botanical details. Materials: fine brush, matte or glossy finish depending on preference, and optional tiny rhinestones for dewy accents.
Quick Tips
- Vary leaf sizes for a more natural look.
- Layer slightly different greens to add depth.
- Finish with matte for a botanical feel or gloss for a dewy shine.
Ombre Pastel Stiletto With Metallic Edge

Create dramatic stiletto nails that fade from a soft butter yellow into lavender or sky blue, then edge the tips with a sliver of metallic chrome or rose gold for contrast. This bold-meets-delicate design walks the line between statement and subtlety—great for spring nights out or fashion-forward events. Materials: gel polish for durable shape, thin metallic striping polish or foil for edges, and precision brush. Vibe: edgy yet soft; pair with monochrome outfits to let nails stand out.
Quick Tips
- If you’re new to stiletto shapes, practice on press-ons first.
- Use thin metallic polish for a crisp edge.
- Strengthen tips with builder gel for long-lasting wear.
Pastel Plaid Nails For Casual Weekend Vibes
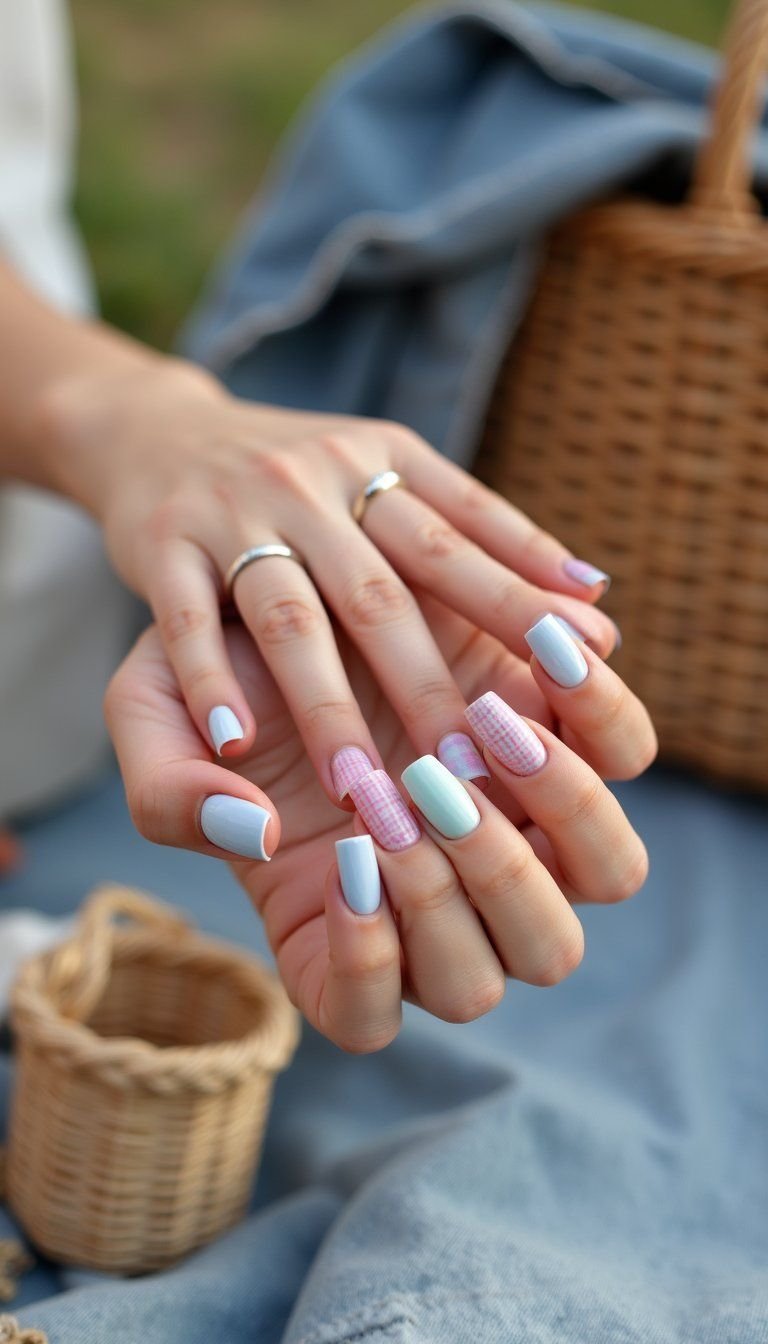
Paint soft plaid patterns using thin stripes in pastel hues like baby blue, mint, and blush over a neutral base. Keep lines crisp and slightly offset for a cozy, preppy look that pairs perfectly with denim jackets and picnic blankets. Use a striping brush or thin tape to achieve tidy lines, and vary stripe thickness for a hand-drawn effect. Materials: striping brush, pastel nail polishes, and glossy topcoat. Vibe: laid-back and stylish—great for weekend outings, casual dates, or study breaks with friends.
Quick Tips
- Measure spacing lightly with a pencil guide before painting.
- Layer darker pastels over lighter bases for contrast.
- Clean up edges with a small brush dipped in remover for sharp lines.
Easter Egg Inspired Pastel Nail Collection
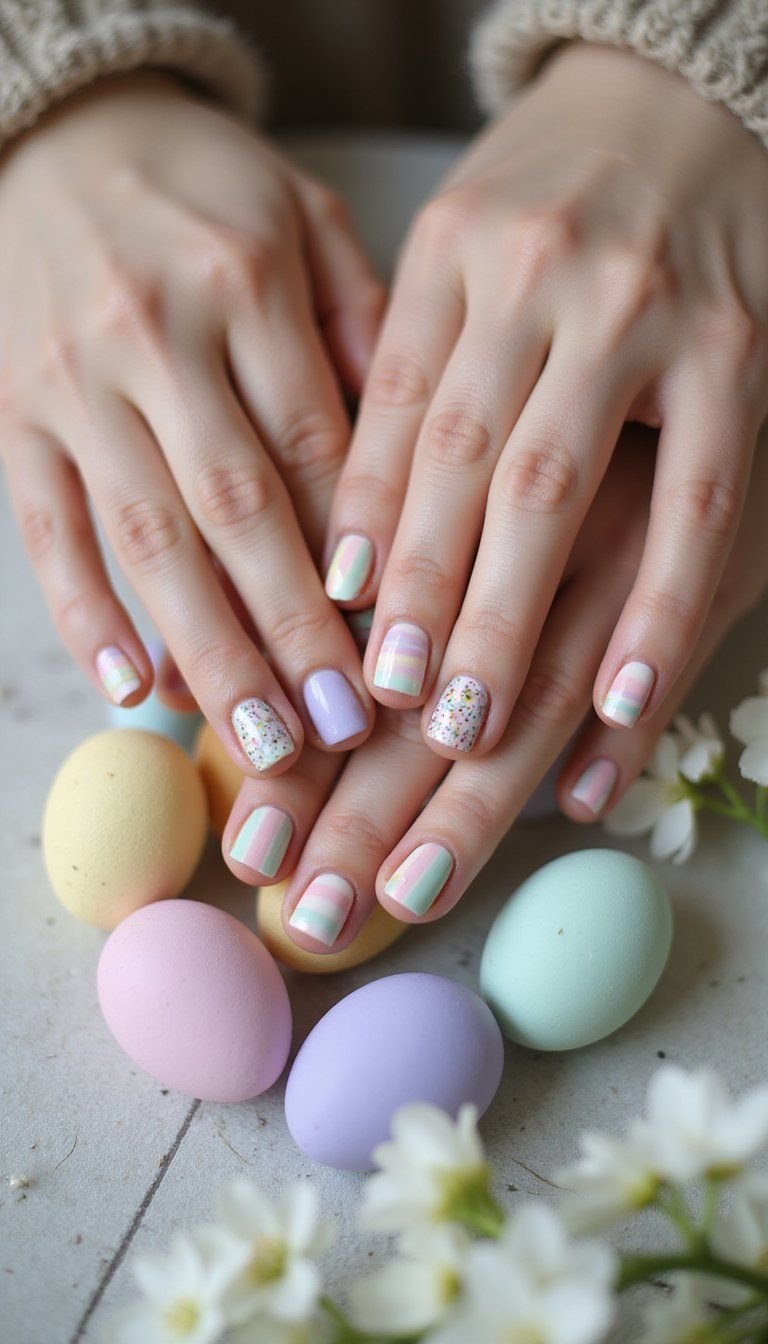
Channel classic Easter egg patterns with speckled dots, tiny stripes, and soft color blocking in lavender, pale yellow, mint, and blush. Mix matte and glossy finishes to echo decorated eggs and add a few tiny metallic flecks for a festive touch. This set is playful and perfect for holiday brunches, egg hunts, or family gatherings. Materials: speckle polish, thin brushes for stripes, matte topcoat for texture, and metallic dust. Vibe: cheerful, nostalgic, and very seasonal—fun for kids and adults alike.
Quick Tips
- Use a combination of finishes (matte + gloss) for visual interest.
- Keep patterns small to fit on short nails.
- Try press-on stickers for quick, kid-friendly versions.
Soft Gradient Tip With Mini Flower Accent
Paint soft gradient tips in pale pink to peach or sky blue to lilac and pair with a tiny hand-painted flower near the cuticle on one nail. This keeps the look fresh and wearable while adding a sweet springtime detail. Use a small sponge or brush for gradient tips and a dotting tool for the flower center. Materials: gradient sponge, dotting tool, pastel polishes, topcoat. Vibe: delicate and wearable—great for everyday wear, bridal showers, or spring photo ops.
Quick Tips
- Blot excess polish from the sponge to avoid thick layers.
- Place the flower near the cuticle for a modern look.
- Use a quick-dry topcoat to preserve crisp edges.
Pastel Geometric Blocks On Short Nails
Block out tiny geometric shapes—triangles, squares, and chevrons—in coordinating pastels like mint, peach, and lilac on short, rounded nails. Keep negative space between blocks for a modern, graphic feel that is both polished and playful. Use striping tape or stencils for crisp edges and a glossy topcoat to make colors pop. Materials: striping tape, pastel polishes, stencils, and a steady hand. Vibe: modern, artsy, and great for students or anyone who prefers bold design on a petite canvas.
Quick Tips
- Apply base color first and cure before adding blocks.
- Use thin tape for cleaner geometric edges.
- Finish with a quick swipe of topcoat to blend seams.
Pearlescent Pastel Ombre For Bridesmaids Set
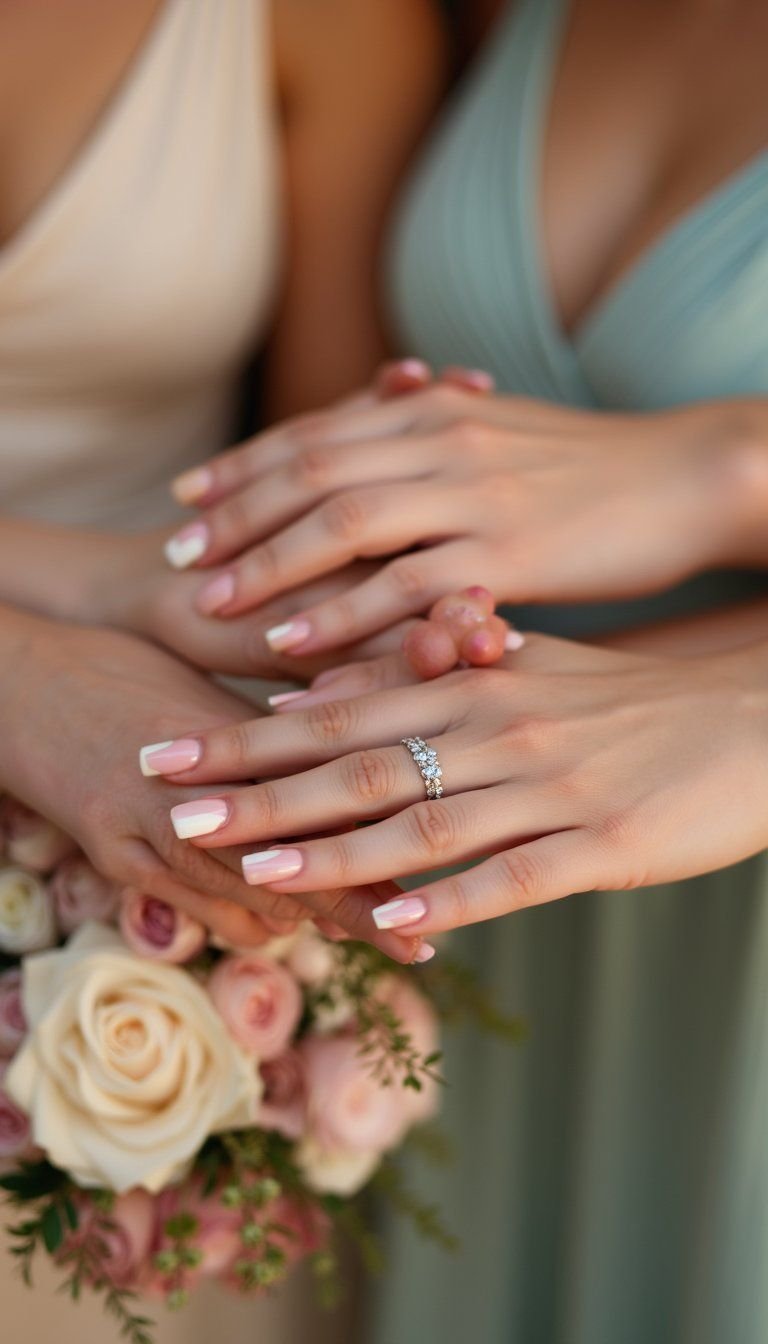
Soft pearlescent pastels blended across nails create a cohesive, elegant set ideal for bridesmaids. Choose complementary hues—soft rose, champagne, and pale aqua—and add a faint shimmer pearl top layer for a luminous finish. Keep shapes uniform, like rounded squares or soft almonds, so the set looks coordinated in photos. Materials: pearlescent polishes, ombre sponge or brush, glossy topcoat. Vibe: refined and camera-ready—perfect for wedding parties, rehearsal dinners, and formal spring events where a gentle glow fits the dress code.
Quick Tips
- Match nail shapes to dress silhouettes for cohesive photos.
- Test pearlescent swirl on a sample nail to set opacity.
- Use gel for long wear through events and handshakes.
Cute Kawaii Pastel Character Nail Accents
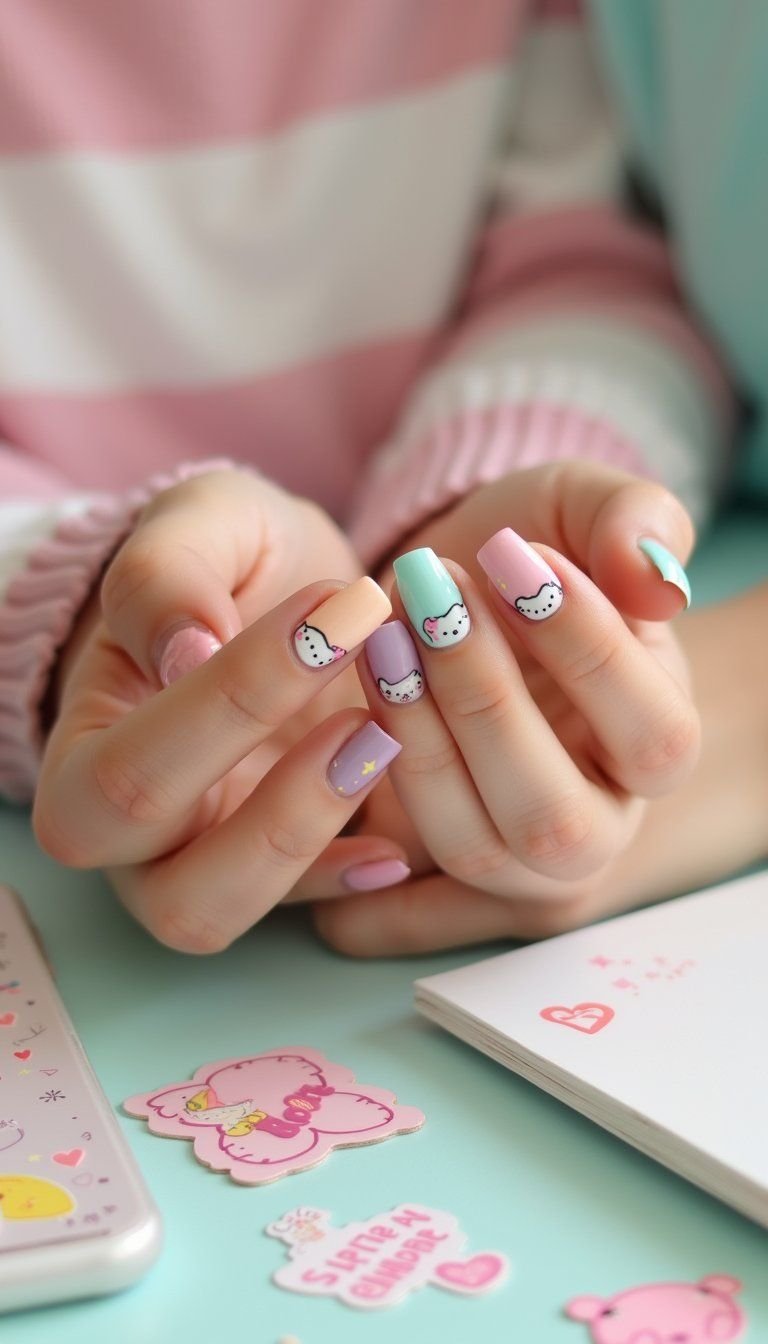
Add tiny kawaii faces, hearts, and mini characters in pastel tones—mint, peach, lilac—on one or two accent nails while keeping others solid pastel. Keep characters simple and rounded for a sweet, youthful aesthetic that pairs well with casual outfits and playful accessories. Materials: fine brush, dotting tool, and topcoat. Vibe: whimsical and nostalgic—perfect for fans of cute stationery, theme cafes, or anyone wanting a cheerful manicure that sparks smiles.
Quick Tips
- Sketch characters lightly with a dotting tool before detailing.
- Keep facial features tiny to fit nail scale.
- Seal with a glossy topcoat to preserve colors and details.
Metallic Thread Pastel Nail Art Minimal Look
Use thin metallic threads or striping polish to create delicate linear accents over soft pastel bases like powder blue or blush. The metallic lines add a modern edge while keeping overall minimalism intact. Try crossing a couple of thin gold threads on an accent nail or tracing the cuticle line for subtle shine. Materials: metallic striping polish, nail art tape, pastel base polishes, and glossy topcoat. Vibe: refined minimalism with a hint of glam—great for office-friendly spring polish that still feels special.
Quick Tips
- Apply metallic accents to fully cured polish to avoid lifting.
- Use tweezers for precise placement of metallic threads.
- Seal with a thick topcoat to smooth and protect lines.
Soft Pastel Checkered Retro Nail Trend

Channel retro vibes with tiny checkered patterns in pastel combos like lemon and lilac or mint and blush. Keep the checks small and neat across one or two nails, leaving others in coordinating solids for balance. Use fine brushes or tiny stickers to keep squares crisp; a glossy finish enhances the vintage playful look. Materials: detail brush or nail stickers, pastel polishes, topcoat. Vibe: nostalgic and fun—perfect for vintage markets, spring festivals, or a playful update to everyday style.
Quick Tips
- Practice a small grid on paper to get spacing right.
- Use tape guides for perfectly straight squares.
- Top with a glossy coat to highlight clean edges.
Tiny Rhinestone Pastel Accent On One Nail

Keep most nails simple pastels—like baby pink or sky blue—and adorn a single accent nail with a cluster of tiny iridescent rhinestones at the base or along a crescent. The small sparkle feels luxe without being over the top and works for both daytime events and evening plans. Materials: micro rhinestones, nail glue or gel, tweezers, and a protective topcoat. Vibe: understated glamour that’s easy to maintain—great for those who prefer a touch of shine without full bling.
Quick Tips
- Place rhinestones on slightly tacky polish for better hold.
- Use a small dot of gel to set each stone before curing.
- Apply topcoat around stones to reduce snagging.
Mixed Pastel Shapes On Clear Base Nails

Use a clear or very sheer base and place tiny pastel shapes—half moons, tiny squares, and dots—in mint, peach, and lilac across nails. The minimalist clear background makes shapes pop and gives a modern, airy look ideal for spring. This technique suits anyone who likes light, breathable manicures that still feel curated. Materials: sheer base polish, small stickers or painted shapes with a detail brush, and glossy topcoat to secure. Vibe: cool and contemporary—great for weekend outings and warm-weather travel.
Quick Tips
- Use nail stickers for precise shapes if freehand is tricky.
- Space shapes deliberately to maintain an airy aesthetic.
- Seal with a clear coat to hold shapes in place.